If you want to become an ABAPer—here is how to create your first ABAP program.
Before you begin, you’ll need developer access to the SAP system with relevant development authorizations and a developer key assigned to your user ID. Contact your system administrator if the system complains about missing authorizations or prompts you for a developer key when creating the program.
Steps to Follow
To begin, follow these steps:
1. Open Transaction SE38 or choose Tools > ABAP Workbench > Development > ABAP Editor.
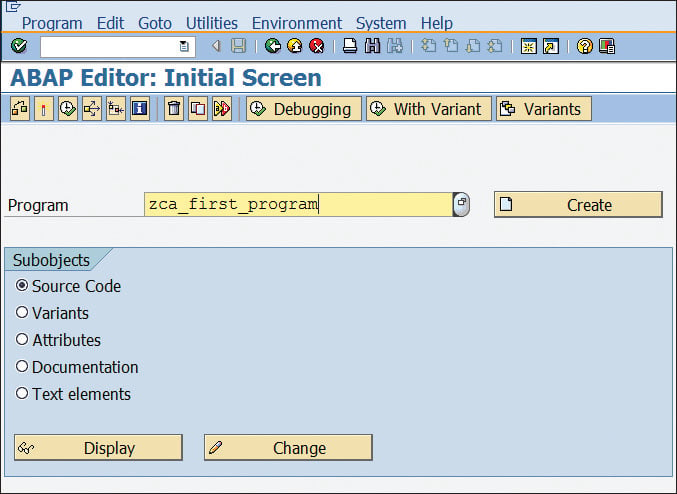
2. On the ABAP Editor initial screen, enter the program name, select the Source Code radio button, and click the Create button. Because this program will be a repository object, it should be in a customer namespace starting with Z or Y, as shown here:
3. You’ll see the Program Attributes window (see figure below) to maintain the attributes for your program. Program attributes allow you to set the runtime environment of the program.
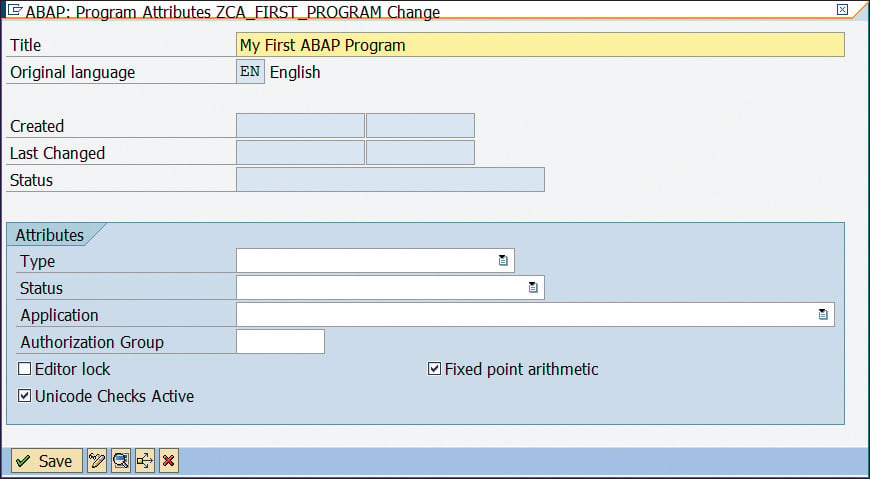
Here, you can maintain a title for your program and other attributes. The Title and Type are mandatory fields; the others are optional.
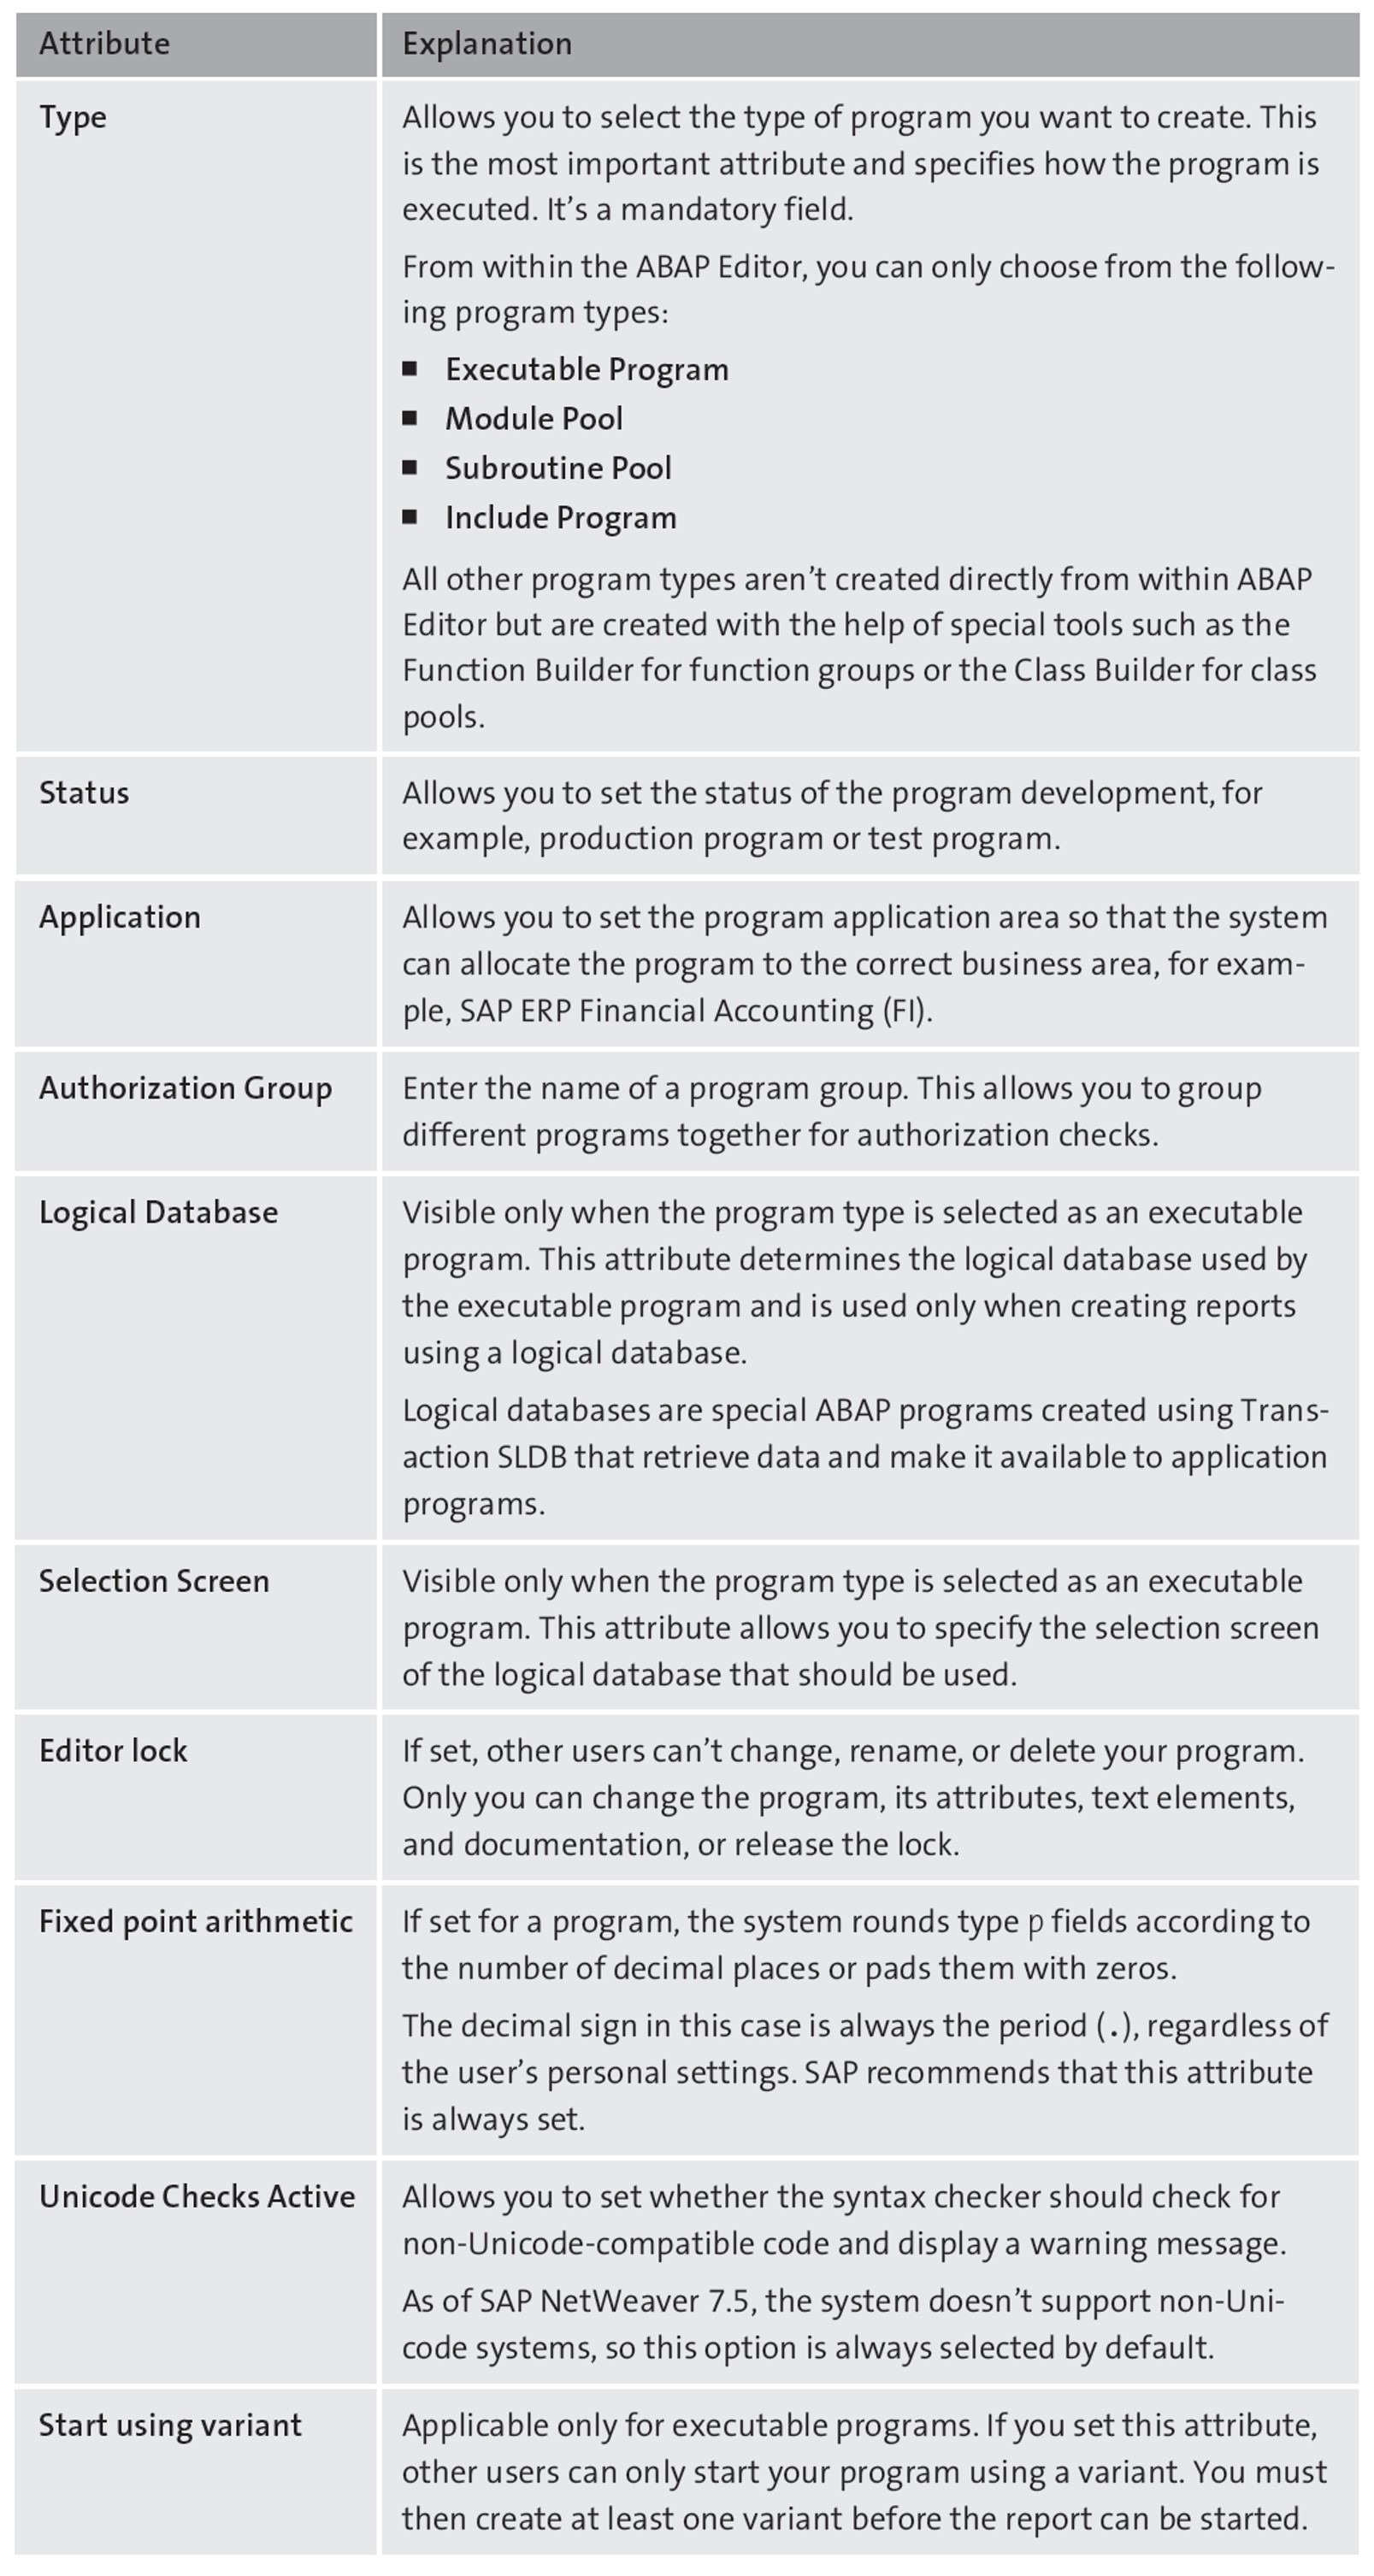
The following table provides an explanation of all the attributes and their significance.
4. Under the Attributes section, provide the following values as shown in the figure below:
- Type: Executable program
- Status: Test Program
- Application: Unknown application
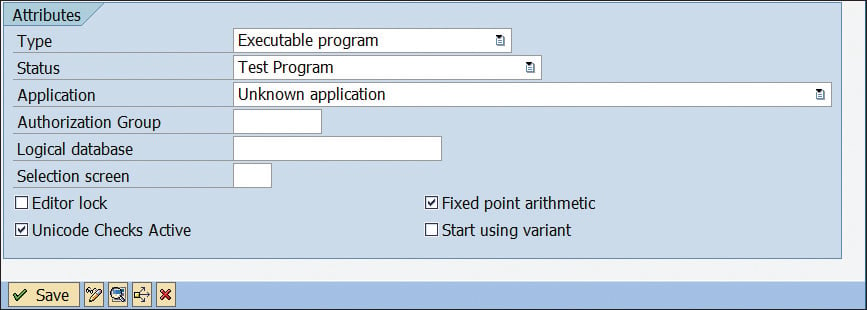
5. Check the Unicode Checks Active and Fixed point arithmetic checkboxes.
6. Click the Save button when finished.
7. On the Create Object Directory Entry screen (see the figure below), you can assign the program to a package. The package is important for transports between systems. All the ABAP Workbench objects assigned to one package are combined into one transport request.
When working on a team, you may have to assign your program to an existing package, or you may be free to create a new package. All programs assigned to the package $TMP are private objects (local object) and can’t be transported into other systems. For this example, create the program as a local object.
8. Either enter “$TMP” as the Package and click the Save button or simply click the Local Object button (see below).

9. This takes you to the ABAP Editor: Change Report screen where you can write your ABAP code. By default, the source code includes the introductory statement to introduce the program type. For example, executable programs are introduced with the REPORT statement, whereas module pool programs are introduced with the PROGRAM statement.
10. Write the following code in the program and activate the program:
PARAMETERS p_input TYPE c LENGTH 20.
WRITE : 'The input was:', p_input.
11. In the code, you’re using two statements—PARAMETERS and WRITE. The PARAMETERS statement generates a selection screen (see below) with one input field. The input field will be of TYPE c with LENGTH 20, so you can input up to 20 alphanumeric characters.
Here, the PARAMETERS statement is performing a couple of tasks:
- Declaring a variable called p_input.
- Generating a screen field (screen element) on the selection screen with the same name as the variable p_input. The screen field p_input is automatically linked to the variable sharing the same name. Therefore, the data transfer between the screen and the program is handled automatically. In other words, if you enter some data in the p_input screen field, it will be automatically transferred to the program and stored in the p_input variable. This data in the p_input variable can then be accessed by other statements, as you’re doing with the WRITE statement to print it in the output.
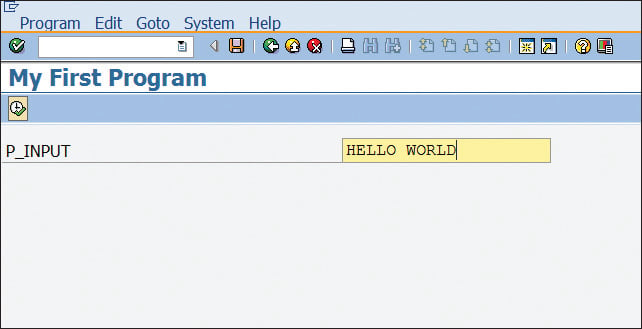
12. Enter a value in the input field, and click the Execute button or press (F8). This should show you the output or List screen, as shown here:
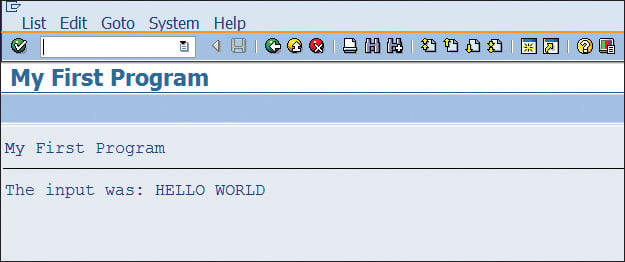
13. The list screen (output screen) is generated by the WRITE statement in the code. With the WRITE statement, you’re printing the contents of two data objects here. One is a text literal, 'The input was:', and the other is the variable p_input created by the PARAMETERS keyword.
Whatever input was entered on the selection screen was transferred to the program and stored in the variable p_input, which was then processed by the WRITE statement to display in the output.
Conclusion
Writing ABAP code is an important skill for developers working with SAP to have. In this blog post, you were provided with 13 steps to follow to write your first ABAP program.
Learn ABAP with Rheinwerk Courses!
Ready to level up your ABAP skills? Explore the full range of our ABAP-focused online courses, from foundational programming to advanced RAP, CDS, AMDP, unit testing, and more. Each one is instructor-led (live and on-demand), includes recordings and slide decks, and is designed to give you practical take-away skills you can apply right away in your SAP landscape. Click on the banner below to get started!
Editor’s note: This post has been adapted from a section of the book Complete ABAP by Kiran Bandari



Comments