
A common requirement posed to developers is to modify the SAP Fiori launchpad and the SAP Fiori apps with the corporate theme of the customers, for example:
- Replacing the SAP logo with the customer’s logo
- Replacing the standard color combinations with the customer’s corporate preferences
- Providing a corporate background image to the SAP Fiori launchpad
Although these requirements can be met by directly writing and including custom Cascading Style Sheets (CSS), it can be very tough to maintain these CSS files, thus increasing the TCO.
SAP provides the UI theme designer tool to make it easy to create and maintain custom themes. The UI theme designer is not only specific to SAPUI5 and SAP Fiori apps but also available to other SAP UI technologies such as Web Dynpro, BSP, HTMLB, SAP Enterprise Portal, SAP GUI for HTML, SAP NetWeaver Business Client (NWBC), and the WebClient UI Framework in SAP CRM.
UI Theme Designer Overview
UI theme designer is available as part of the central UI of the frontend server infrastructure. When working with SAP Fiori apps, you’ll be using the UI theme designer hosted on the SAP Gateway server. However, the tool is also available in SAP Business Technology Platform as a service and as part of SAP Enterprise Portal.
UI theme designer can be launched via Transaction /UI5/THEME_DESIGNER in your SAP Gateway/frontend system. You can also go to the following URL to open the tool:
https://<host:port of your Gateway System>/sap/bc/theming/theme-designer
The UI Theme Designer screen is shown below. On the left, you can see a list of custom Themes created within this server so far. You can select any of these custom themes and perform various actions, including Edit, Rebuild, Delete, Duplicate, or Rename.
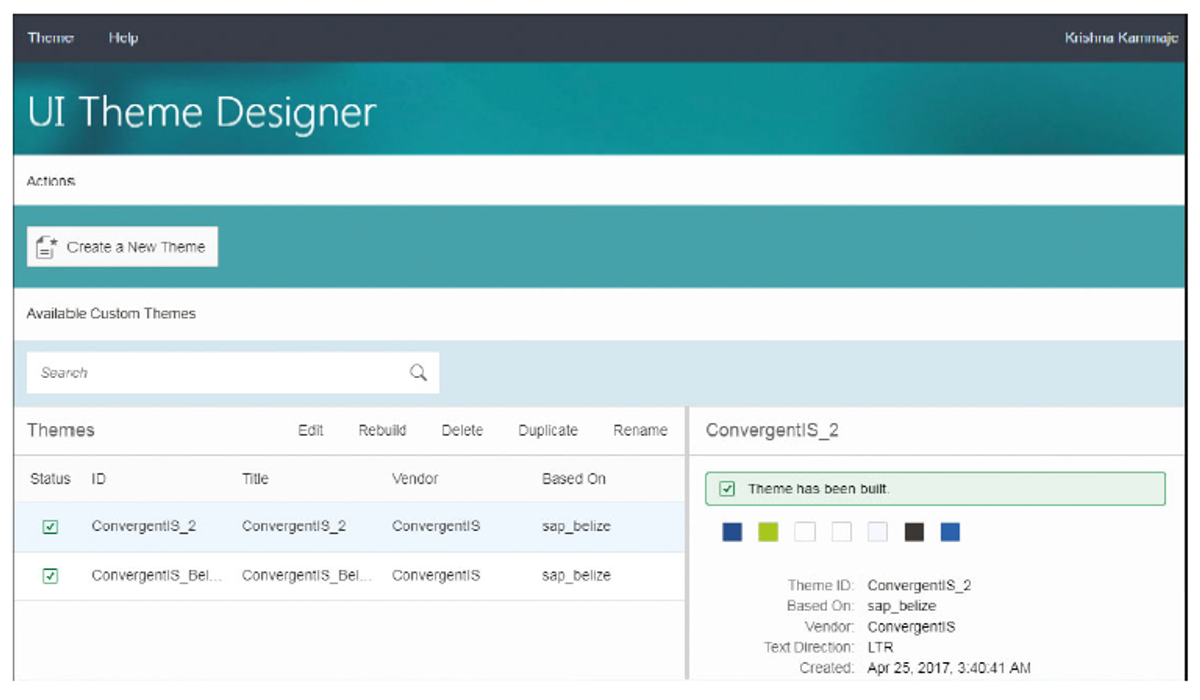
The Create a New Theme button is used for creating a brand-new theme based on one of the existing themes. The box on the right side of the screen displays the details about the selected theme.
Creating a Theme
Let’s create a new custom theme based on the SAP-delivered Belize theme by following these steps:
- Click on the Create a New Theme This opens a three-step wizard popup, as shown in the figure below.
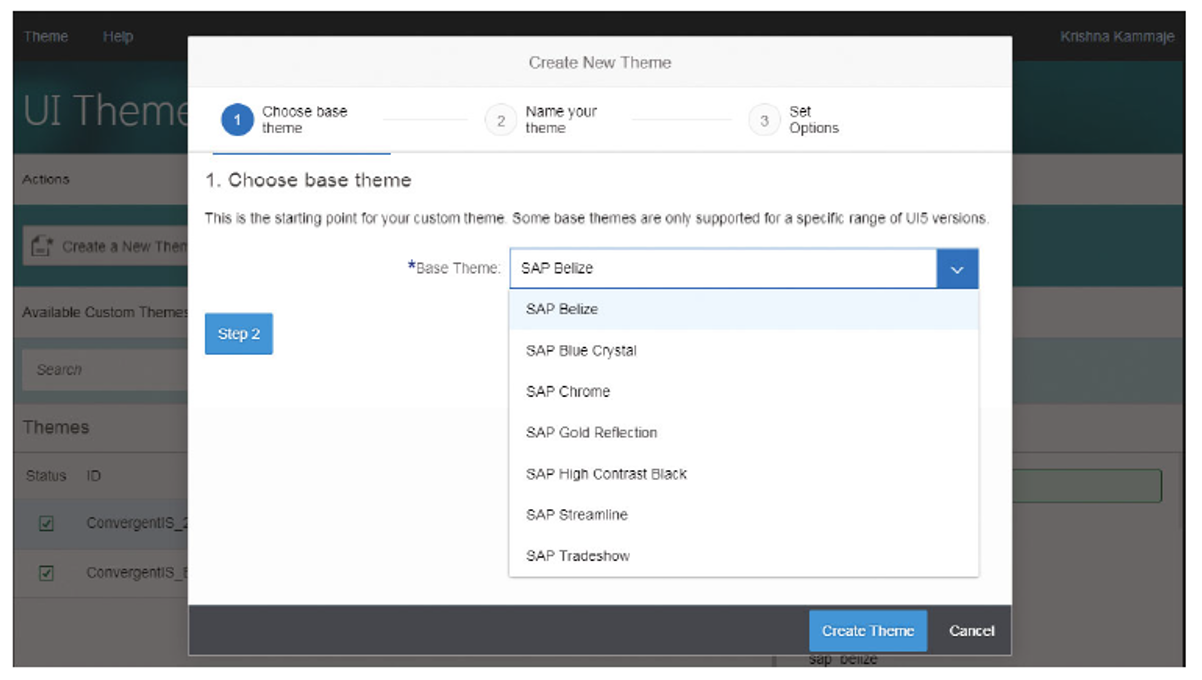
- In the first step, you need to choose a Base Theme to start from because a theme contains numerous properties and attributes that are difficult for customers to create from scratch. By basing the theme on an existing theme instead, all those parameters will be copied, and customers can go about making incremental changes on the copied theme. For this example, choose SAP Belize.
- Click on Step 2.
- Provide a Theme ID and a descriptive Title for the new theme, as shown in this figure.
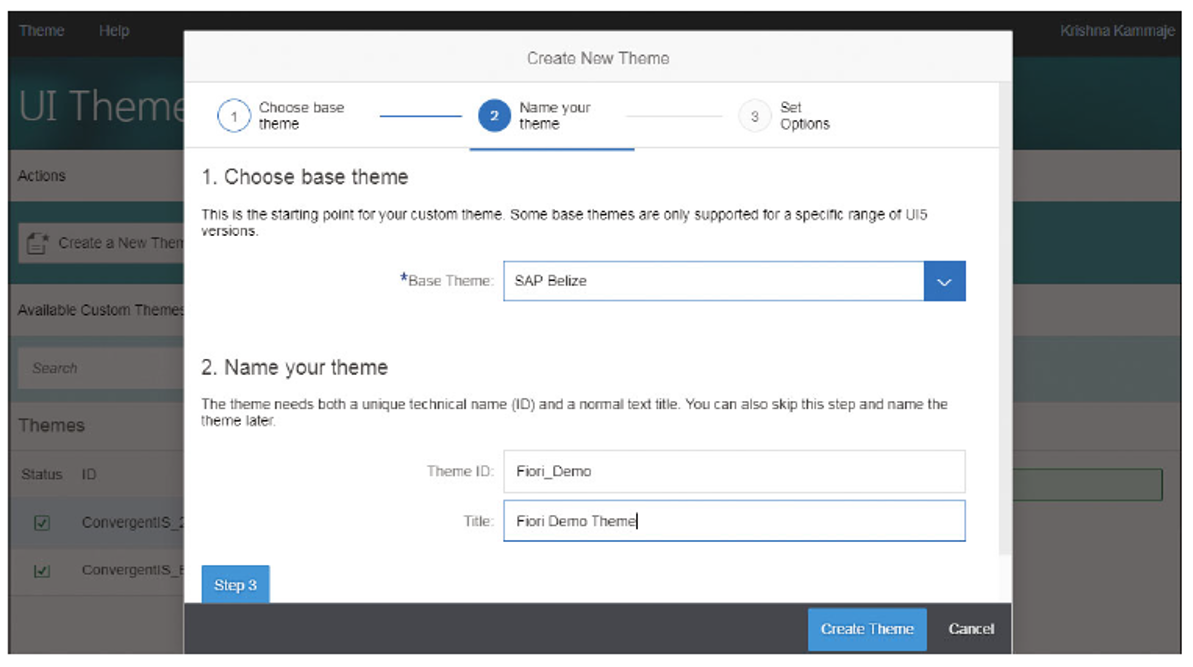
- Click Step 3.
- In the next screen, provide a Vendor name, and choose whether the new theme supports RTL (right-to-left scripts). Click on Create Theme.
- In the new screen that appears, enter the target pages. Target pages are used to preview and test the changes you made to the theme for verifying the results. You can add multiple target pages, so that you can instantly see the effect of your theme on all those pages.
Warning: Adding the target page doesn’t assign the theme to the target page permanently.
In the Link to Application field, enter the SAP Fiori launchpad URL and a name identifying it in the Name of Application field, as shown below.
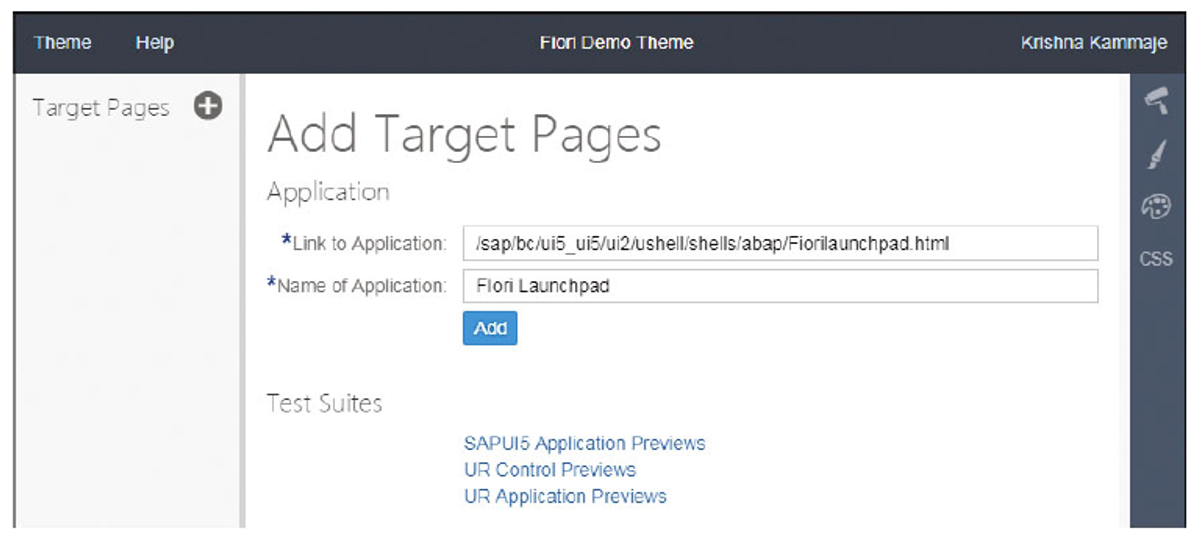
- Click on the Add button
This will load the target page within the UI theme designer, as shown here.
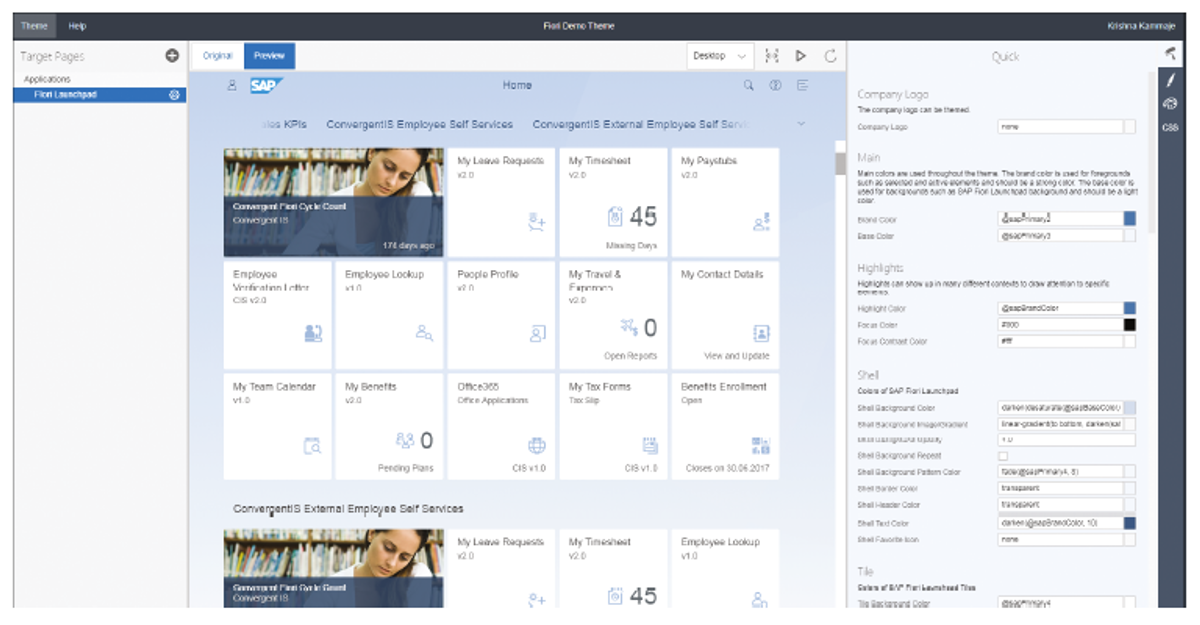
The central area where the target page is loaded is called a canvas, and it has a toolbar providing various options. The figure below describes the various available options on the canvas area. There are options to compare the current state with the original page (1), view the page in different device types (2), preview the page in full width (3), run the preview in a new tab (4), and refresh the preview (5).

On the right, the Quick toolbar opens by default. This toolbar has enough options for beginners as well as for most frequent requirements. You can set the Company Logo, Brand Color, Base Color, and other properties for frequently required items such as Shell, Application Backgrounds, Tile, Object Header, and so on, as shown in the next figure.
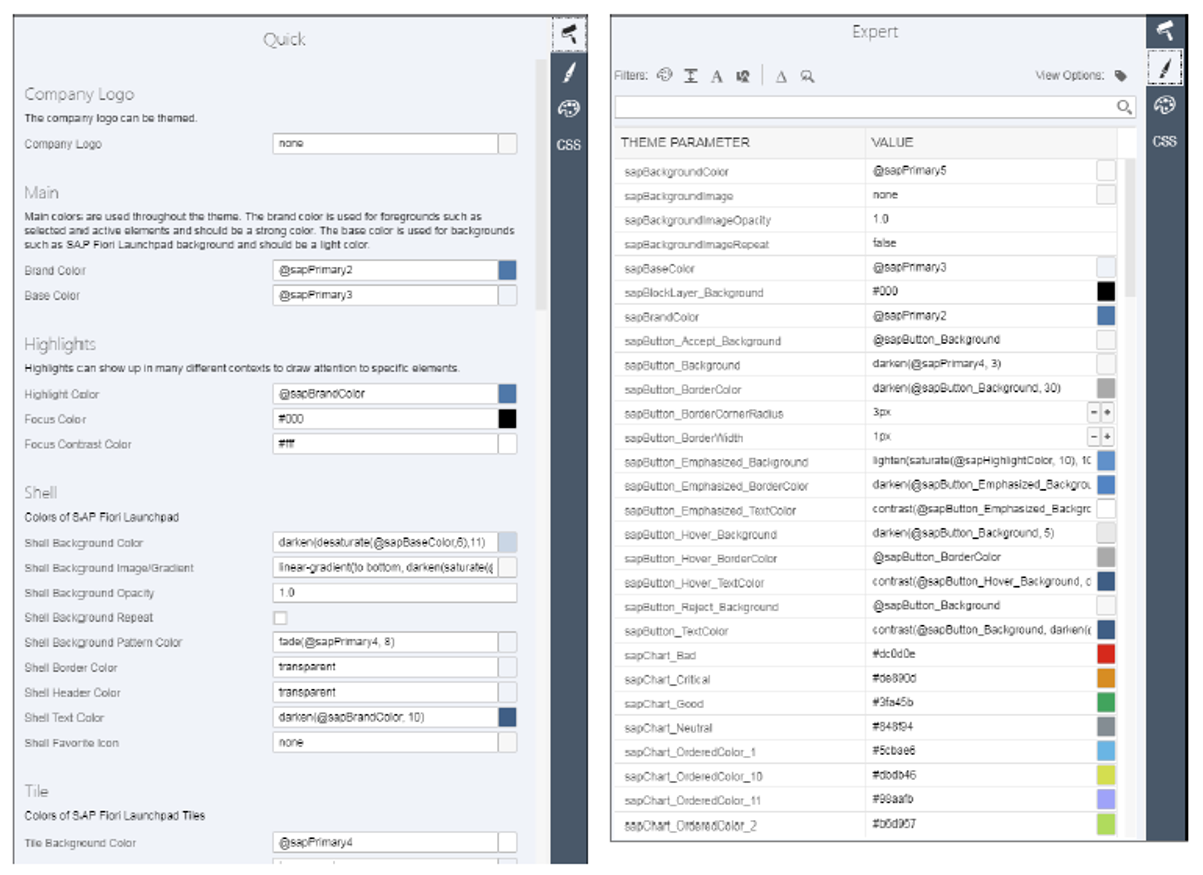
The second icon (paintbrush) on the right vertical toolbar opens an Expert window that provides advanced options based on theme parameters. These theme parameters are reused in all of SAP Fiori launchpad and its applications.
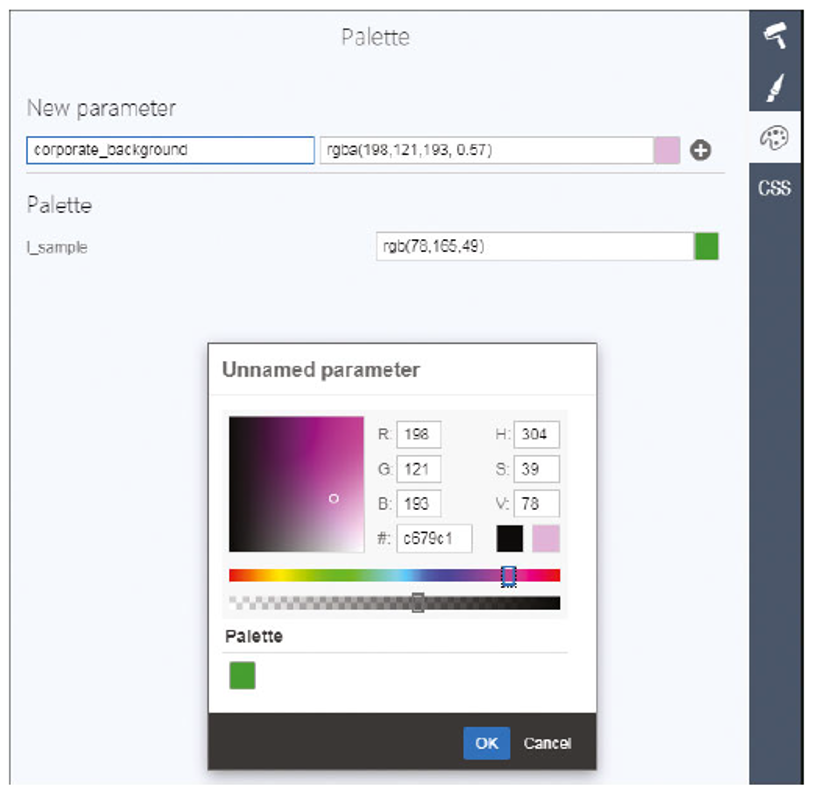
The third icon on the right vertical toolbar is Palette, which allows customers to predefine their corporate colors and reuse them in both the Quick and Expert windows. You can simply enter a parameter name in New Parameter and then select the color and its properties (e.g., hue). Click on the + button to add the parameter, as shown below. There are two custom parameters now in total.
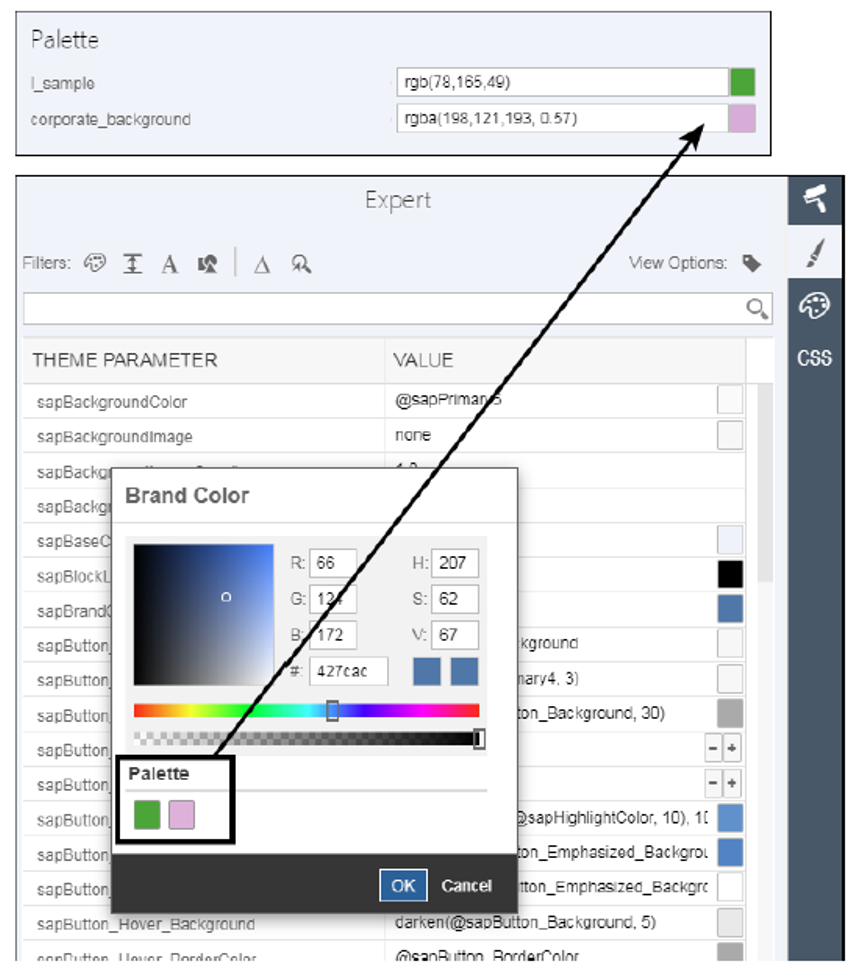
Now, go back to either the Quick or Expert window, choose a parameter, and click on the color picker button. You’ll see that new custom parameters are available.
The last option on the right toolbar is CSS. As the name suggests, this enables customers to influence the appearance of apps by inserting their own CSS. However, changes achieved by adding custom CSS can break across upgrades, and SAP provides no guarantee of those changes working. In such cases, customers need to document the expected outcomes well and redo the changes after the upgrade.
The next figure shows where CSS class names for the status text No Assignments were copied and the color was changed. When you click Apply, the changes are reflected on the canvas.
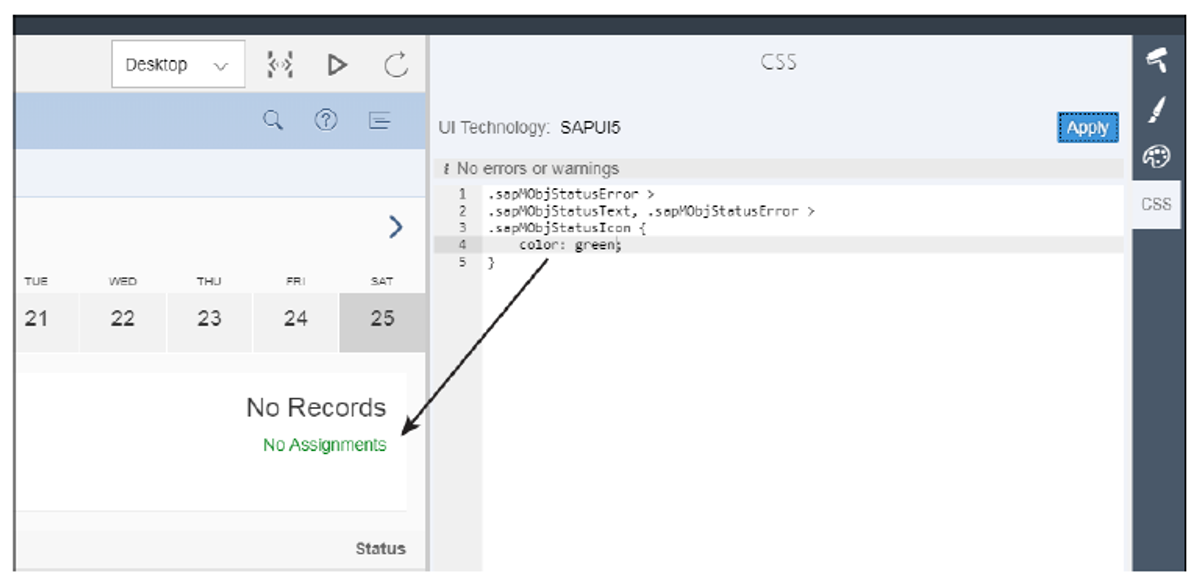
After making changes, the theme can be saved by clicking on Theme on the menu bar and selecting Save. The theme needs to be built before it can be used. To build it, choose Theme > Save & Build from the menu bar. The new theme is now available in the home screen.
Maintaining Themes
After a new theme is created in the development system, it needs to be transported to the testing and production systems so that real users can use it. You may also want to set it as a default theme for your users, so that users don’t have to explicitly choose it. You can also export the theme from one system and import it into another. Let’s explore all these possibilities in this section.
Setting the Default Theme
After a theme is created, it can be set as the default theme for all users so that they need not set the theme from the SAP Fiori menu. To set a default theme, you use Transaction /UI2/NWBC_CFG_CUST in the following steps:
- Navigate to Change Mode 1, and then click on New Entries 2 in Transaction /UI2/NWBC_CFG_CUST, as shown below.

- In the New Entries screen, enter “SAP_FLP” in the Filter field, enter “Theme” in the Parameter Name field 3, and press (Enter).
- This will open the Value field for input. Enter the technical name of the new theme that was created.
- Click Save to save the entry. This setting will default the Fiori_Demo as the new theme for all the users. However, users can go to SAP Fiori menu options and choose a different theme to override this setting.
Tip: SAP sets a default theme initially using Transaction /UI2/NWBC_CFG_SAP. However, this should not be changed because further SAP upgrades will overwrite the changes.
Transporting Themes
After completing the development and testing of the theme in the development server, it’s a normal requirement to transport the theme to other servers in the landscape. To transport the themes, you need to go to generic Transaction /UI5/THEME_TOOL. This tool will list each of the custom themes created in the server. Against each theme name, it provides options such as Info, Transport, Download, and Delete, as shown below.
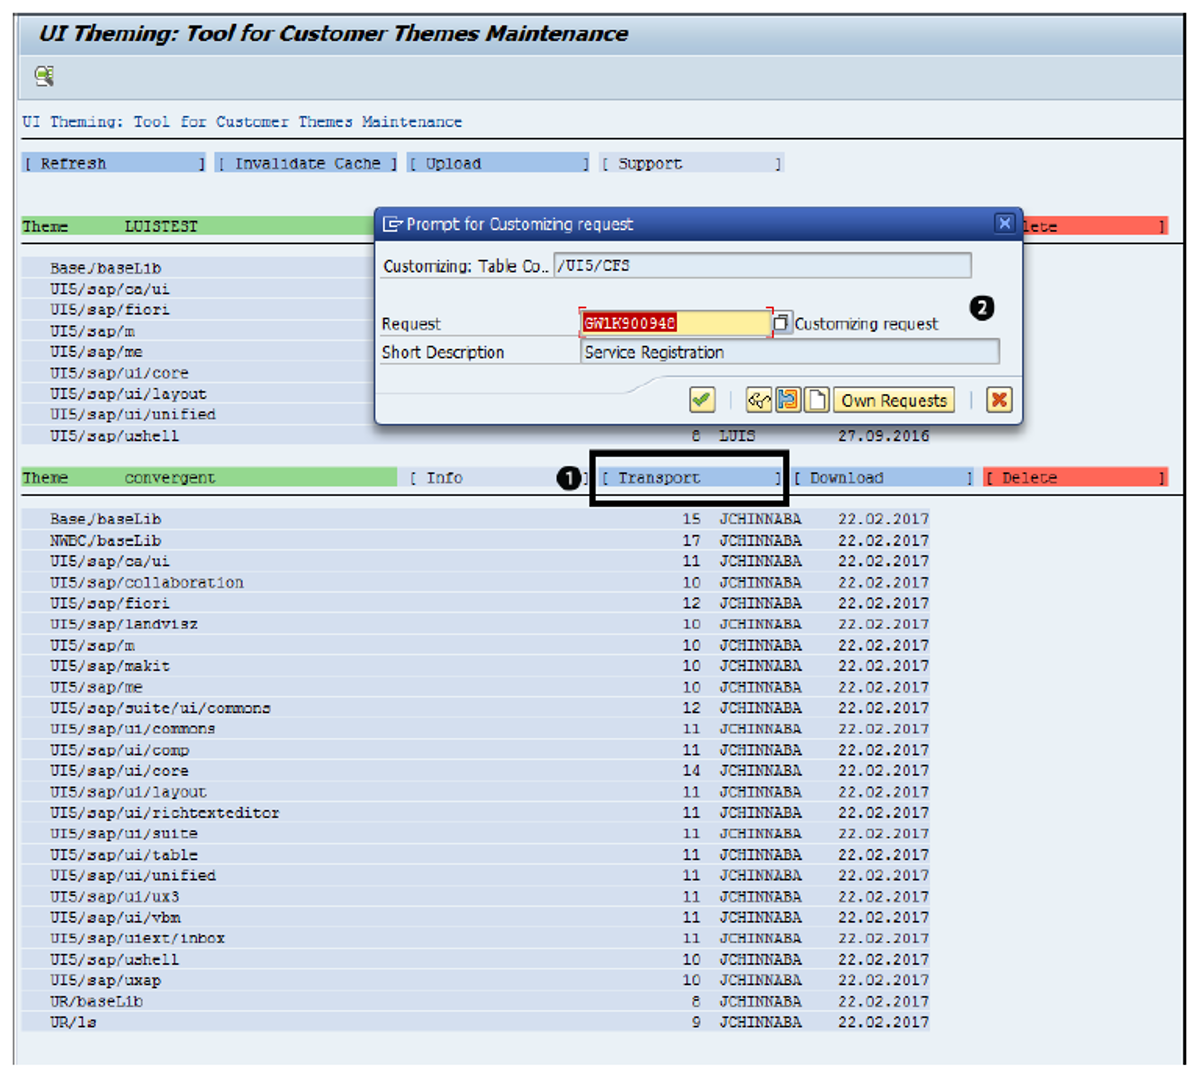
To transport a theme, click on the Transport button, and then click on the magnifying glass, as shown above (or just double-click on the Transport button 1). A standard dialog opens allowing you to choose or create a transport to hold the changes in the theme 2. After selecting a transport, click on the OK button to close the dialog.
Exporting/Importing a Theme
In some scenarios, there are no transport routes between two systems, and you need to manually repeat the theme changes. For such scenarios, SAP provides an export/import (Download/Upload) option (refer to the figure above) through which you can achieve the desired changes.
To download a theme, double-click on the Download button. SAP will prompt you for a file name and location. Upon providing those details, the entire theme will be written to a file. Transport this file manually to a target system’s file system. In the target system, click on the Upload button, and choose the previously downloaded file. This will create the new theme in the target system.
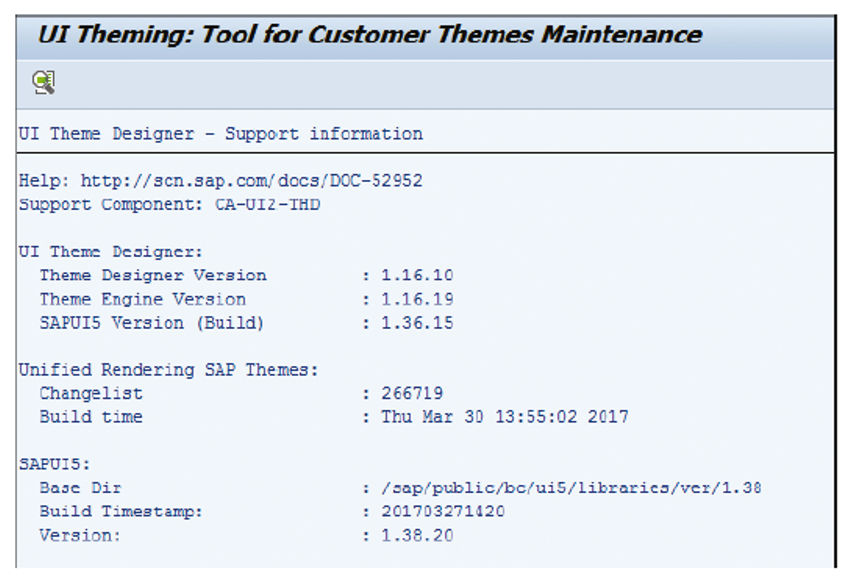
When you need details about the theme designer, such as its version and SAPUI5 version, you can use the Support button at the top of the screen. Double-click the button to see various related details, including the support component, as shown here.
Conclusion
The SAP Fiori launchpad is an important tool for companies to use when publishing SAP Fiori applications to users. While you can run it in a number of pre-configured styles, many companies want branding that matches their internal guidelines. This post shared how to utilize the UI theme designer to make such changes.
Editor’s note: This post has been adapted from a section of the book SAP Fiori Certification Guide: Development Associate Exam by Krishna Kishor Kammaje. Krishna is currently a developer and architect working at ConvergentIS, SAP products and consulting provider. He was recognized as an SAP Community top contributor for SAP Fiori and SAP Gateway for several years and was named an SAP Mentor in March 2017. His latest interests are around machine learning and exploring ways to make SAP Fiori apps intelligent using those technologies.
This post was originally published 3/2021.

Comments