
In this blog post, let’s take a look at managing users in the SAP BTP, Neo environment and SAP BTP, Cloud Foundry environment.
User Management in SAP BTP, Neo Environment
Managing users in SAP BTP, Neo environment plays a key role in security. You can manage business users, administrative users, and developers in numerous ways. Basically, a distinction must be made between global account users, subaccount users, and end users, with the following considerations in mind:
- Global account level users are exclusively administrators who create subaccounts and assign resources to the subaccounts for use within the subaccount. In addition, support staff and auditors must be added as users at the global account level. These users are authenticated against the SAP ID service without exception. Typically, these users are S-users that you create in the service marketplace.
- Users at the subaccount level are created for administrators, developers, and support staff. The end users of the applications deployed in this subaccount are not created as subaccount users (members).
- Application end users do not need any permissions in the subaccount. These users are maintained in the application identity provider and do not require platform roles, only application roles. These application roles are usually mapped to groups in the application identity provider.
A prerequisite for the direct mapping of users is that the corresponding user accounts must already be registered in the SAP ID service. If this requirement is not fulfilled, SAP Support Portal enables you to create S-users for your company.
To create S-users for global account users, you must log on to the https://support.sap.com/ page with an S-user for your company. This user must have the appropriate user administration permissions. Then, proceed with the following steps:
- In the SAP Support Portal menu, select the Manage Users entry in the menu to jump to user maintenance, as shown in this figure.
- You’re now in the user overview.
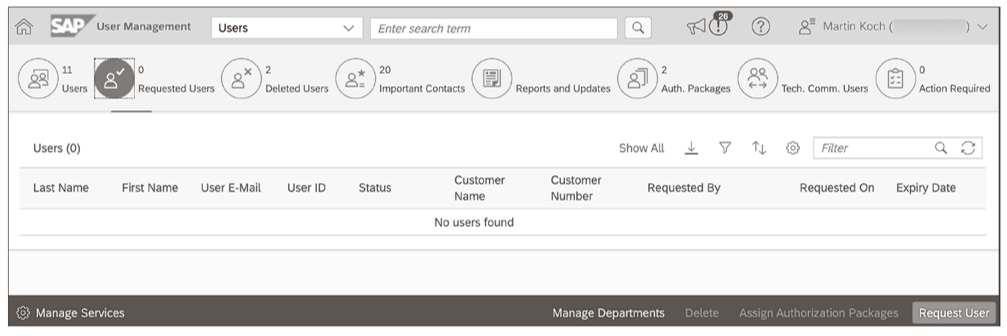
Click on the Request User button in the bottom toolbar to create a new user.
- In the creation dialog box, enter the details of the user, as shown here.
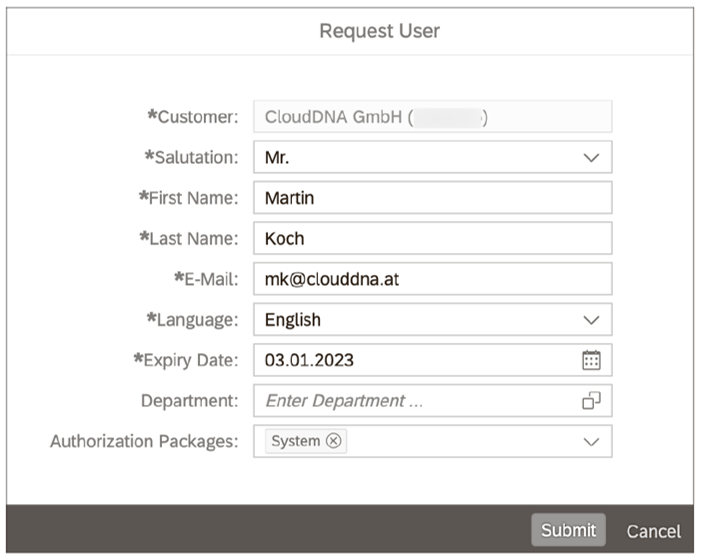
- Finish the creation process by clicking Submit.
The S-user is not created immediately since SAP must first confirm its creation, which can take up to 24 hours. SAP also assigns the S-user ID during this process. Once approved, the user will receive an invitation email with instructions on activating the user account.
Prerequisites for managing users at the subaccount level include, first, logging on to the subaccount and, second, having sufficient permissions for user management. The user who created the subaccount is automatically assigned the administrator and developer roles for the subaccount. Initially, only this user has access to the subaccount.
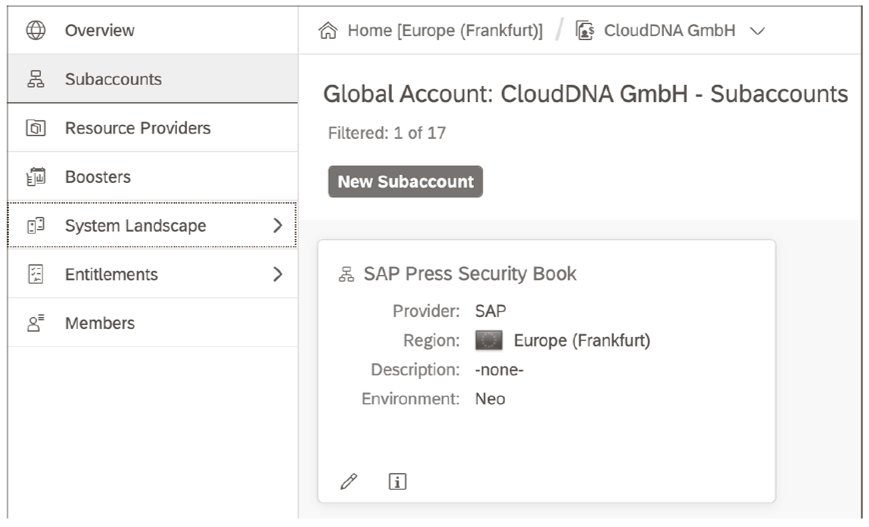
To create additional users on the subaccount level, (which are called members), switch to the user administration screen. For this task, select the Members menu item in the SAP BTP cockpit, as shown below.

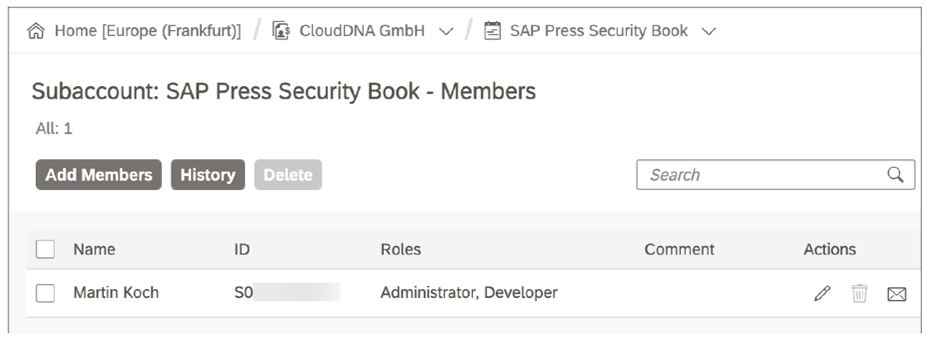
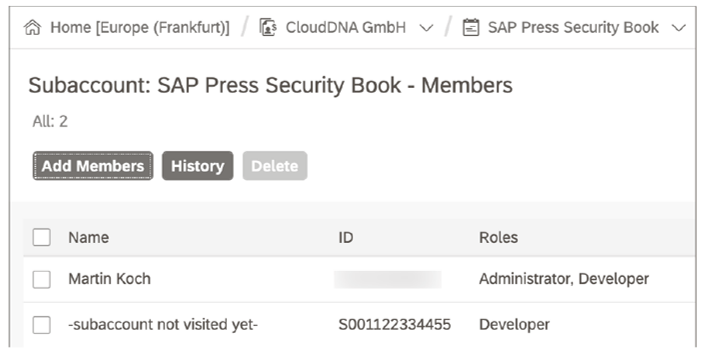
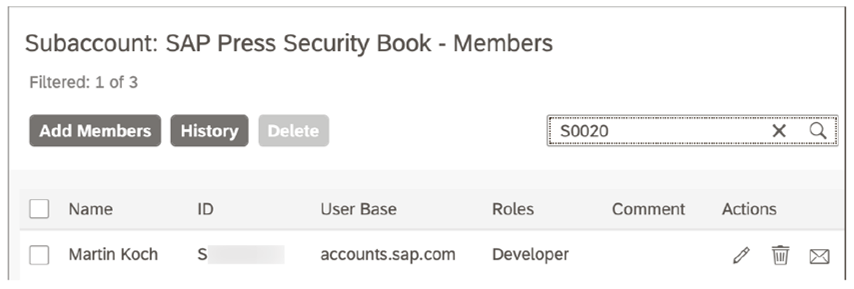
On the user overview screen, you’ll see all users currently assigned to the subaccount, as shown in the figure below. These users can be edited and deleted at this point. Only your own user cannot be deleted.
To add a new user to the subaccount, click on the Add Members button.
You can create up to 100 users at a time. In the User IDs field, specify the S-user ID(s) generated by the SAP ID service, as shown below. The system does not check whether these IDs actually exist, nor whether the corresponding users are assigned to your company’s user master data in SAP Support Portal. Therefore, check the IDs carefully; otherwise, people from outside your company might be granted access.
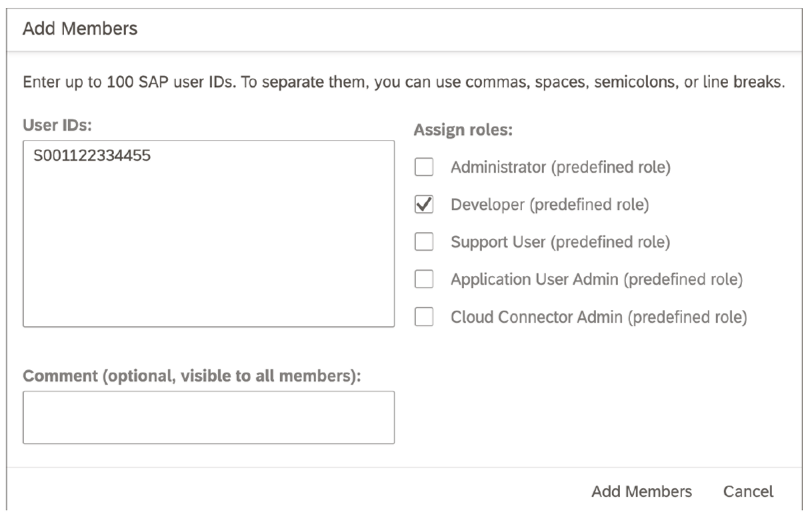
In the same dialog box, you can assign roles to users. You can either use the standard roles delivered by SAP or use self-defined roles.
After users have been successfully assigned, they will appear in the user overview with the note -subaccount not visited yet- in the Name column, as shown below. Once a user has logged on to the subaccount for the first time, the name of the user maintained in the SAP ID service is used instead of this note.
Using the SAP ID service to authenticate the users of a subaccount has some disadvantages. For example, you cannot store a validity period for a user in the subaccount. You also have no way to lock or unlock a user directly in the subaccount.
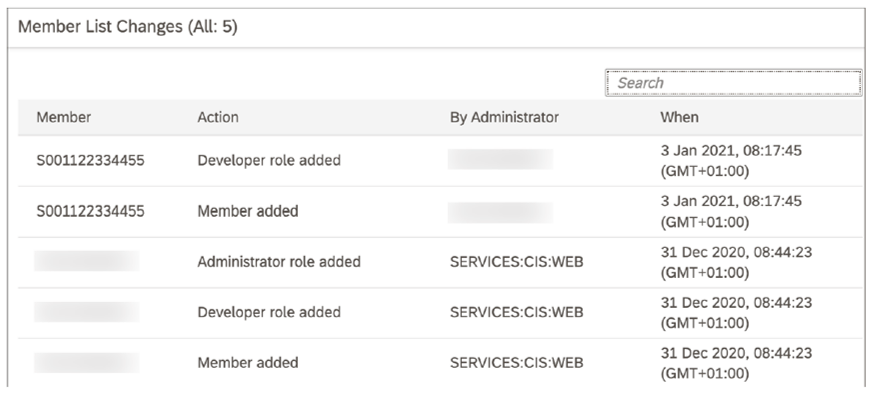
On the user overview screen, you also have the option of viewing all changes made to users by clicking the History button. The change history for the subaccount used in the book this post is based on is shown here.
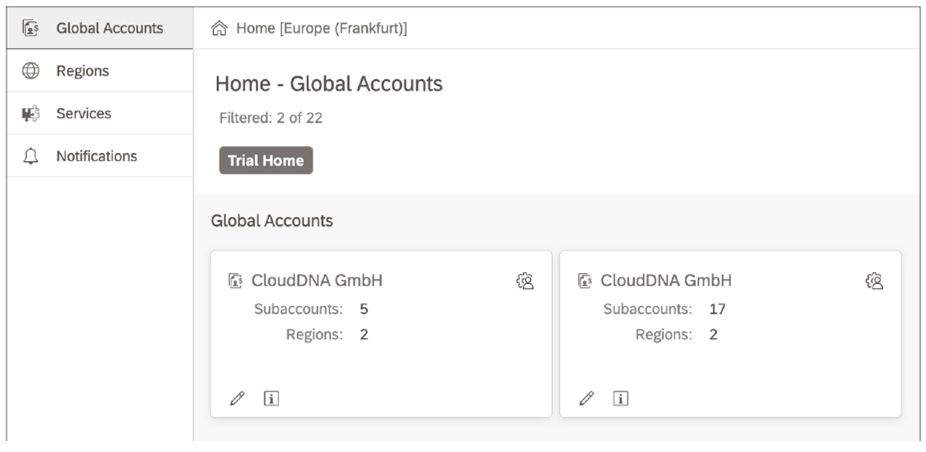
How a user logs on to the subaccount depends on whether the SAP ID service is used for authentication or whether the Identity Authentication service takes on the role of platform identity provider for the subaccount. If the SAP ID service is used, users can log on with their user data via the URL https://account.hana.ondemand.com/. After successfully logging on, as a user, you’ll see an overview of all the global accounts to which you’re either directly assigned or in which you’re assigned at least via a subaccount, as shown in this figure.
If you navigate to the SAP BTP cockpit of the global account, navigate to Subaccounts > System Landscape to call up the overview of all subaccounts to which you’re assigned, as shown in this figure.
When a user has logged on to the subaccount for the first time, the user name is read and stored in the user overview of the subaccount, as shown here.
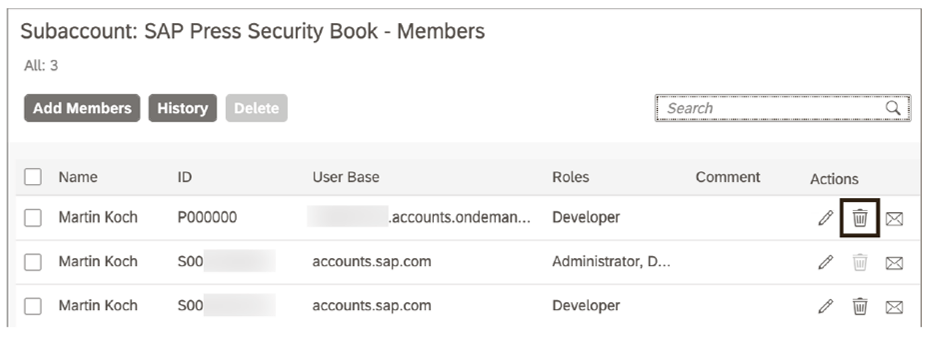
You can delete a user by clicking on the delete icon in the Actions column for a user’s entry, as shown below. This action is logged and can be viewed via the change history.
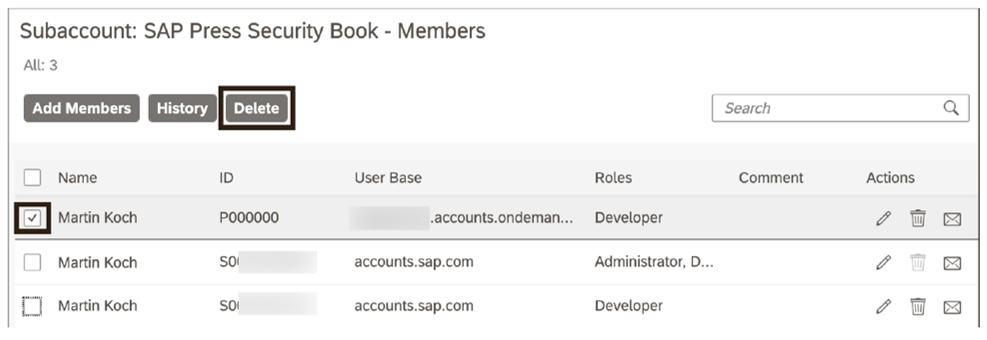
SAP BTP also offers the option of deleting more than one user at a time. For this task, select the desired users and then click the Delete button, as shown below. This action is logged just like the deletion of a single user and can be viewed via the change history.
User Management in SAP BTP, Cloud Foundry Environment
You can add users as members to an organization within your subaccount in SAP BTP, Cloud Foundry environment. In turn, you’ll assign roles to these members to authorize them to perform actions. A prerequisite for creating members and assigning roles is that you have been assigned the organization manager role. The user who created the subaccount is automatically added as a member and assigned this role.
You can also add members to a space and assign roles to these members. The prerequisite for this capability is that you must have the space manager or organization manager role. If you only have the space manager role, the users you want to add to the space as members must have already been assigned to the organization as members beforehand. If you have the organization manager role, the new member will not only be added to the space, but also to the parent organization automatically. In SAP BTP, Cloud Foundry environment, members are identified at the subaccount level and the space level solely by their email addresses.
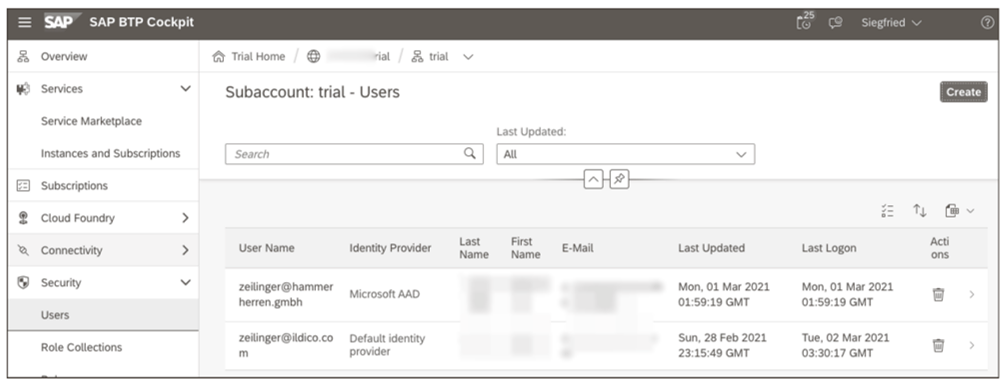
The user administration screen can be accessed via the menu path Security > Users in the SAP BTP cockpit. The figure below shows a standard view of the user management screen for an administration user that has been assigned as an identity provider via the SAP ID service. In our example, another user that has been provided via Microsoft Azure AD. For both users, the email address is specified as the User Name in each case.
Click the Create button to create new users. For users originating from the SAP ID service (as indicated by Default identity provider in the overview screen), you should create users explicitly. For other identity providers, you do not need to add users explicitly.
On the user creation screen, enter the user’s email address in the User Name and E-Mail fields as a unique characteristic, as shown in the next figure. Also specify the Identity Provider that provides this user. Confirm your entries by clicking the Create button.

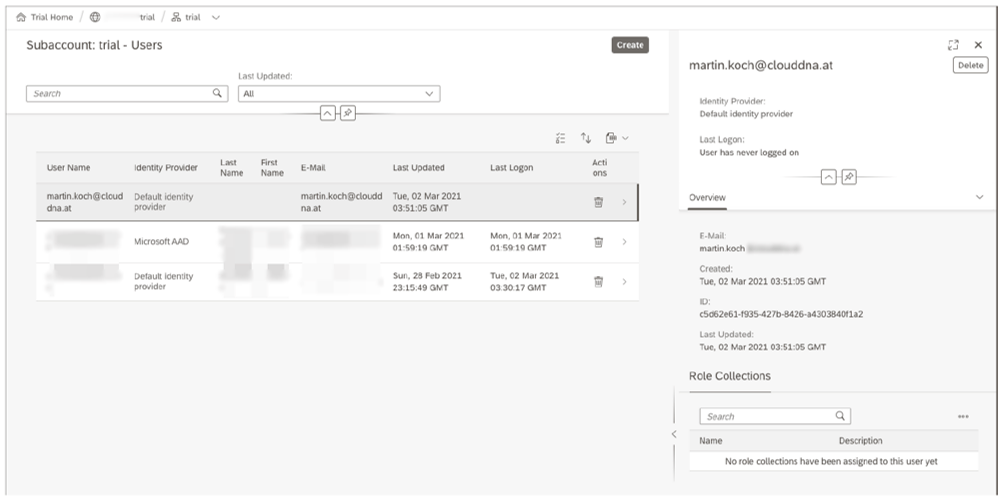
After creating the user, to show the user detail view, you can check the user data again by clicking the arrow on the right side of the line, as shown in the next figure. At this point, you can also directly assign roles to the user. You can also delete a user by clicking the Delete button.
For administrators, this process is the default way to create new users at the subaccount level. On the other hand, if you want end users to have access to a cloud application running in a subaccount of SAP BTP, users are usually created automatically from the company’s own identity provider. For this task, you’ll select a checkmark during identity provider configuration. In practice, this setting saves you several steps when creating users for end users.
A point worth mentioning is that you should have at least two administrators assigned the subaccount-specific standard subaccount admin role. This approach allows you to manage the subaccount comprehensively. You should also manage at least two users via the default identity provider in case the external identity provider is ever unavailable.
Learn SAP BTP in Our Rheinwerk Course!
What is SAP Business Technology Platform and what can it do? Get all the information you need in this course. Take a tour of the platform’s tools and services for development, integration, analytics, data management, and more. Learn directly from the experts and see SAP BTP in action with practical demos! Get access to course recordings by clicking the banner below.

Editor’s note: This post has been adapted from a section of the book Security and Authorizations for SAP Business Technology Platform by Martin Koch and Siegfried Zeilinger. Martin is the managing director of CloudDNA GmbH, an SAP partner in Austria. He and his team conduct training for SAP and have developed four of their own training courses on the topics of SAPUI5, SAP Fiori, cloud integration, and cloud security, which are listed in the SAP training catalog. Siegfried is a freelancer and managing director of a small management consultancy. His focus is on consulting and security auditing of IT systems as well as authorization and identity management for SAP.
This post was originally published 5/2023.
.png?height=600&name=What%20Are%20the%20Five%20SAP%20BTP%20Development%20Environments%20(2).png)

Comments