So, you want to install an SAP S/4HANA on-premise system. Good choice!
If you don’t want to use the SAP S/4HANA Fully-Activated Appliance, you’ll need to first perform the sizing for your specific case. The sizing process determines the hardware requirements of the SAP S/4HANA system and SAP HANA database as well as the disk size, the required memory, and the anticipated network throughput. (Check out these seven things to consider before an SAP S/4HANA migration.)
Additional Information on Sizing: Depending on the target system release and scenario, the following links provide more information on the SAP S/4HANA sizing process:
- Sizing starting point in SAP Service Marketplace: http://sap.com/sizing
- Quick Sizer: http://s-prs.co/v581671 (note that this link requires S-user authentication)
- SAP Note 1872170 for ABAP sizing reports
Sandbox System
This section describes how to set up an on-premise SAP S/4HANA system in your landscape. The steps remain the same for private cloud or hosting environments. According to SAP's recommendation, this action explains how to install a sandbox system that contains an ABAP backend server and the SAP Fiori frontend server in the same system (also known as co-deployment).
Downloading the Installation Files
First, you need to identify all installation files, and then you can download the files either using SAP Download Manager or SAP Fiori’s Download Basket app in SAP Support Launchpad. Maintenance Planner helps you identify the correct files for your installation.
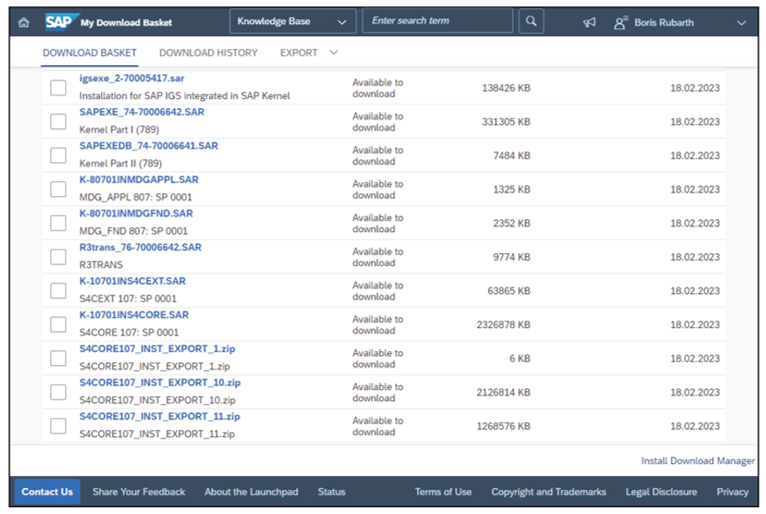
Download Basket: Empty the Download Basket by deleting obsolete download requests before selecting the individual components for SAP S/4HANA. As a result, you’ll be able to track more effectively the files you still need to install. SAP Download Manager allows you to delete only individual archives from the list at a time. To delete multiple entries at once, it’s better to use the Download Basket app in SAP Support Launchpad.
Maintenance Planner
To easily identify and place the necessary files in Download Basket, you need to log on to Maintenance Planner—a tool that is used for system conversion and for new implementations. Maintenance Planner lets you plan new system installations, perform updates, and implement new or additional SAP products (e.g., the frontend server for SAP Fiori).
Additional Information on Maintenance Planner: For more information on Maintenance Planner, go to http://help.sap.com/maintenanceplanner.
Starting Maintenance Planner
To start Maintenance Planner, go to https://maintenanceplanner.cfapps.eu10.hana.ondemand.com, or use the corresponding SAP Fiori app in the SAP Support Launchpad. An SAP Fiori–based website opens, which you can access with your S-user credentials (see figure below). For SAP partners, the partner user must be linked to the company user to be able to view the company’s systems. Select the Plan for SAP S/4HANA tile. Maintenance Planner helps you find and download the required installation files and provides the necessary documentation.
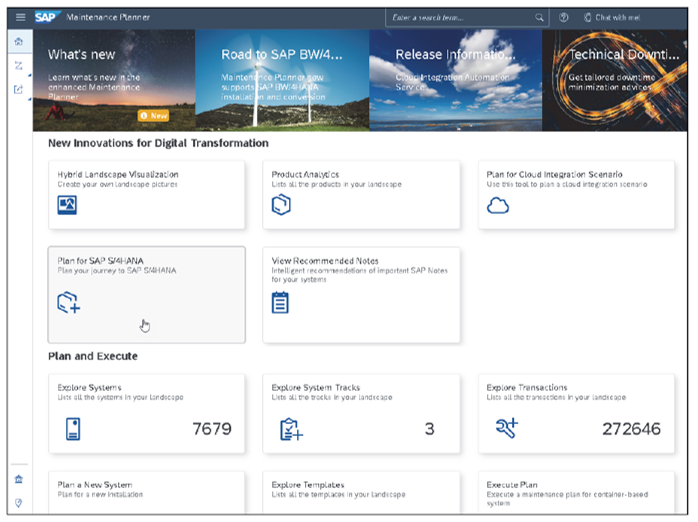
You not only use Maintenance Planner for the installation of new systems but also for system conversions (see below). The tool helps you search for add-ons and business functions on the existing system. Maintenance Planner also helps you to determine whether a system conversion can be performed at all.
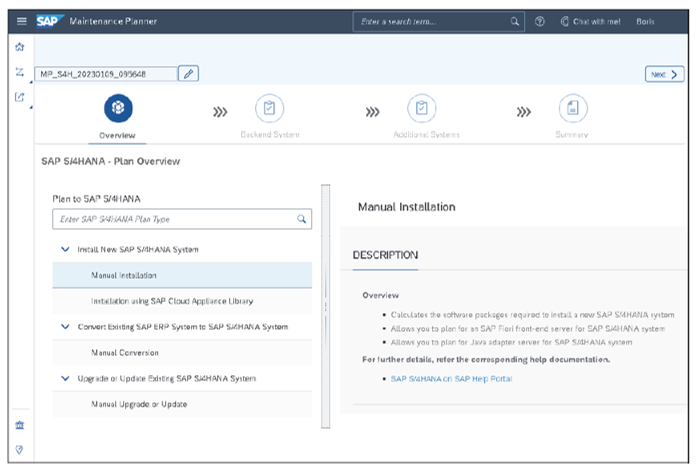
SAP S/4HANA Installation Guide
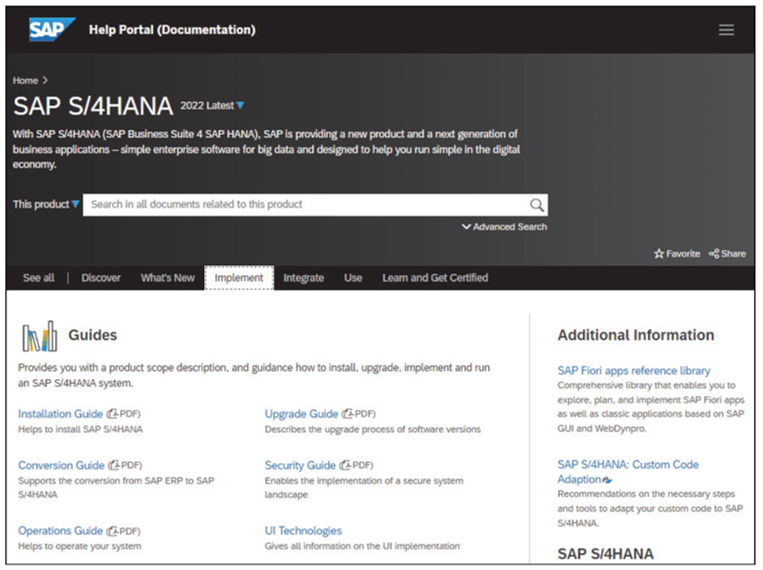
Download the Installation Guide for your SAP S/4HANA version using the link provided in the Manual Installation section. You can find it on the SAP Help Portal on the Implement tab.
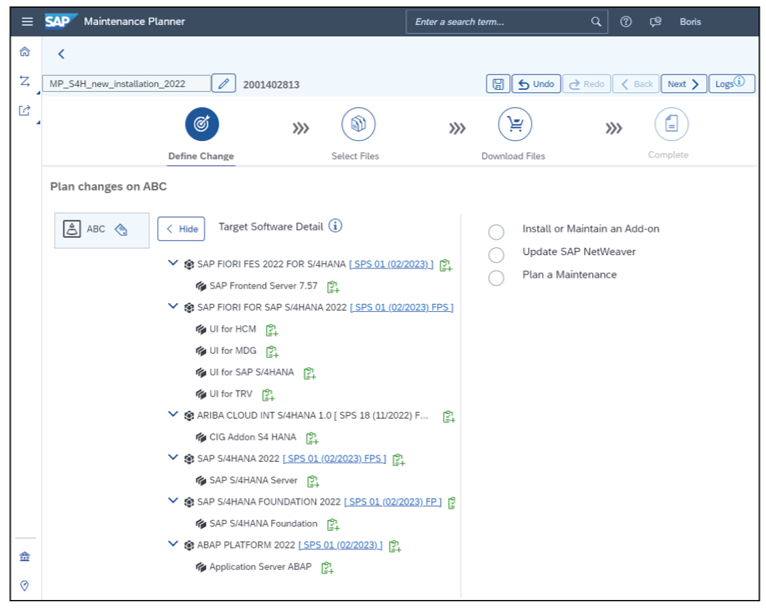
Maintenance Planner guides you through the steps of the installation preparation process, in this example, for SAP S/4HANA 2022 FPS01. On the initial Plan Overview screen, the Next button takes you to the Backend System step, where you specify the system ID and details such as the version of SAP S/4HANA and desired product instances. In the Additional Systems step, the specification for the frontend server is made with the recommended option Co-deploy with Backend.
The Summary step is then followed by the steps that you may already be familiar with from a maintenance operation in Maintenance Planner. First, under Define Change, you can select add-ons in particular to be installed along with it. In the figure below, you can see the Ariba Cloud Integration add-on that was added manually.
In the Select Files step, select the SAP kernel version for the operating system of the application server host. As shown in the next figure, you can also select the software for the SAP HANA database here if it hasn’t been installed yet. In addition, it’s useful to select the archives for SWPM (for installation) and for Software Update Manager (SUM; for patching) at the same time.
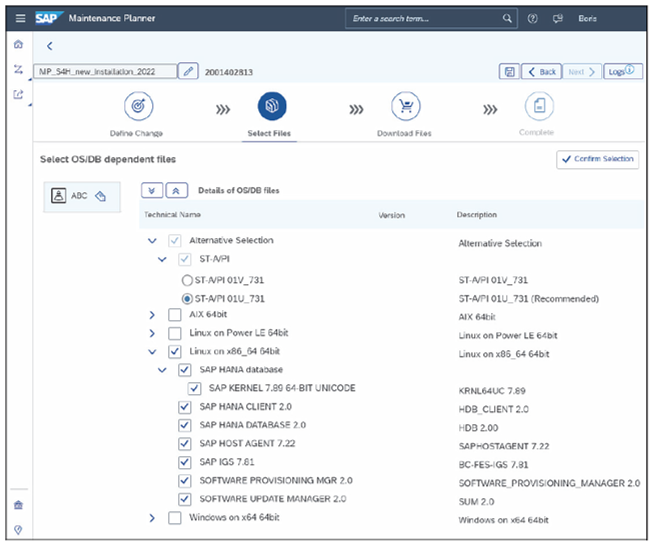
Once you’ve gone through the process, you can push the installation files to the Download Basket at the end in the Download Files step using the Push to Download Basket button and download the maintenance plan as a PDF directly from the tool under Additional Downloads.
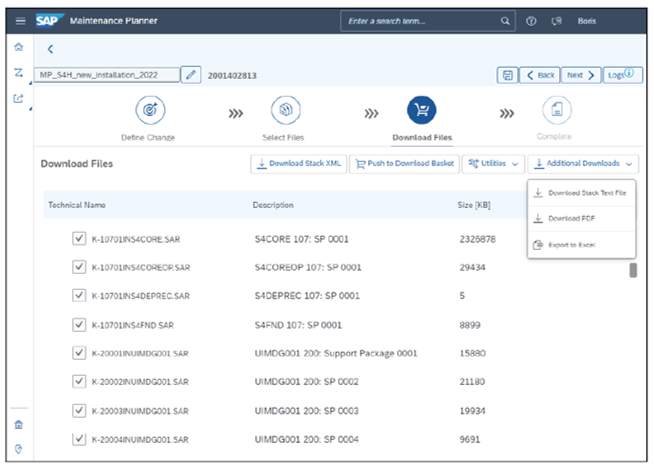
The next figure shows a subset of the download files identified and provided for your SAP S/4HANA installation in the Download Basket.
Installation Using the SWPM
The SWPM then performs the actual SAP S/4HANA installation using the files you downloaded with Maintenance Planner. This process follows the steps described in the installation guide and may take several hours. If you didn’t have an SAP HANA database installed yet, the SWPM will take care of this installation as well. If SAP HANA is already implemented, you’ll need to patch the database to the version that you need for your SAP S/4HANA version, and you’ll have to create a new database container.
SUM
After successfully installing a “naked” SAP S/4HANA system, you can use SUM to install the support packages you may need.
Up-to-Date Installation
You may have noticed earlier that Maintenance Planner also provides a Stack.xml file for installation, which is more familiar for updates via SUM. You can start the installation with the SWPM using this stack file. In particular, SUM for patching to the desired Support Package (SP) level is also started directly afterward. SUM consumes the same Stack.xml file provided by Maintenance Planner. This saves you from having to register the new system in Maintenance Planner after installation, to plan the SP level there, and finally to start SUM with the Stack.xml file of this planning. This approach is referred to as up-to-date installation.
Third-party add-ons that can’t be selected in Maintenance Planner can be imported using the SAP Add-On Installation Tool (Transaction SAINT) together with the Support Package Manager (Transaction SPAM).
Postprocessing
Finally, you should perform some cleanup and then install the SAP Notes Postprocessing for your SAP S/4HANA version from SAP S/4HANA Release Notes using Transaction SNOTE. Now, your SAP S/4HANA installation is complete.
Additional Information on the Installation: You can find more information on the installation specifics in the SAP Community (see https://community.sap.com/) and in the Roadmap Viewer (https://go.support.sap.com/roadmapviewer).
Not sure if on-premise is for you? Learn more about the different versions of SAP S/4HANA here.
Editor’s note: This post has been adapted from a section of the book Migrating to SAP S/4HANA: Operating Models, Migration Scenarios, Tools, and Implementation by Frank Densborn, Frank Finkbohner, Martina Höft, Boris Rubarth, Petra Klöß, and Kim Mathäß. Used with permission of SAP PRESS. All rights reserved.


Comments