To reduce the amount of front-end code while developing an SAP Fiori app and to keep the design consistent, SAP introduced a framework to generate UIs; it’s called SAP Fiori elements.
SAP Fiori elements uses metadata annotations and predefined templates to generate an SAP Fiori app. With the latest release of SAPUI5 (version 1.44), the floorplans shown below are available with SAP Fiori elements.
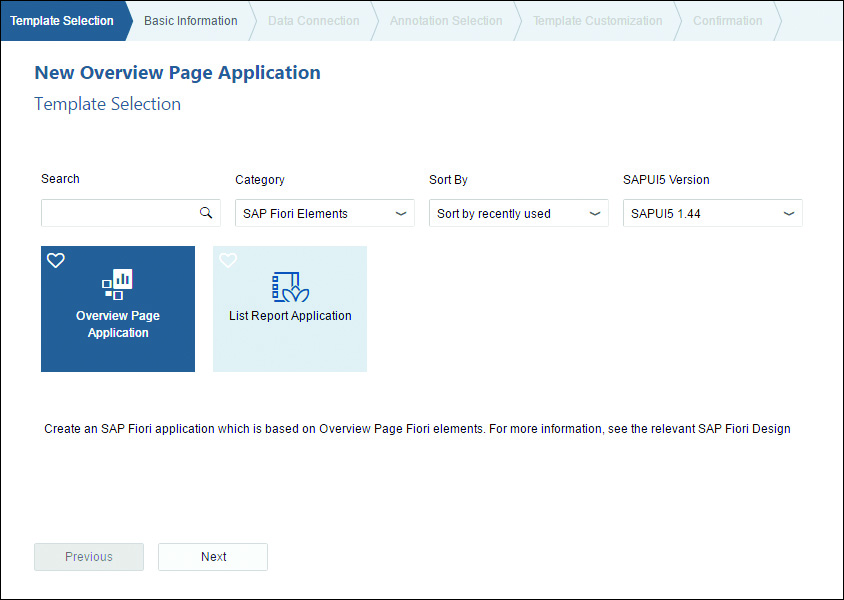
Types of SAP Fiori Element Floorplans
Overview Page
The SAP Fiori overview page application is a type of floor plan with a UI framework that provides quick access to vital business information at a glance. This is in the form of actionable cards on a single page, enabling users to make faster decisions and focus on their most important tasks.
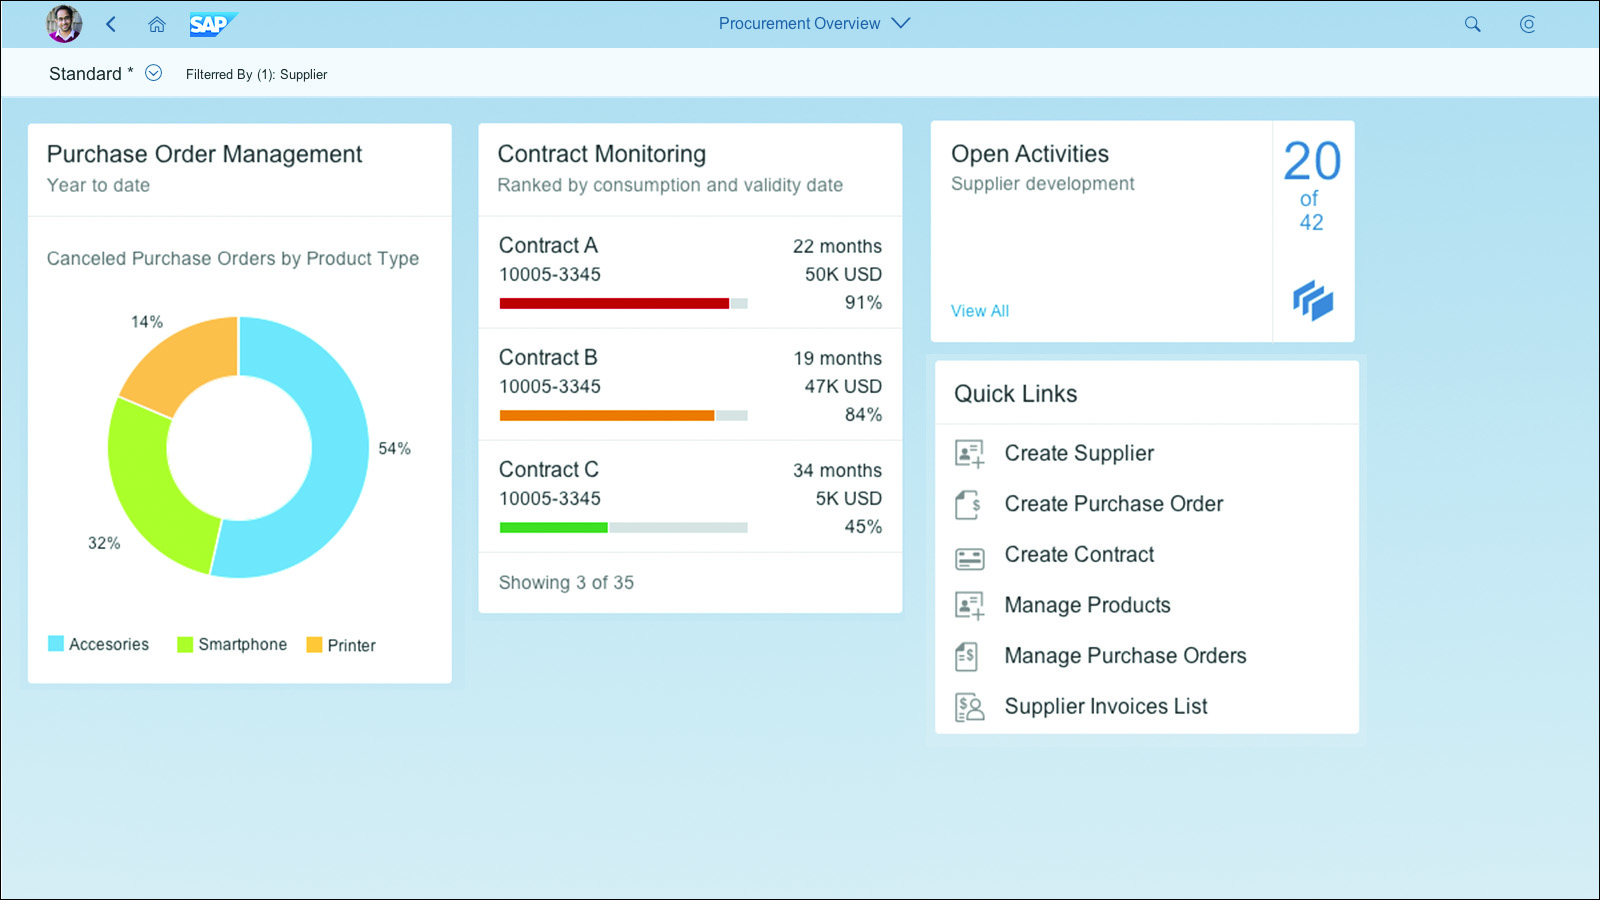
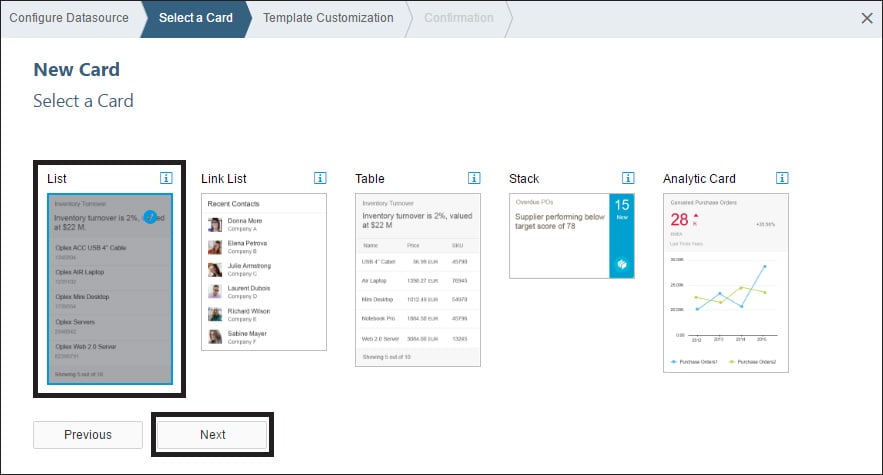
Cards are containers for app content, and they represent an entry-level view of the most relevant app data for a given topic. The SAP Fiori overview page contains five types of cards, shown in this figure:
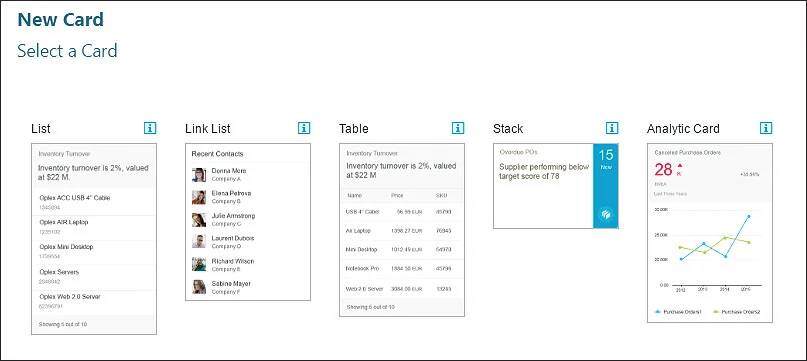
Each type of card allows users to visualize information in an interactive and efficient way:
- List: List cards display items in a vertical list.
- Link list: Link list cards display items as links or images that can navigate to a target or open a pop-up window with additional information.
- Table: Table cards display items in a table format.
- Stack: The stack card is a special type of card that displays a collection of single object cards. This type of card has two clickable areas; the left area navigates to the parent app, and the right area opens the object stream.
- Analytic: Analytic cards consist of two areas: a header area that displays the aggregated values of a KPI and a chart area that displays data in a graphical format.
List Report Floorplan
The second type of floorplan is the List Report application, a reusable floorplan template that allows users to work with large lists of items and act on each one.
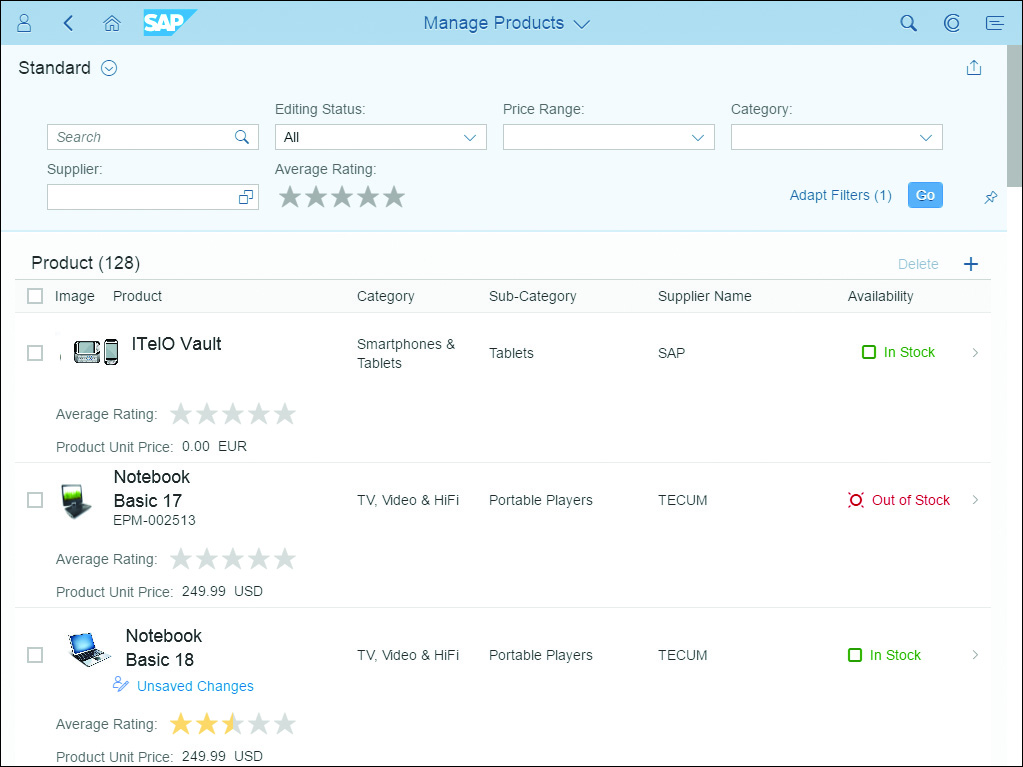
Object Page Floorplan
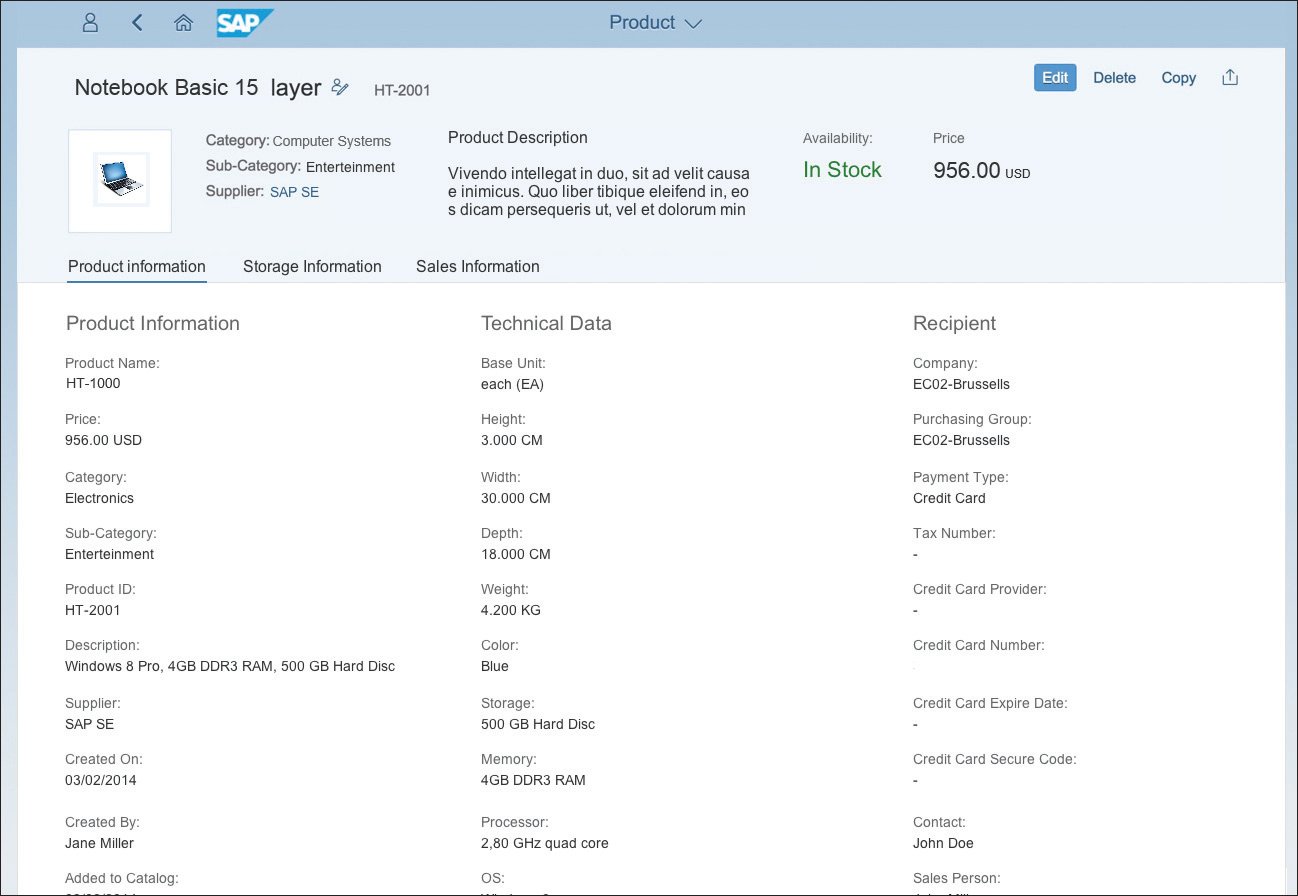
Object Page (as seen below) is another type of floorplan template, which allows users to display, create, or edit an item. The Object Page floorplan can be implemented using the pre-built SAP Fiori element.
Exercise: Developing SAP Fiori Apps with SAP Fiori Elements
Now that you understand the different floorplans available with the latest SAPUI5 release, we’ll walk step-by-step through how to develop SAP Fiori apps using SAP Fiori elements.
In this exercise, we’ll cover the end-to-end scenario of developing a basic SAP Fiori overview page using SAP Web IDE and the deployment to your SAP Fiori launchpad. All the data in the overview page is based on the Supplier List OData service. Let’s get started; follow these steps.
To Create an Overview Page:
1. Login to SAP Web IDE.
2. Create a new project, and choose New Project from Template.
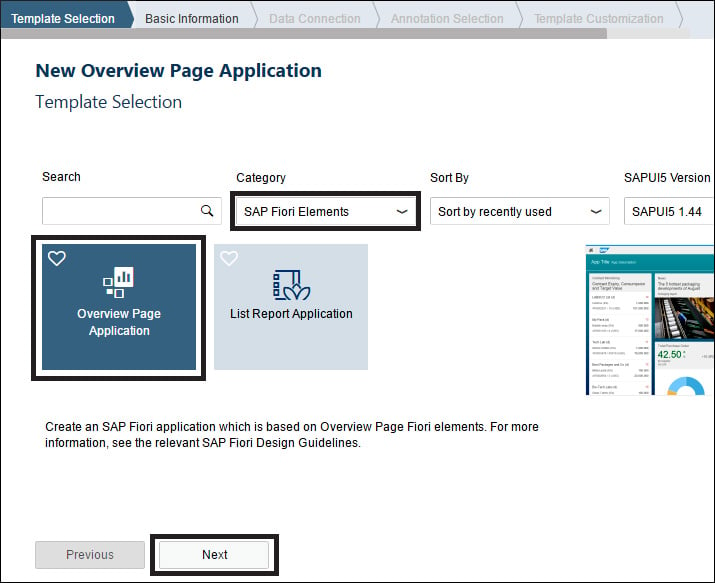
3. Select SAP Fiori Elements from the Category dropdown, select Overview Page Application, and click Next.
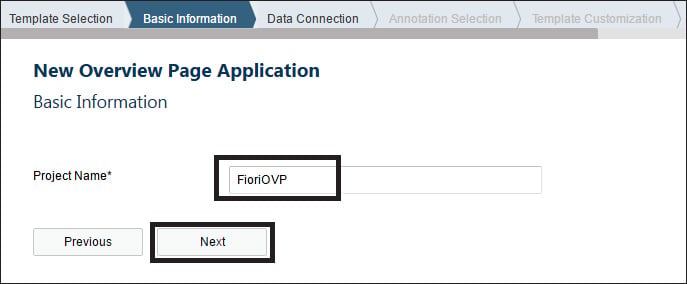
4. Enter a Project Name and click Next.
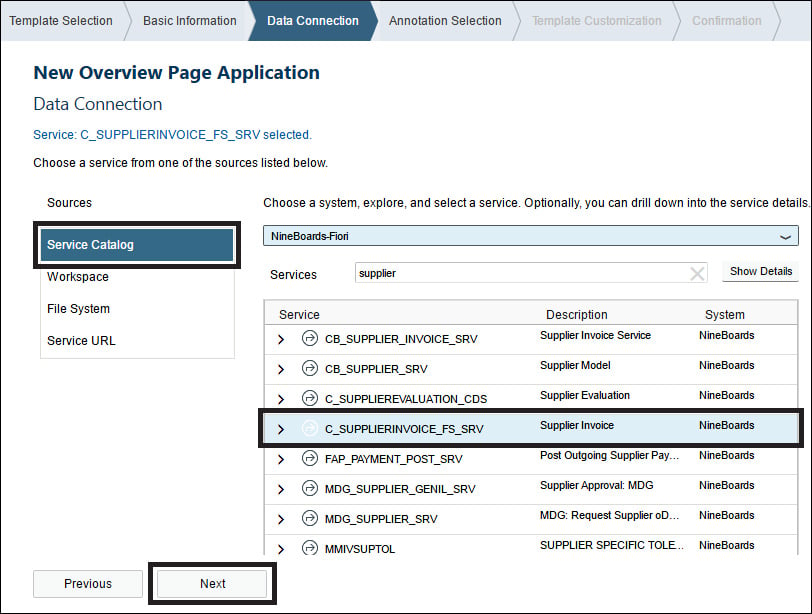
5. Select the Service Catalog and the Server.
6. Select the OData service on which you’d like to build the app, then click Next. In our example, we selected the Supplier Invoice OData service.
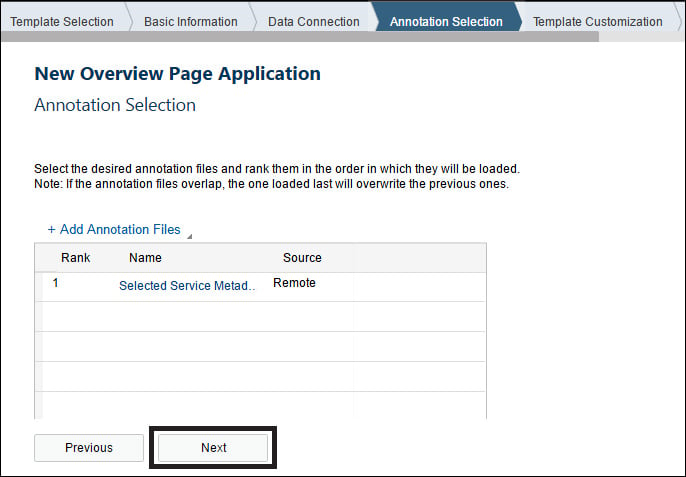
7. In the Annotation window, for now, just click Next (see below). An annotation file is a semantic description of an OData service; in general, an annotation file should be populated, and you can create your own annotation file and upload it in this step in the future.
8. Enter Technical and General details, such as the App Title and App Description, then click Finish.
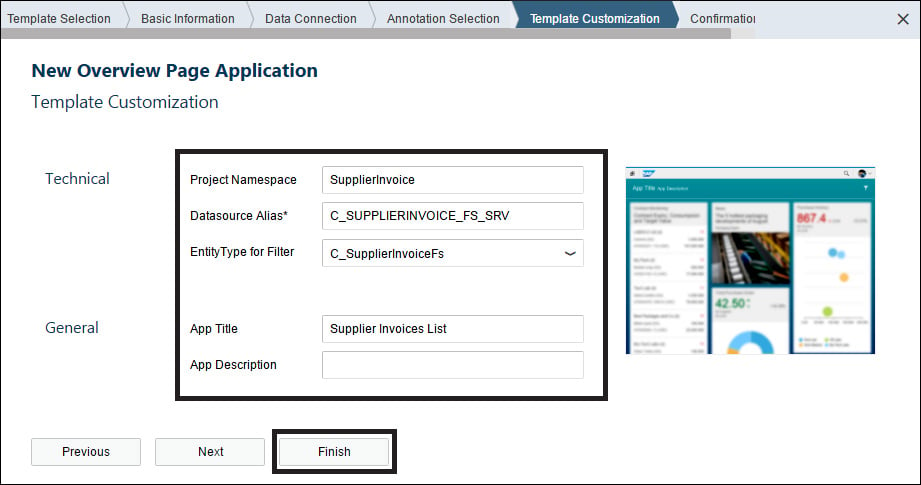
You’ve successfully created an SAP Fiori overview page project from a template. Next, let’s create a card.
To Create a Card
1. Right-click the project and select New, then click Card.
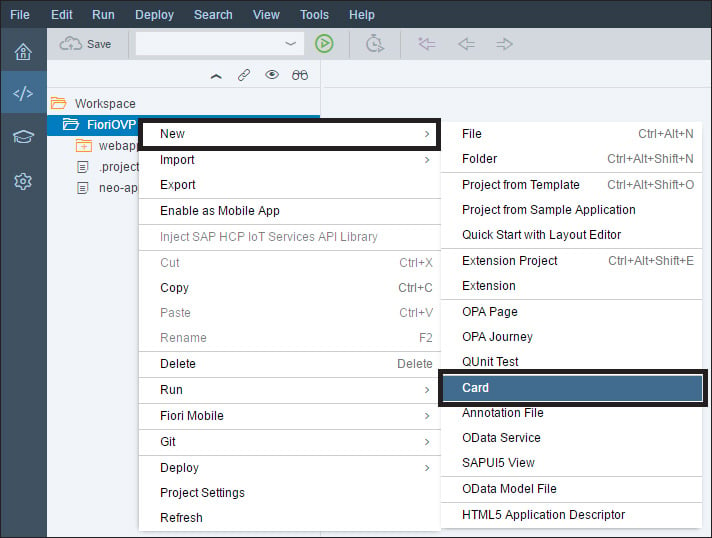
2. Verify the data source and click Next.
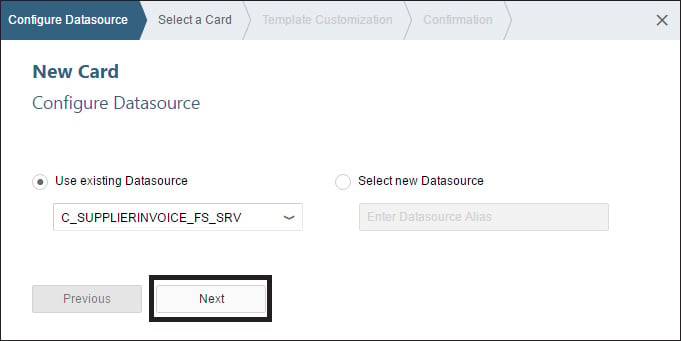
3. Select List from the list of cards and click Next.
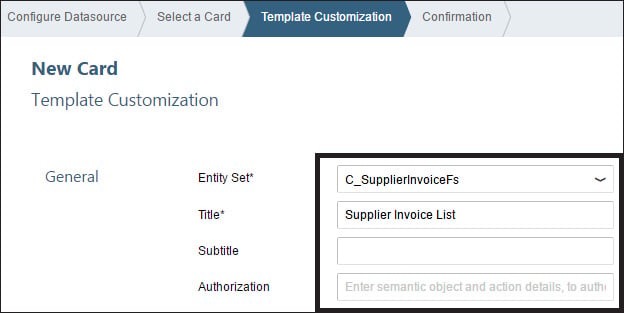
4. Select the Entity Set from the dropdown, and enter the Title and Subtitle.
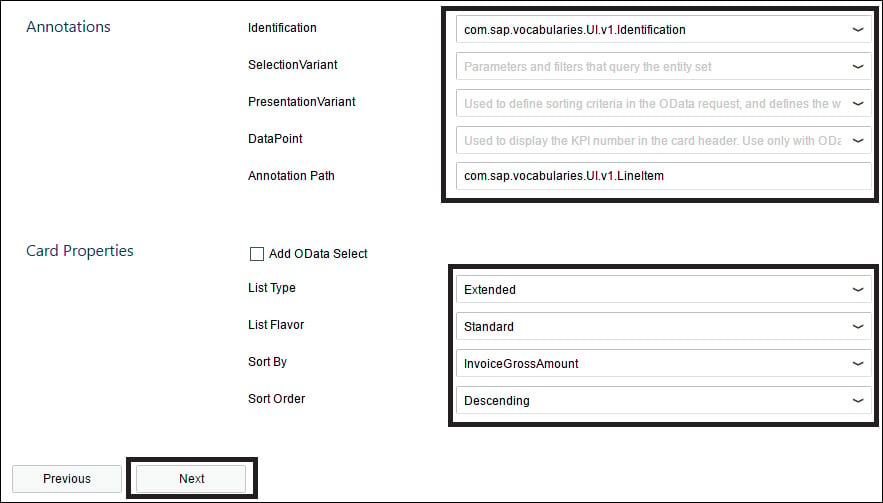
5. Scroll down to view Annotations and Card Properties (see below). Annotations are usually pre-selected. Select the card properties, then click Next.
6. Click Finish.
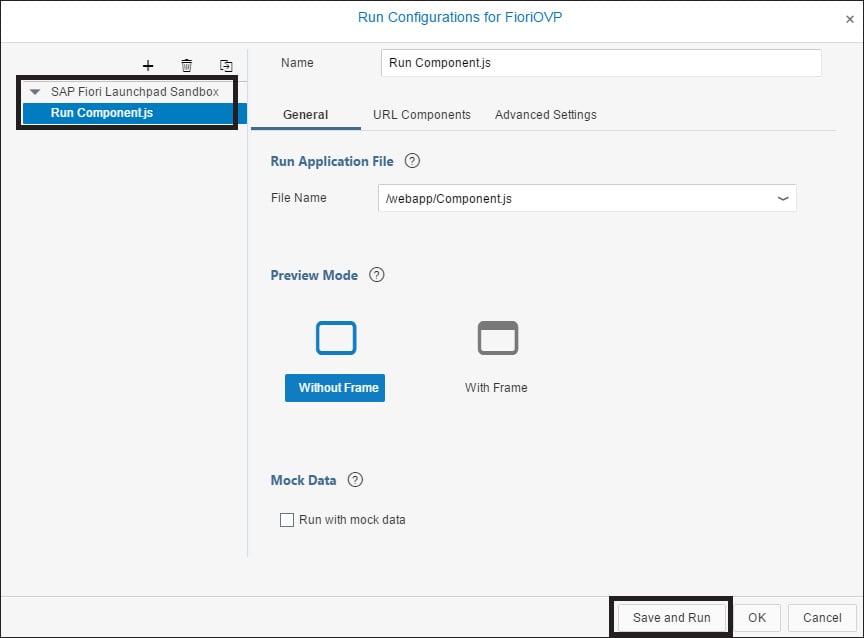
7. Right-click the project and select Run, then select Run Configurations.
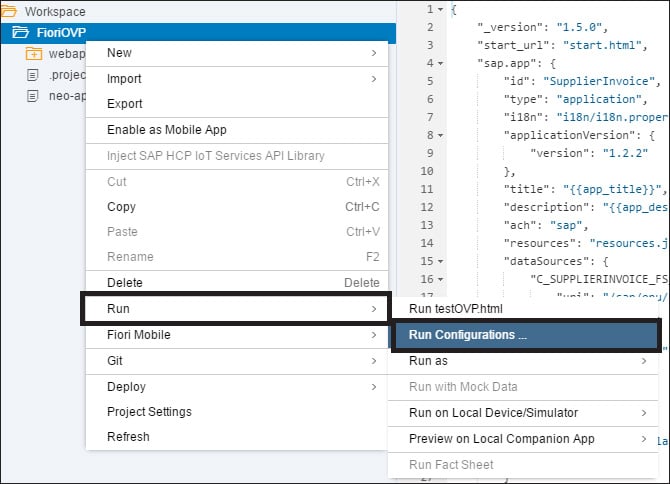
8. Select Run Component.js, then click Save and Run.
9. You should now see the list card that you created in this exercise.
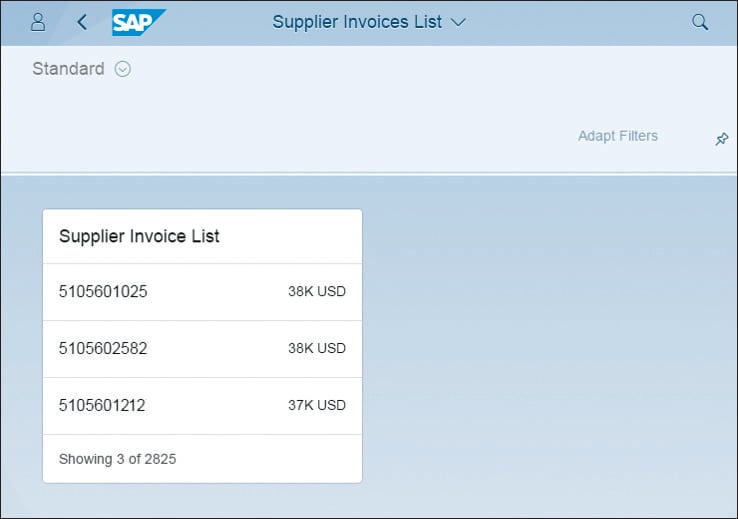
To add more cards to the overview page, you can follow the same steps and add different types of cards. Once your overview page is ready to deploy, right-click the project and select Deploy, then select the destination (e.g., SAPUI5 ABAP Repository or SAP Cloud Platform).
Conclusion
Now you know how to utilize SAP Fiori elements in your development processes. Ready to take the next step? Learn even more about SAP Fiori elements at https://sapui5.netweaver.ondemand.com. Choose the Developing Apps with SAP Fiori Elements option.


Comments