
SAP Cloud Connector is used to setup a secure connection between your computer and SAP Cloud Platform.
Once you've installed the cloud connector, here's how to initialize it, connect it to SAP Cloud Platform, and enable the access to your local SAP NetWeaver AS ABAP system from the cloud, as follows:
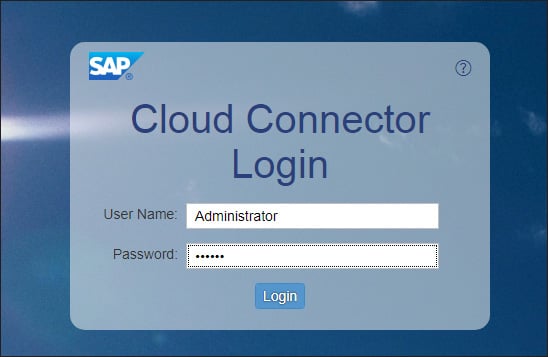
1. Access https://localhost:8443 or use the port you’ve defined. Use the predefined User Name “Administrator” and Password “manage” and then click Logon, as shown in the figure below.
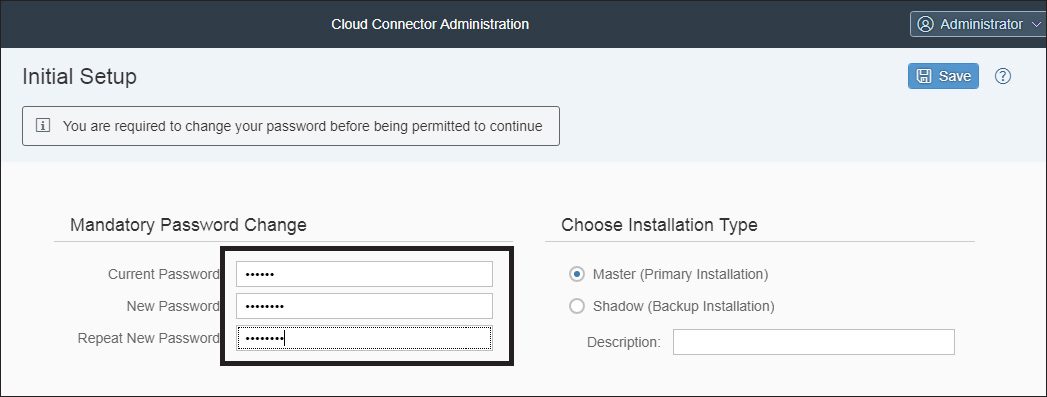
2. First you need to change the default password to a new one. You may also need to set a proxy to connect to the internet.
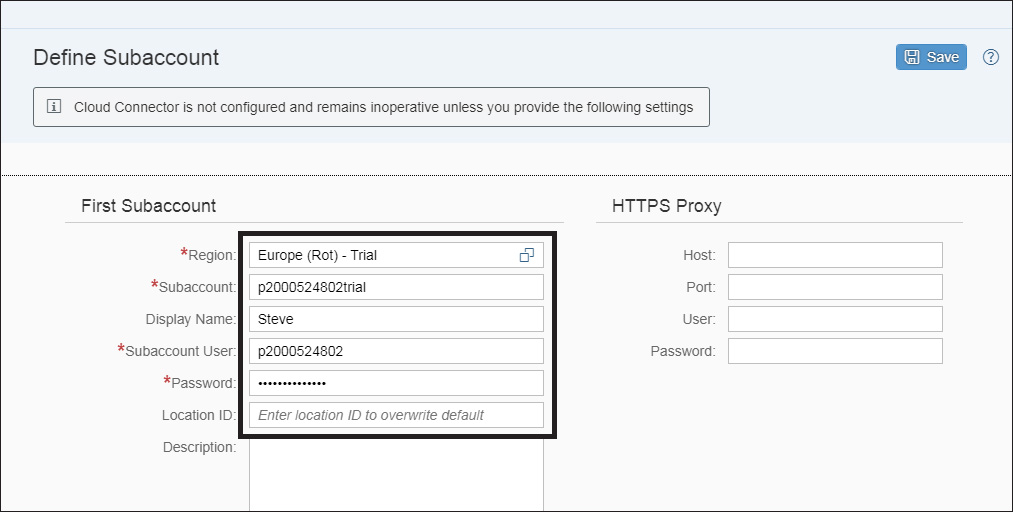
3. Now you’ll connect SAP Cloud Connector to your SAP Cloud Platform trial account. Here you need to select Europe (Rot)-Trial for Region. Fill in your account name, which looks like “p<xxxxx>trial”, in the Subaccount field. Also enter your Account User (pxxxxx) and Password. Then click Save to save this configuration.
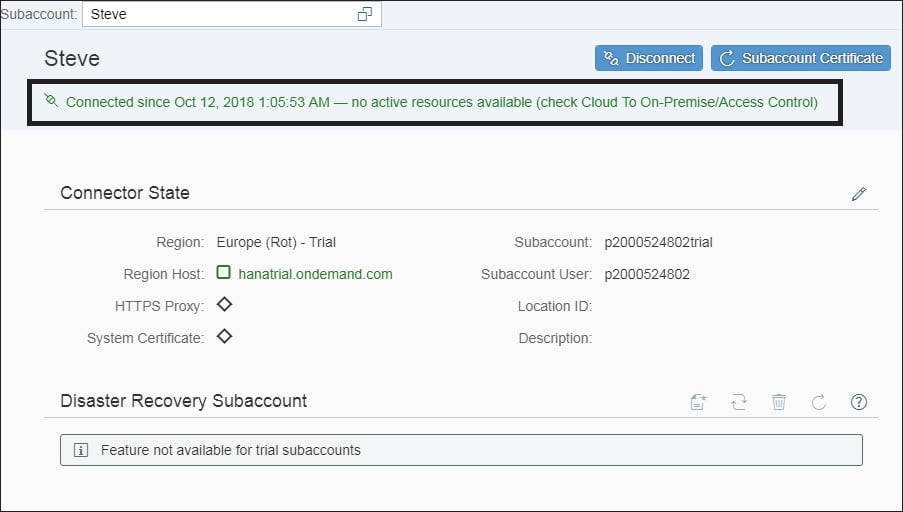
4. Below shows the status when you’ve connected to SAP Cloud Platform. You’ll see a green success message.
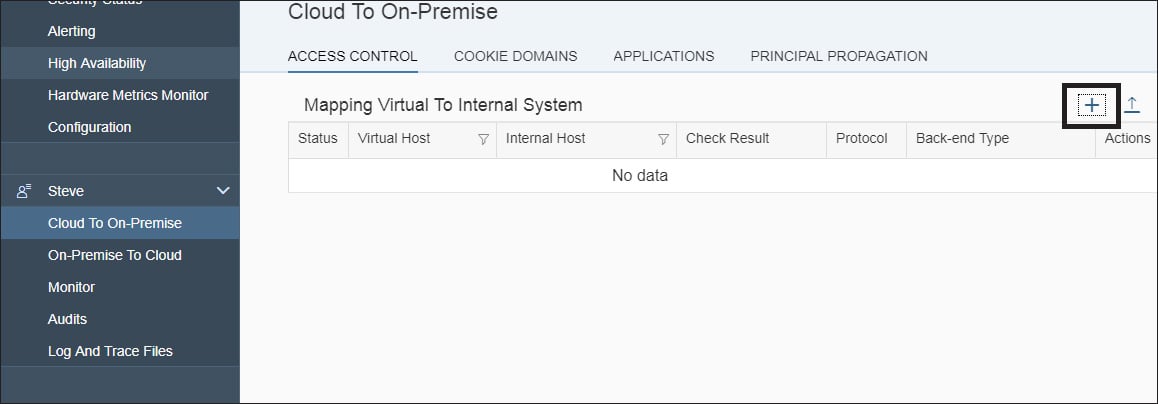
5. Click Cloud To On-Premise in the left menu, then click the Add button on the right side.
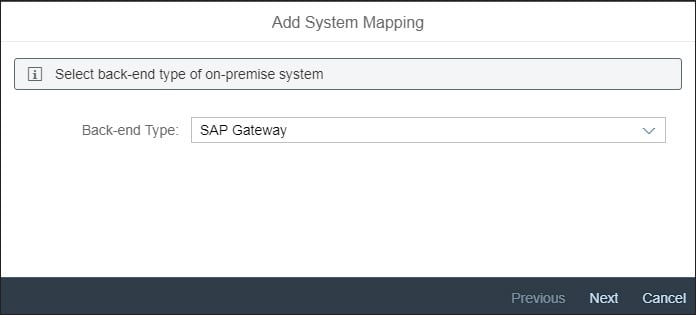
6. Choose SAP Gateway as the Backend Type, then click Next.
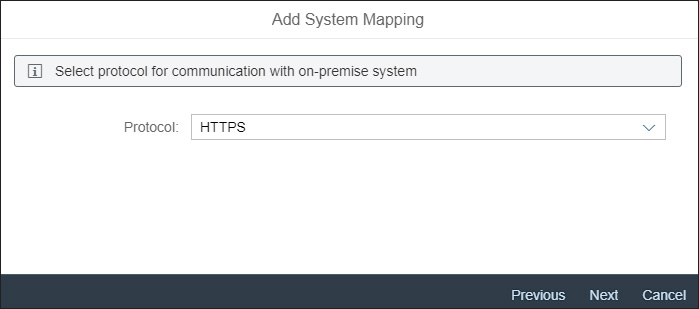
7. Choose HTTPS as the Protocol, then click Next.
8. For Internal Host, enter “vhcalnplci.dummy.nodomain”, and enter “44300” for Internal Port. Then click Next.

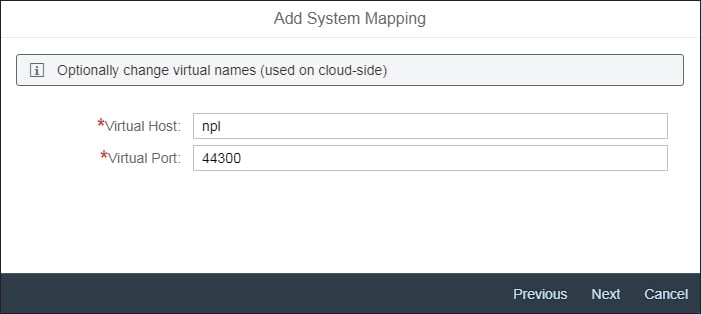
9. Change Virtual Host to “npl”, then click Next.
Note: The purpose of the virtual host is to hide your real address in the cloud. The virtual host and virtual port are only things you can see in the cloud.
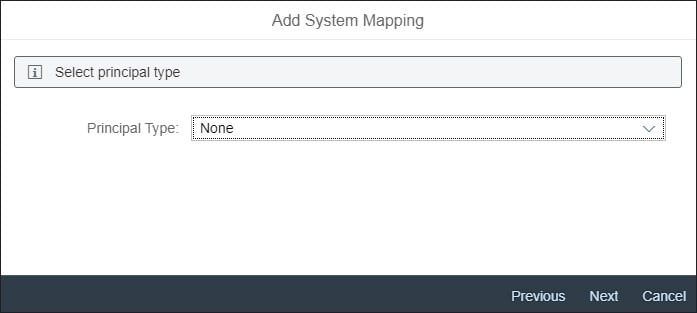
10. Select None for Principal Type, then click Next.
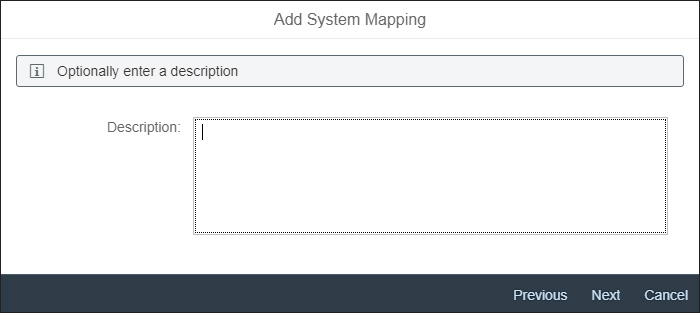
11. Optionally, add a Description. Click Next.
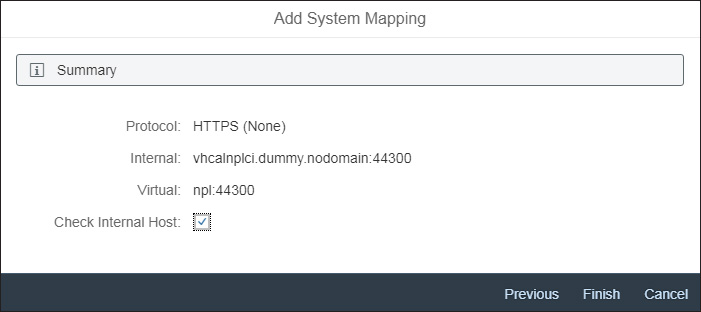
12. Check the checkbox for Check Internal Host, then click Finish, as shown below. This option will test if your SAP NetWeaver AS ABAP service is accessible from your computer.
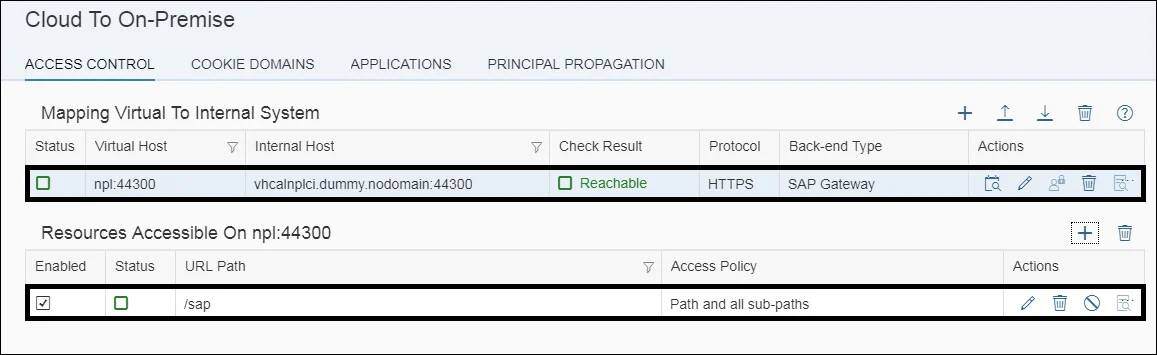
13. You should now see a row in the first table Reachable listed in green under the Check Result column. Click the Plus button in the lower table.
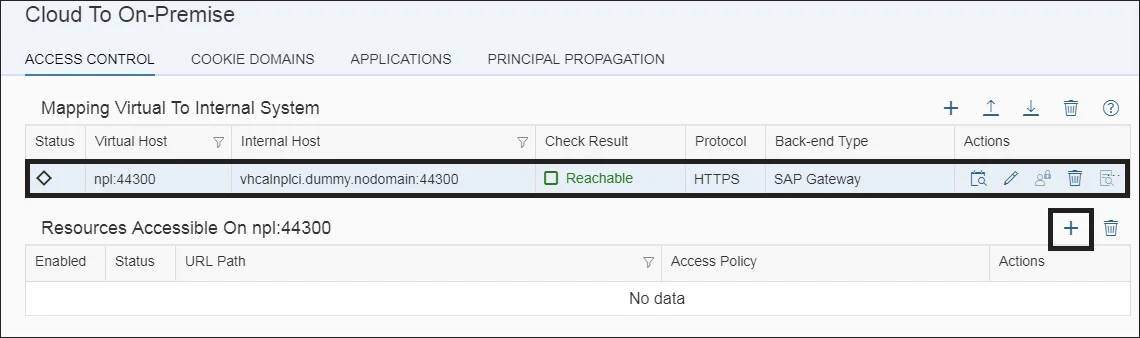
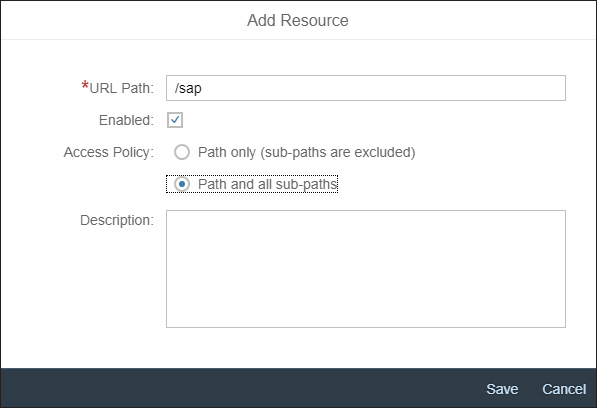
14. In the Add Resource pop-up, enter “/sap” for URL Path, then select the Path and allsub-paths radio button for Access Policy. Then click Save.
15. Below shows the final status of SAP Cloud Connector.
By following these 15 steps, you’ll be able to set up SAP Cloud Connector, connect it to SAP Cloud Platform, and enable the access to your local SAP NetWeaver AS ABAP system. Pretty easy, right?
Editor’s note: This post has been adapted from a section of the book SAP Fiori Launchpad: Development and Extensibility by Steve Guo. Steve is an SAP mentor, developer, and trainer who has been working with SAP for more than 8 years. Since 2014 he has been working with SAP's new technologies, including SAP HANA and SAP Fiori, and has helped numerous developers and SAP customers adopt and use SAP software. Steve is the author of three SAP training courses for SAP Fiori and other SAP user interface technologies. He has been recognized as a Gold trainer for his training work by SAP Greater China.
This post was originally published 12/2019.


Comments