
Let’s take a look at how to create a time profile in SAP Integrated Business Planning (SAP IBP).
The time profile configuration screen can be accessed from the SAP Fiori UI. Click on the Time Profiles tile (1) in the Model Configuration group, as shown in the figure below.
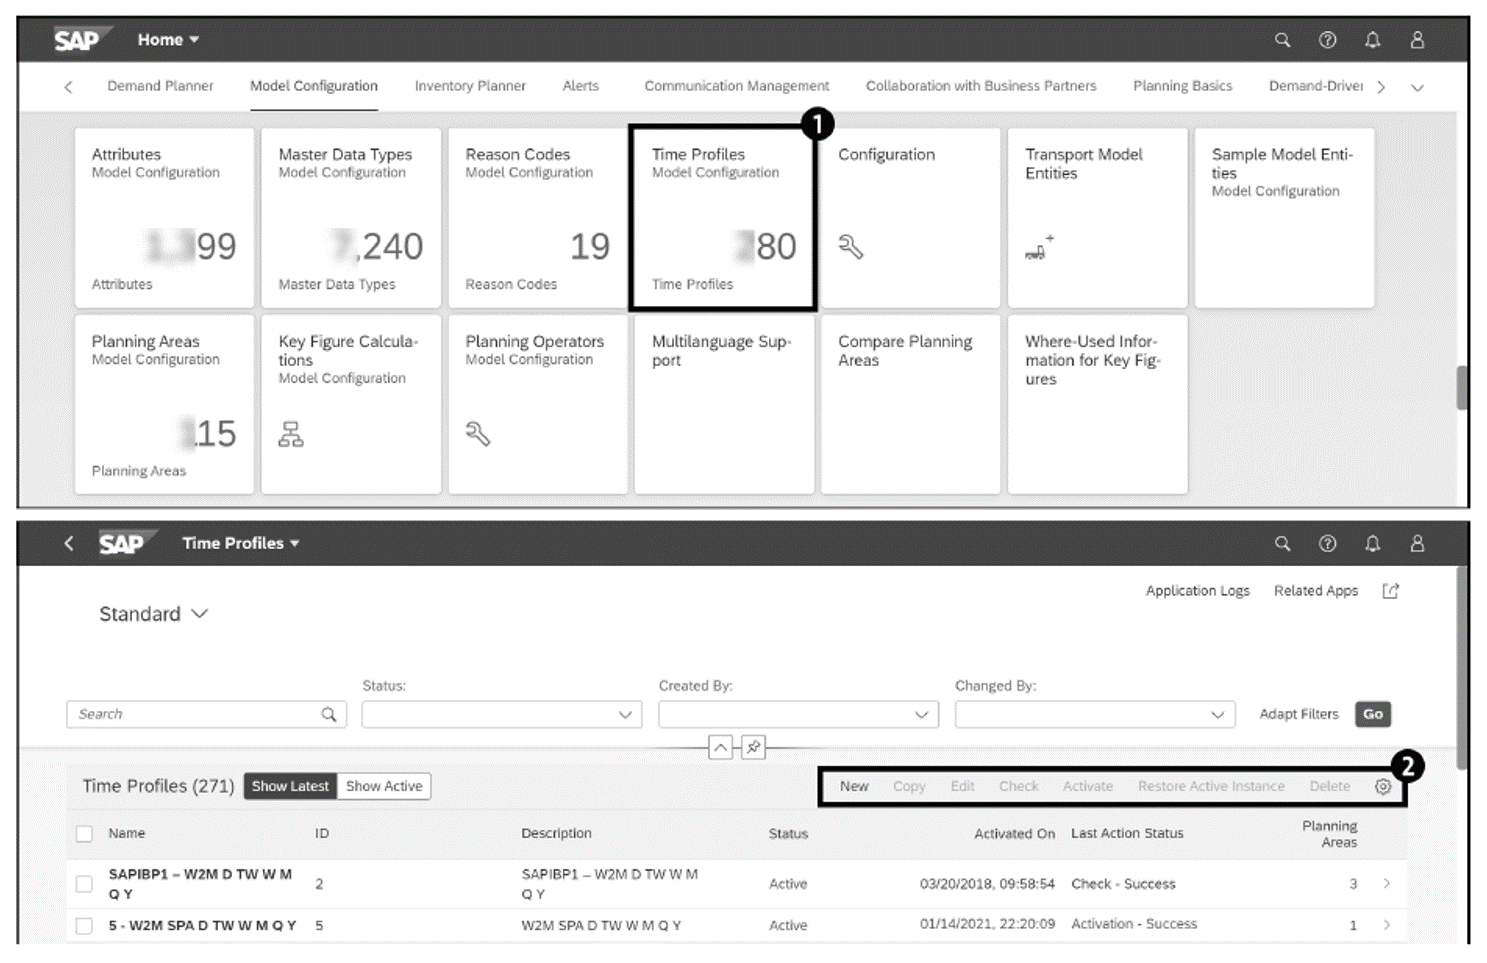
Click the New button (2) to create a new time profile. When you click the New button, a popup window will be displayed where you can select what time profile levels are required in the time profile, as shown in this figure.
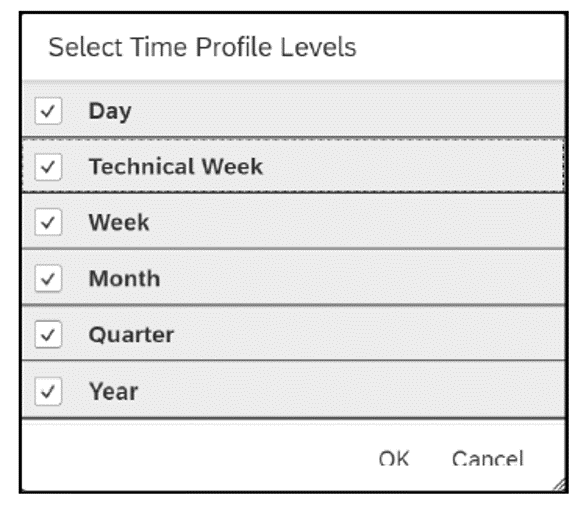
Select the time profile levels required. A new screen will be displayed where you’ll maintain the ID, Name, and Description fields of the time profile. A numeric value from 1 to 999999 can be used as the ID for a time profile; we recommend assigning a 3- or 4-digit numeric value. For the Description field, we recommend using the same 3-letter prefix used in the master data type, along with the associated periods. The following figure shows a time profile created with an ID of “400” and a Description of “ABC TP TW W M Q Y.” The Start Date and End Date fields of the time profile controls the planning data’s relevance in the past and the future. This time profile was created for a more extended period than the planned time horizon for planning so that the associated time profile and planning area can be used for an extended period of time after the initial solution configuration.
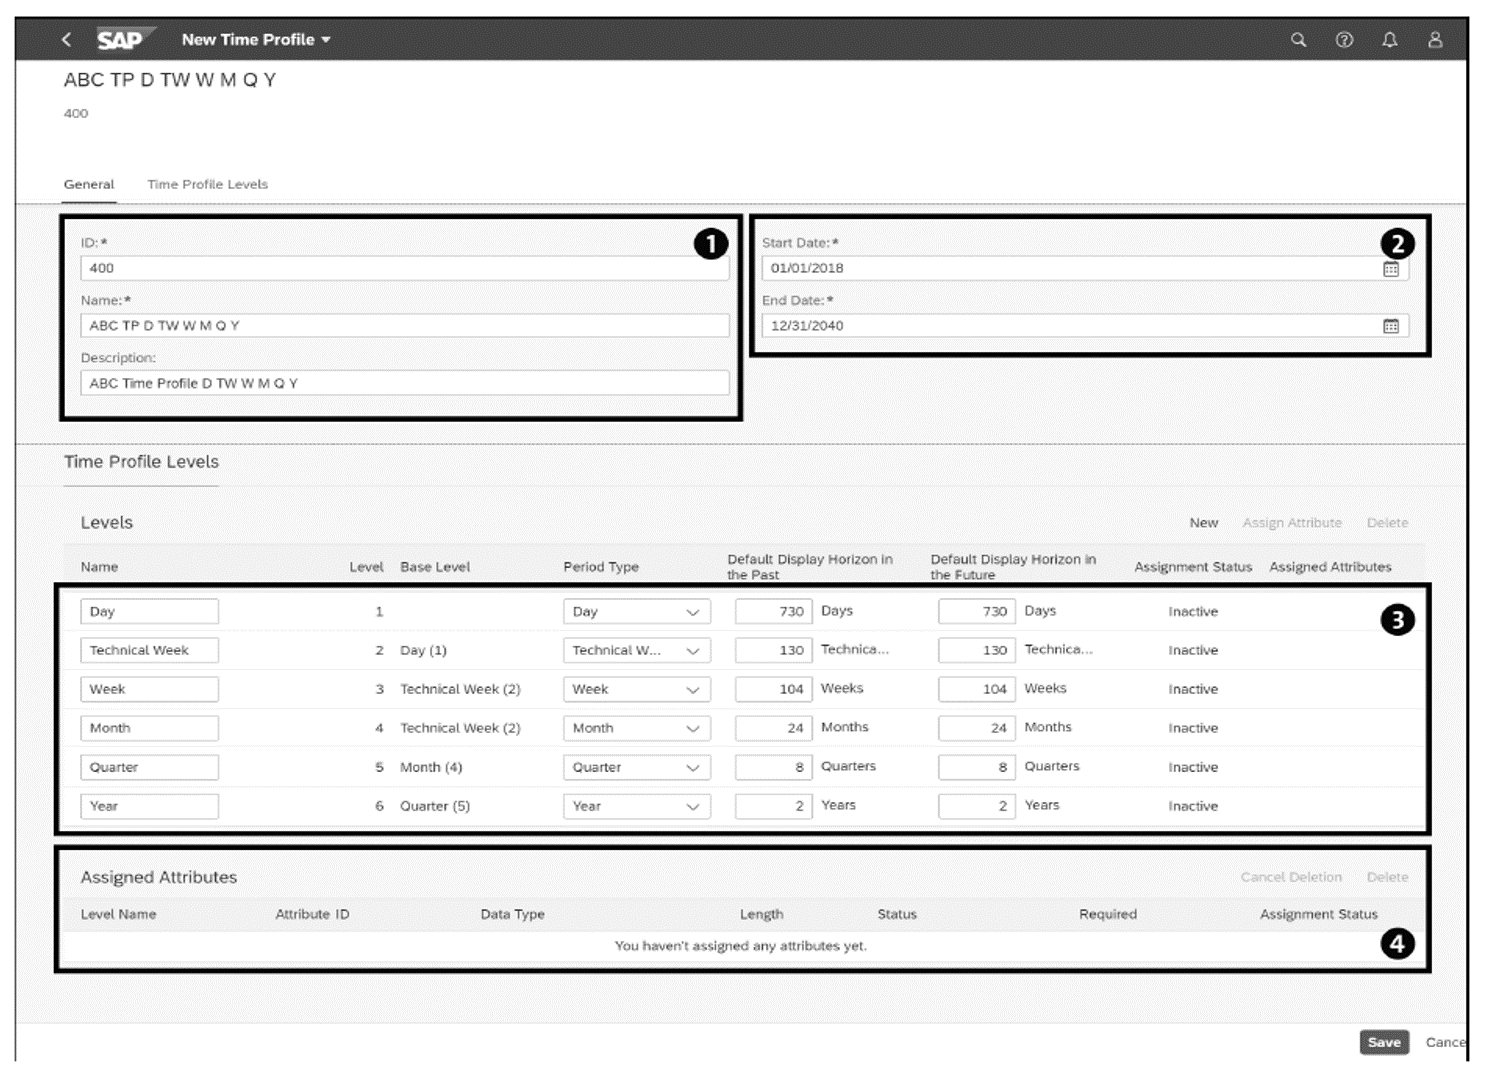
Time profile levels are automatically populated, but you can add levels to a time profile manually using the New button, as shown in the first figure earlier on. You can select a period type from the Period Type dropdown list in the Levels section, but you’ll need to start at the most granular level. As shown above, the Day is the most granular level in the time profile and thus appears in the first row. A technical week is more granular than a week and is useful for aggregating data to a monthly level and a weekly level. When the month changes, a calendar week can be split into two technical weeks: TWa (part of the week in the previous month) and TWb (part of the week in next month). The system will automatically create base level values.
As shown in the previous figure, you’ll maintain the main areas of the time profile by following these steps:
- Maintain the ID, Name, and Description fields of the master data type (1).
- Maintain the Start Date and End Date fields for the time profile (2).
- Time profile levels will be automatically populated based on your selections. You can change the level’s Name or Description fields or change the planning horizon to the past or the future (3). (The future is the default horizon in planning views.)
- Add any attributes to the time profile as required (4).
- Click the Save button to save the time profile.
The different types of planning periods supported by SAP IBP are day, technical week, week, month, quarter, and year. In some businesses, fiscal periods are required, in which case, you would define and generate time periods manually. The Default Display fields control the time horizon shown in the default planning view; for example, a value of 0 to 104 for the weekly bucket will display data from the current week to the next 104 weeks (about 2 years). If a value is populated for the past, say −6 for the week, then the default planning view will show data for the past 6 weeks. Note that you can change the periods via the planning view through the screen shown above. After maintaining the time profile, save and activate the time profile.
To use the time profile in a planning view, you must create the time periods for the time profile. Time periods for a particular time profile can be set up by uploading the time period data through the manual upload screen or setting up an application job to create the time period in the SAP IBP system automatically. To load time periods manually, the template for the time profile data load is generated from the Data Integration tile, found in the Administrator section on the SAP Fiori launchpad for SAP IBP. To automatically create time periods, click the Application Job Template tile in the Administrator section. Use the Create Time Periods for Time Profiles template with the same name you assigned for the time period and then select the time profile level of the time period. Scheduling this job creates time periods for the time profile, readying them for use in the planning view. For fiscal time periods, you must load time periods manually through the Data Integration tile.
Editor’s note: This post has been adapted from a section of the book SAP Integrated Business Planning: Functionality and Implementation by Sandy Markin, Amit Sinha, Sanchit Chandna, and Jay Foster.


Comments