
In this blog post, we’ll cover how to create new custom business objects in SAP S/4HANA.
The main parts of the overall process to create a new business object are shown in the following figure.
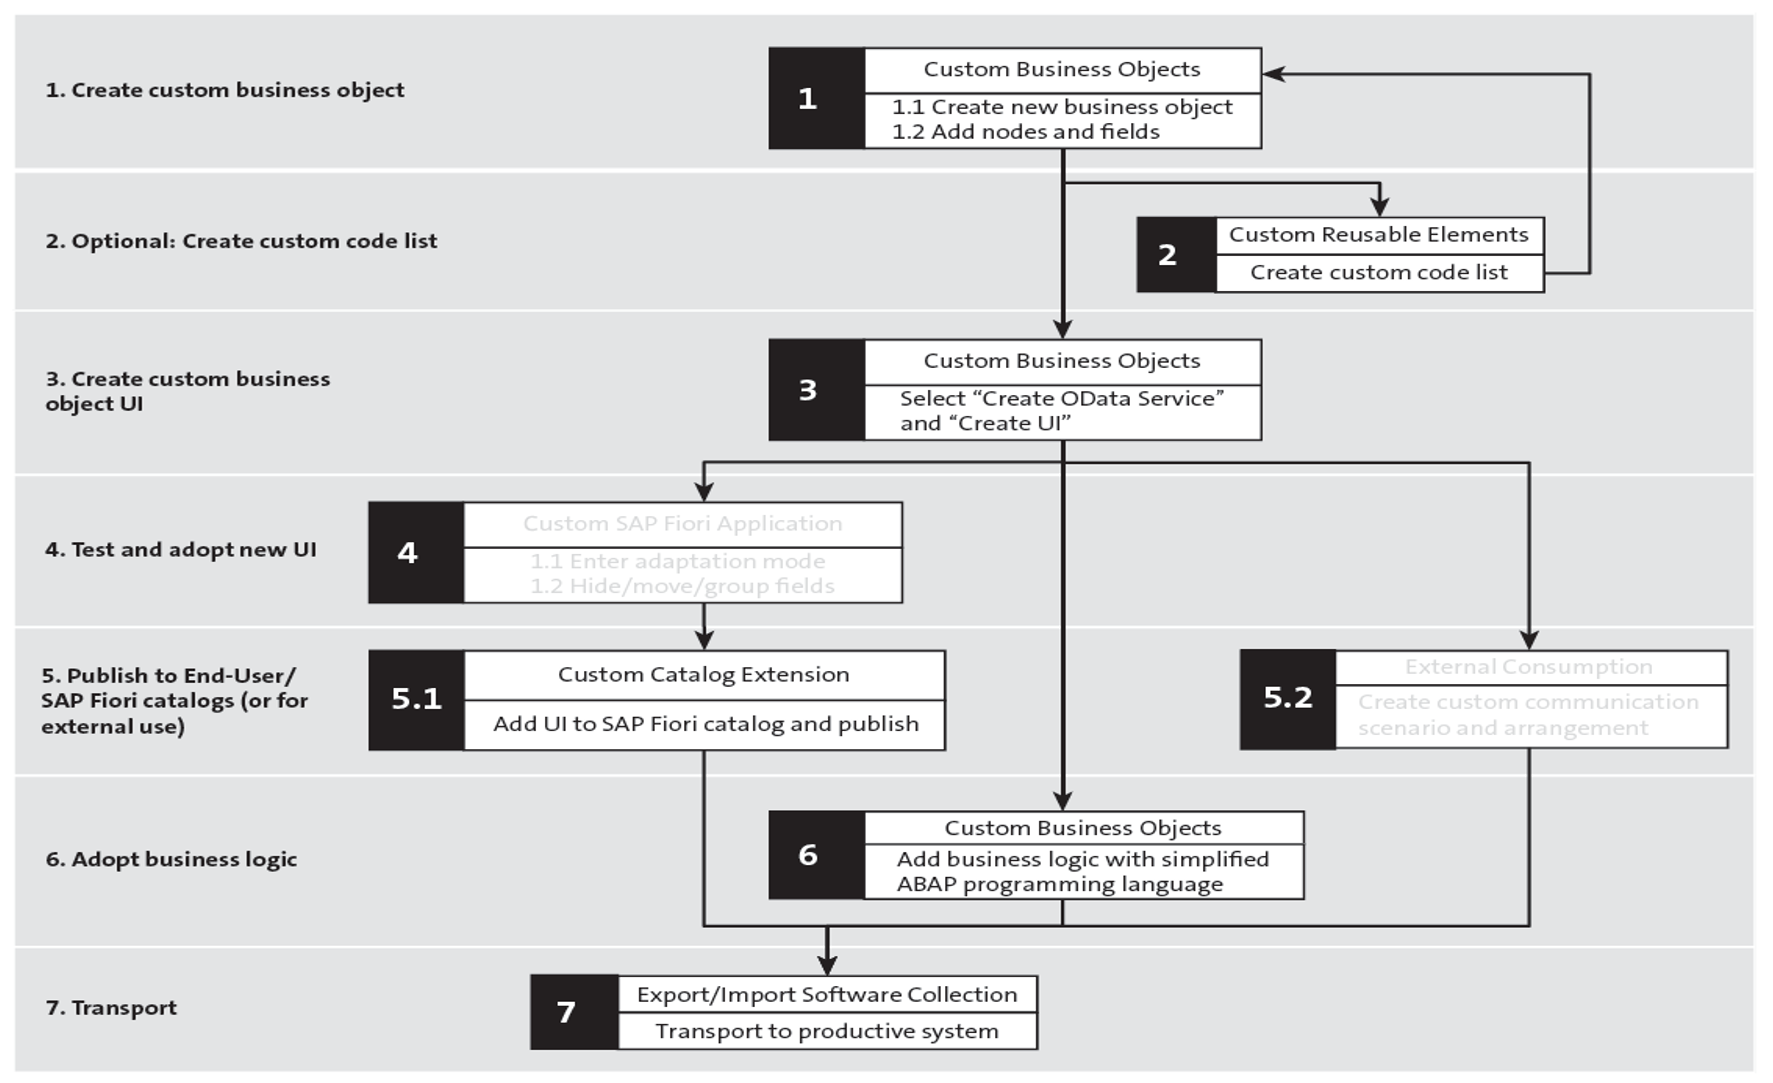
The following paragraphs will focus on the creation of a new custom business object from scratch. The option to start the process from an existing SAP Fiori app is not described; it’s mainly the same, except for the starting point.
As the figure above indicates, large parts of the process to create a new business object take place in the Custom Business Objects app (F1712), which comes as part of the content for the administrator role (SAP_BR_ADMINISTRATOR). The business catalog the app is assigned to is SAP_CORE_BC_EXT.
This app is not strictly structured according to the process, so the sequence in which the functions are described will not exactly match the sequence of the process steps shown.
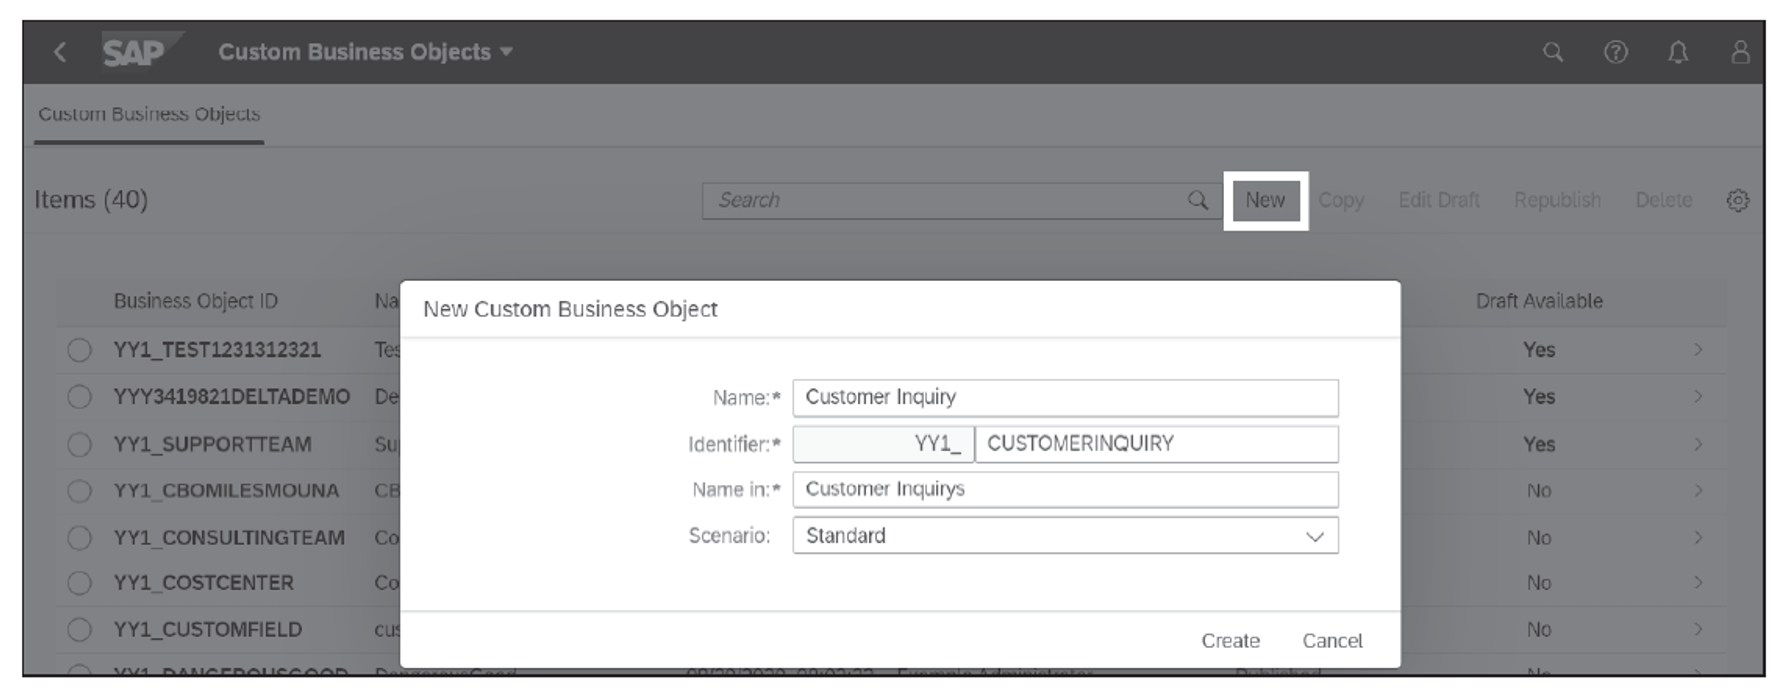
Step 1.1: Create New Business Object
The Custom Business Objects app initially lists all the already created custom business objects. From here, the creation of a new custom business object can be started using the New function in the function bar above the list (see below).

At first, only the Name, Technical Identifier, and Name in Plural must be entered. The latter two will be suggested based on the name.
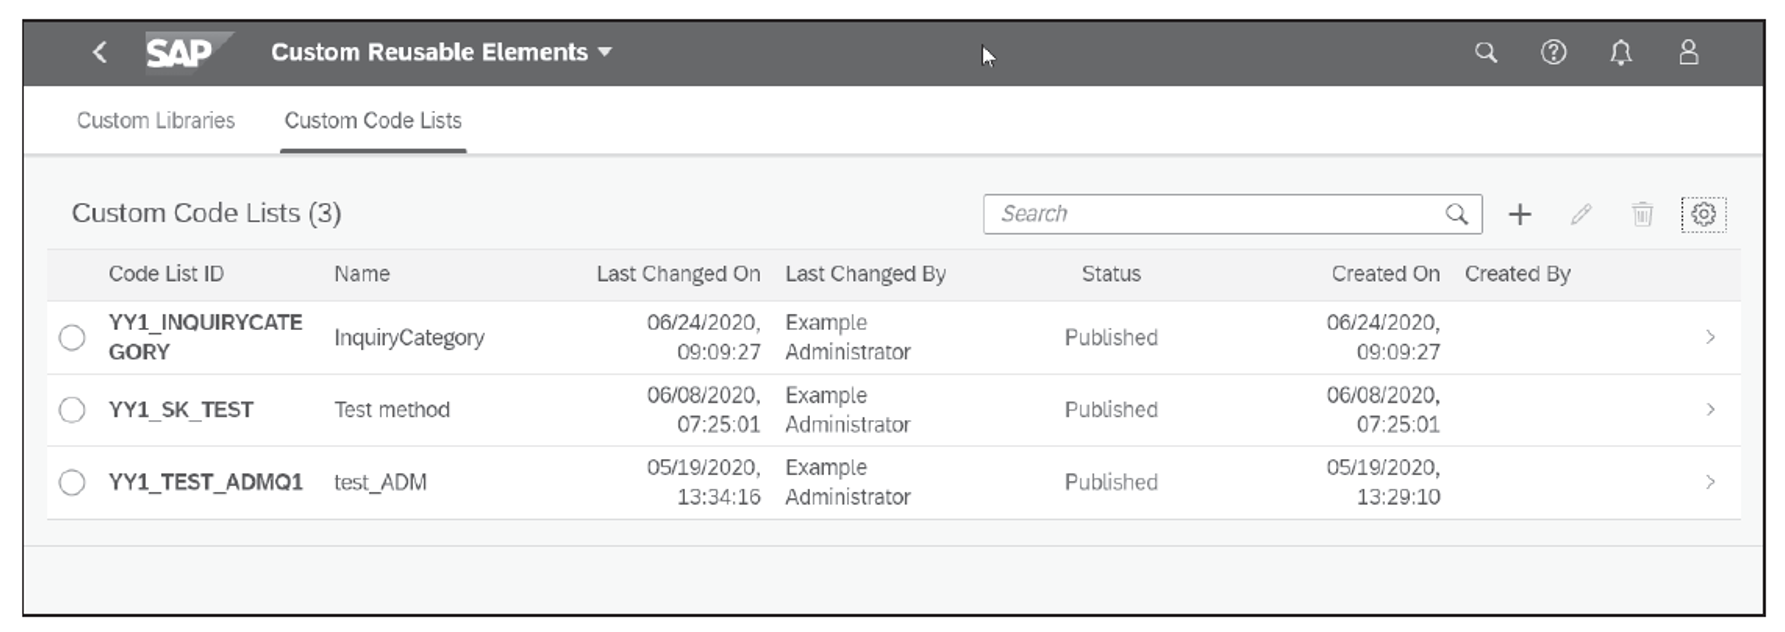
(Optional) Step 2: Create Custom Code List
In case the new custom business object requires fields that contain code lists, it’s a best practice to create those code lists first before creating the fields of the new business object. Those new code lists can be created in the Custom Reusable Elements app (F3248), as shown below. Select the respective add function using the + icon from the function bar to begin the creation of a new custom code list.
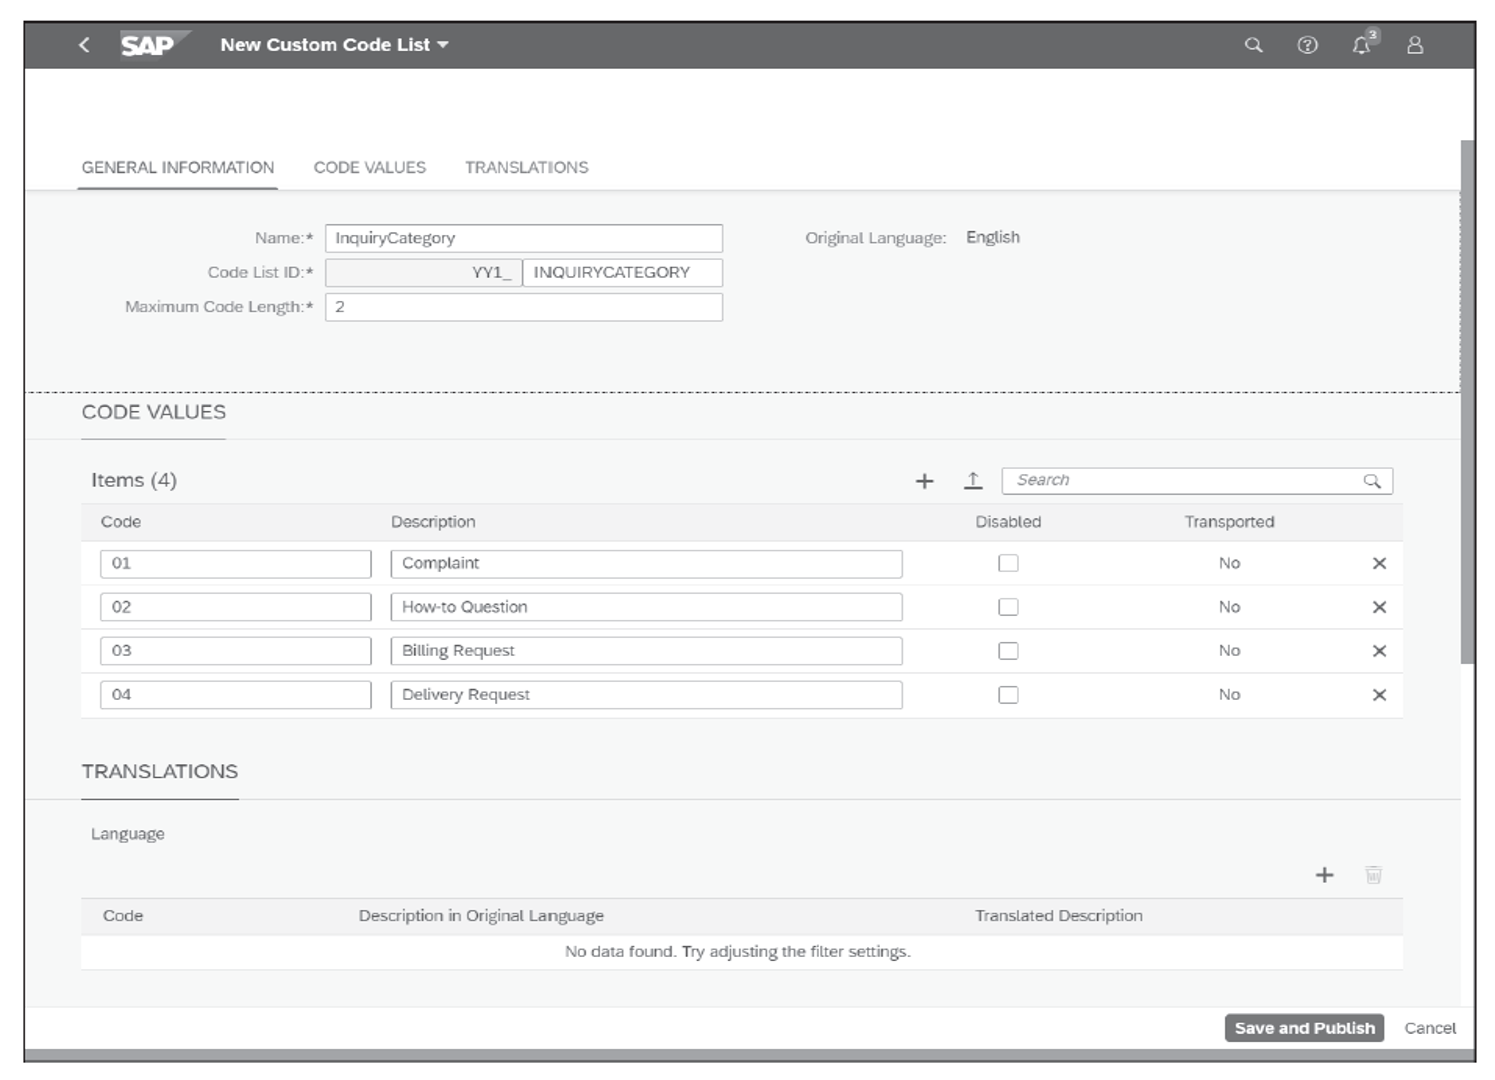
Using the + (New) function, you can enter the Name, ID, code values, and (optionally) translations (see next figure).
Step 3: Create OData Service and Create UI
Next, the app lets you enter a couple of general settings, as shown in the next figure.
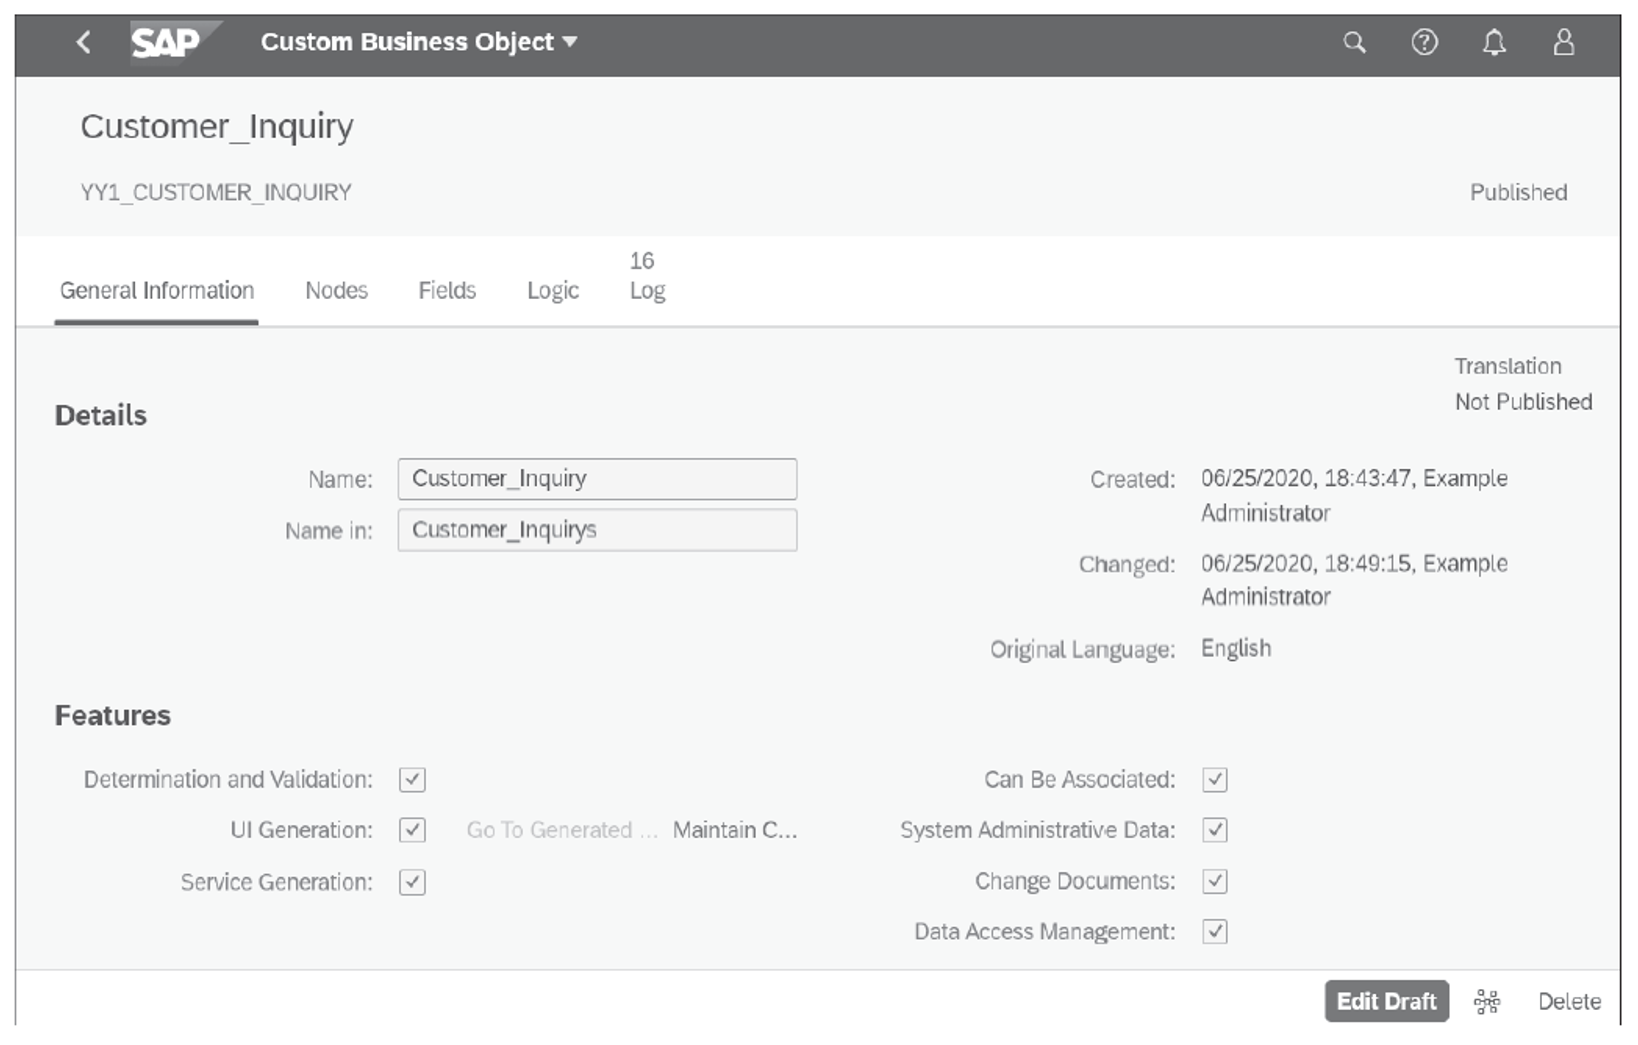
Some of them, like viewing the generated UI and Maintain Catalogs, become relevant after the nodes, fields, and potentially additional logic for the new business object are defined. The settings in the Features section are mostly optional, as follows:
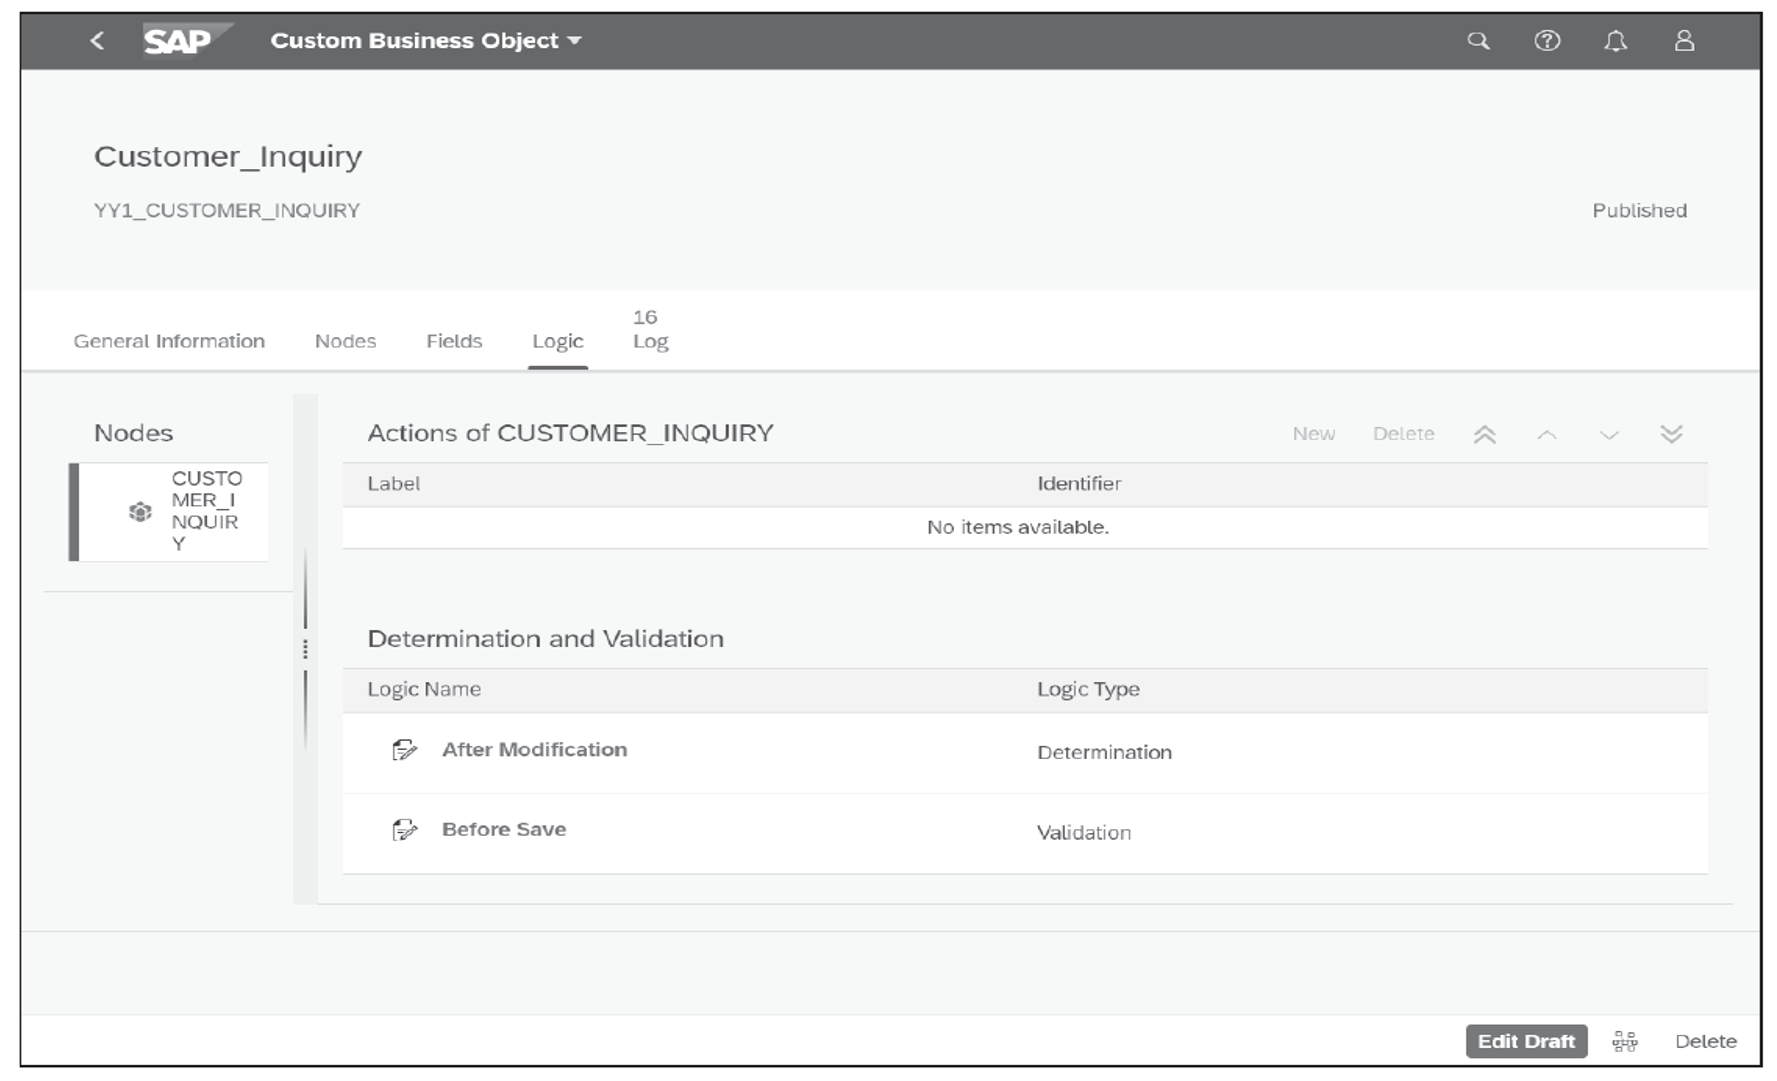
- Determination and Validation: Lets you add custom logic to a business object after its activation. The logic added will follow one of the following patterns:
- After Modification: Used to calculate/modify data after node instances have been created or edited.
- Before Save: Used to validate the data consistency within a node. This includes displaying an error message if the data in a field is incorrect.
- UI Generation: An OData service and an SAP Fiori app for CRUD operations will automatically be created for the new business object.
- Service Generation: Will create and activate an OData service for the business object. The function is automatically switched on if UI Generation was checked.
- Can Be Associated: Lets you use the new business object in associations with other business objects. As a prerequisite, one field in the root node of the business object must be defined as the key field for the association.
- System Administrative Data: Checking this option generates additional fields: Created on, Created By, Last Changed On, and Last Changed By. These fields are automatically filled for the new business object once it’s used in an app.
- Change Documents: This option allows you to track changes to the instances of the business object you just created—a very important feature if those changes are, for example, relevant for audits.
- Data Access Management: Checking this box will add the Lifecycle Status field to the new business object. Thus, every record will get one of the two possible values for this field:
- A for Active: Business users who have access to the business object can see those records.
- C for Purpose Completed: These records are no longer visible for business users, but only for auditors.
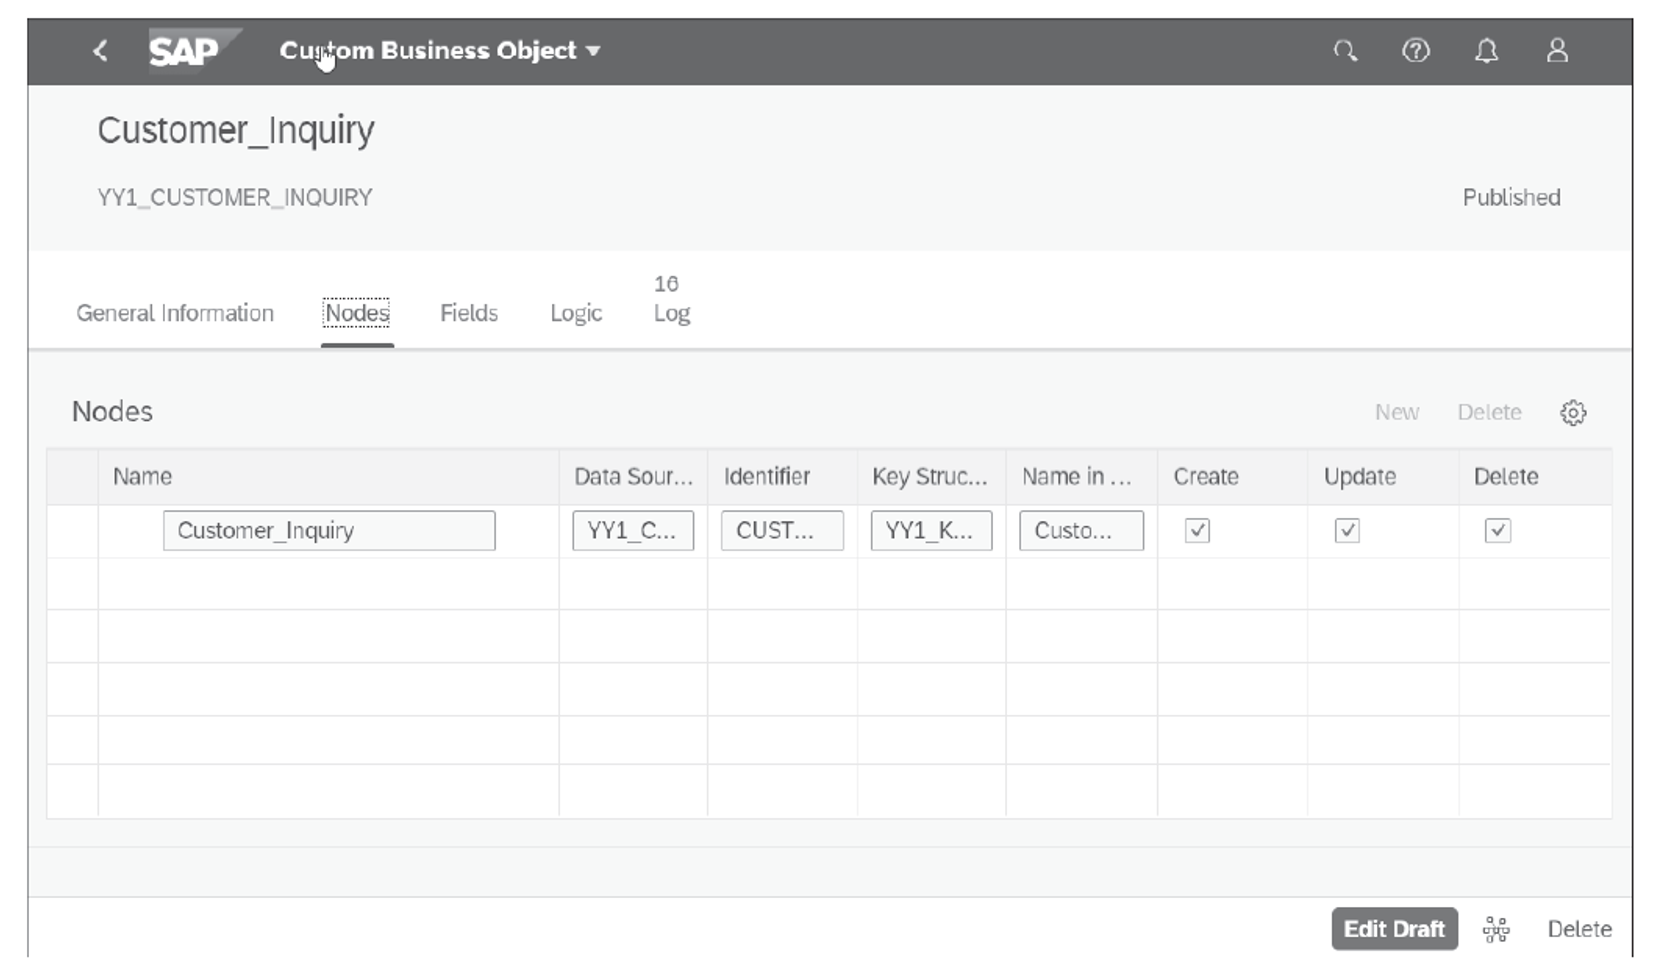
Step 1.2: Add Nodes and Fields
Next, the nodes and fields of the new business object will be maintained by selecting the respective functions. In this example, the business object has only one node (see below). Nodes can be created or deleted using the New or Delete function from the function bar above the list of nodes.
In the Fields section, the required data fields for the business object are maintained, as shown here.
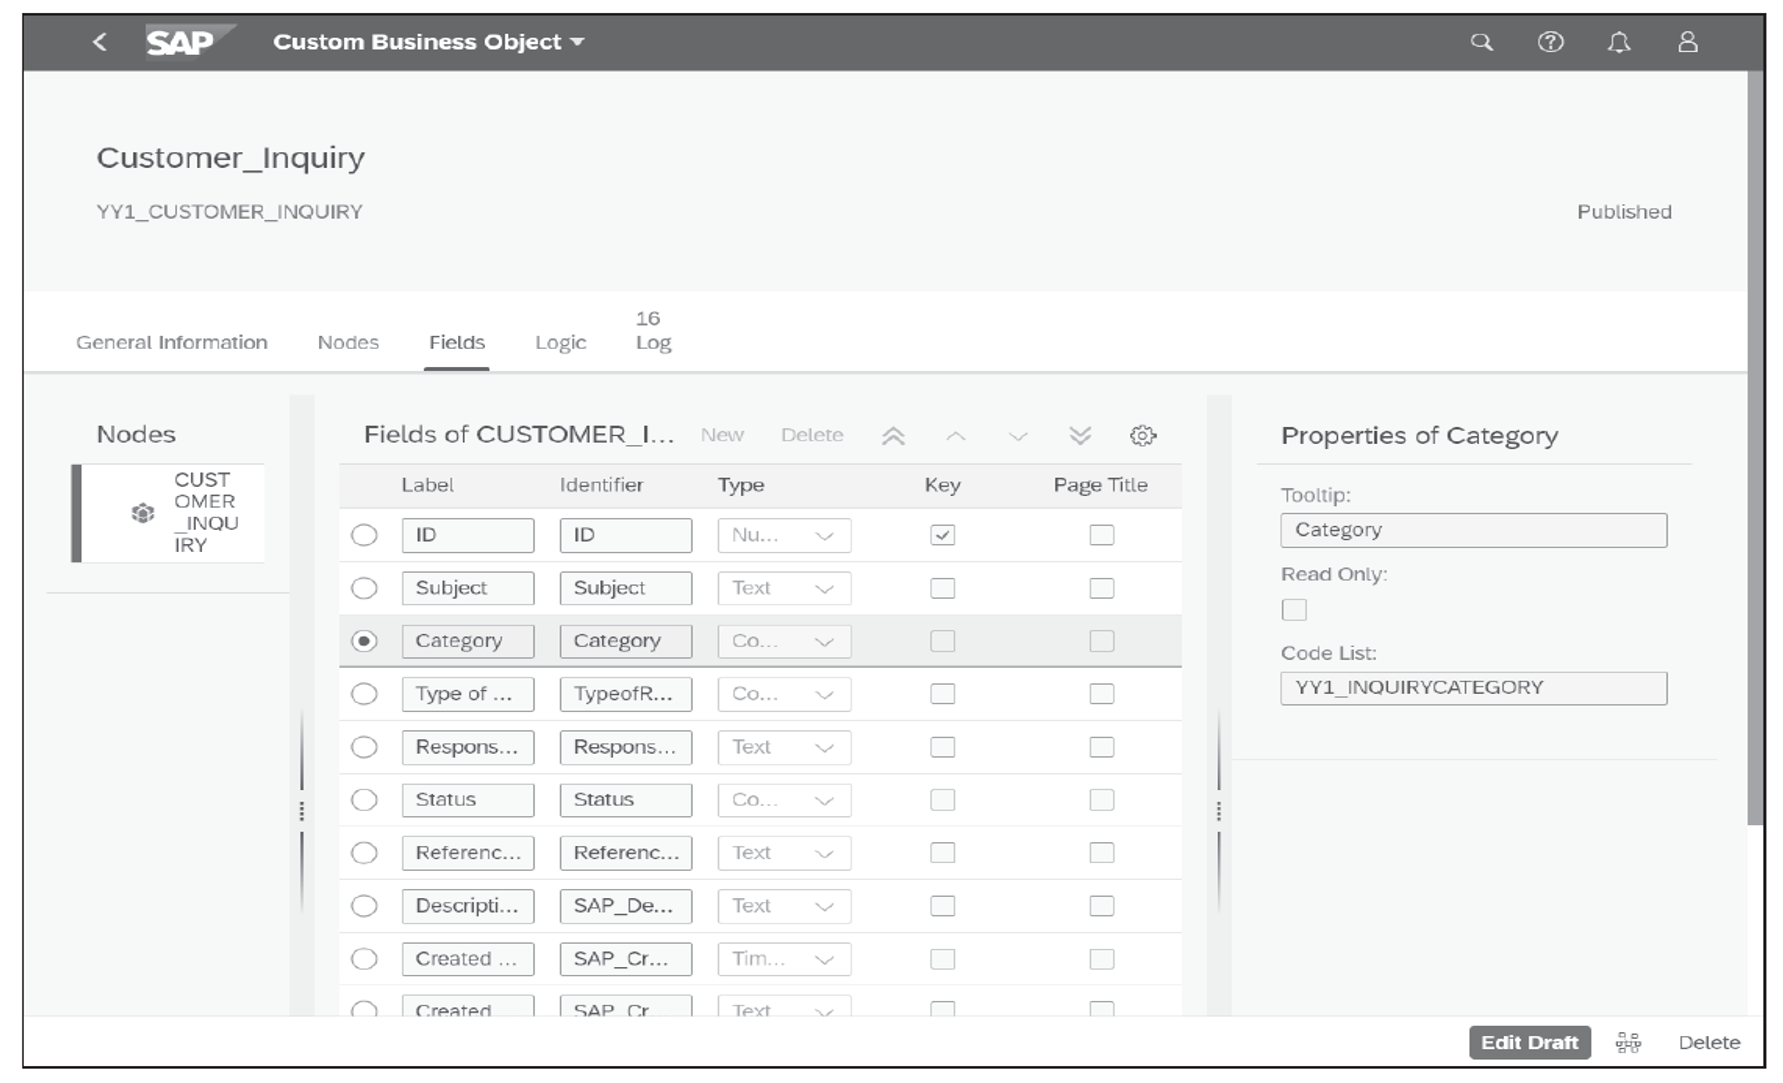
The definition is straightforward: a field requires a label, an identifier, and a type. Additional properties of a field, like length or a tooltip, can be maintained in the area on the right of the screen for the selected field. The field types currently available are as follows:
- Amount with Currency
- Association to Business Object
- Checkbox
- Code List
- Date
- Email Address
- Number
- Numeric Identifier
- Phone Number
- Quantity with Unit
- Text
- Time
- Timestamp
- Web Address
If the System Administrative Data option is checked on the General Information tab, those additional fields are displayed in the list as well.
Step 6: Add Business Logic
If the Determination and Validation option is checked on the General Information tab for the new business object, the Logic section will become available and can be used to implement specific logic for the After Modification and Before Save events.
Note: Sample code for these events and further details about custom business objects can be found at the SAP Help Portal (https://help.sap.com); there you can search for “How to Create Custom Business Objects”.
Step 5.1: Add UI to SAP Fiori Catalog and Publish
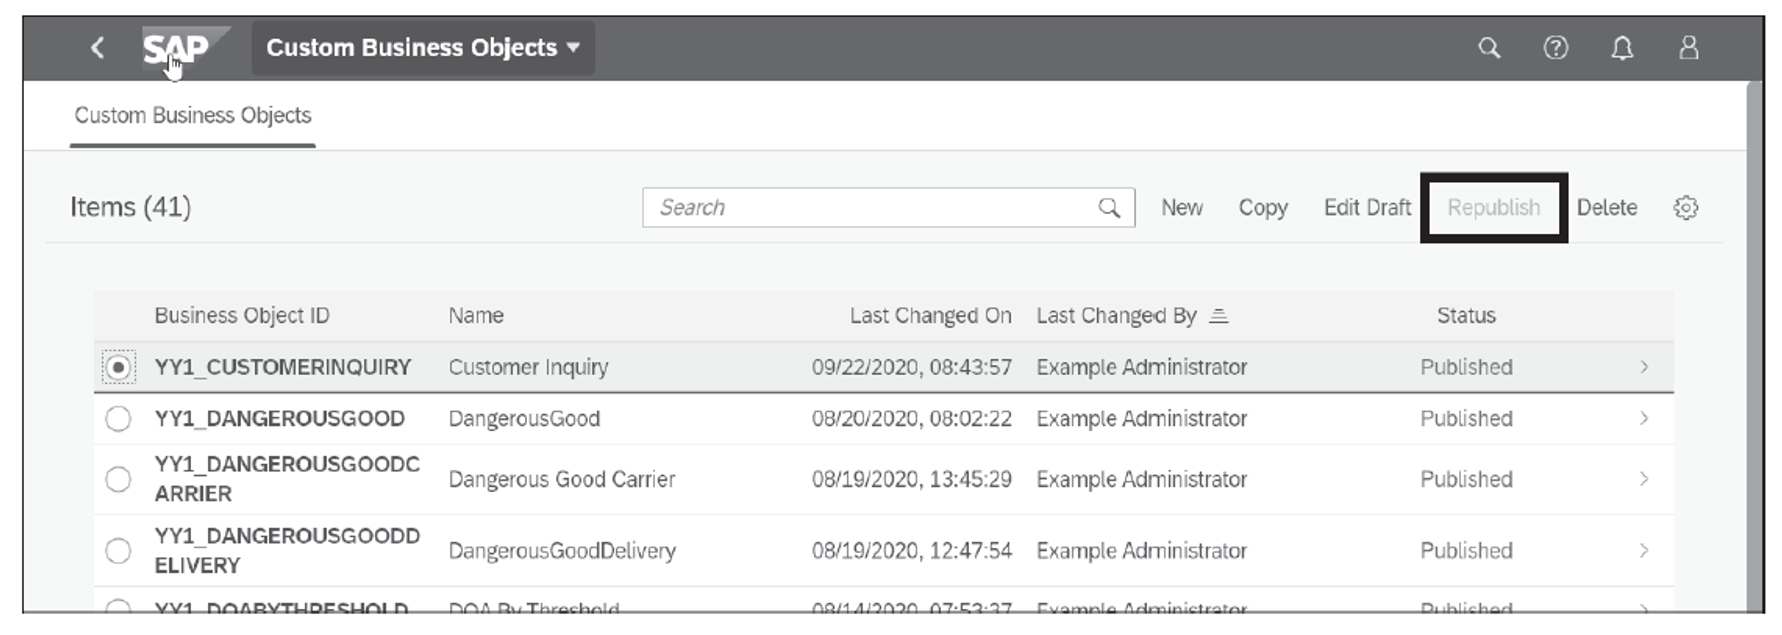
Publishing the new business object happens during the process of creating it by using the Publish function in the function section in the lower-right portion of the screen. Republishing can be started from the initial screen, as shown in the final figure.
The new business object now can be used by business users for recording data. In contrast to creating an entirely new business object, the next section will describe the creation of additional single fields for existing business objects and the creation of additional, related logic.
Editor’s note: This post has been adapted from a section of the book SAP S/4HANA Embedded Analytics: The Comprehensive Guide by Jürgen Butsmann, Thomas Fleckenstein, and Anirban Kundu.

.png?height=600&name=Embedded%20Analytics%20Content%20Delivered%20with%20SAP%20S4HANA%20(1).png)

Comments