
SAP Discovery Center is an indispensable source for an initial orientation about SAP Build Apps.
In addition to detailed service information and pricing information, it also provides insight into the geographical distribution of the various data centers used for service provisioning. In addition, you will find the cornerstone features of the roadmap there.
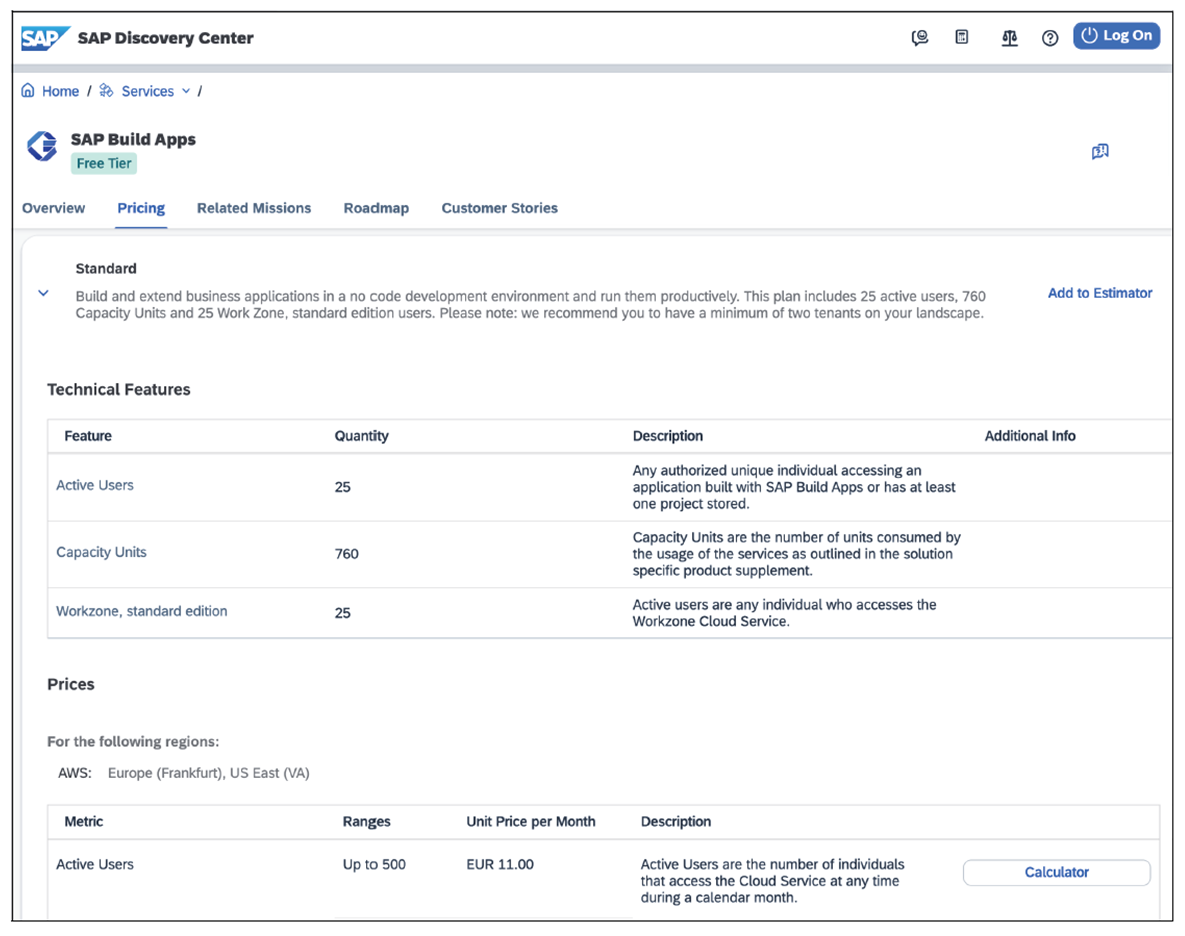
SAP offers two plans for SAP Build Apps: a standard plan and a free plan. The standard plan is ready for productive use, encompassing the full range of SAP Build Apps capabilities, with the added assurance of enterprise-level support. The free plan comes with the following restrictions:
- Number of builds: There is a limit of wo successful builds per app per platform.
- Cloud runtime: Only development runtime is available; there is no production use.
- Support: Only community support is available for free service plans, and these aren't subject to a service-level agreement (SLA).
In SAP BTP, boosters at the global account level facilitate the installation and configuration of services in a subaccount. These boosters act as automated assistants that perform standardized setups and configurations. They minimize manual effort and reduce sources of error during setup by automatically performing the steps required to activate a service. By using these boosters, developers and system administrators can save time and focus on more specific customizations and optimizations after the basic service setup is complete.
Within the SAP BTP cockpit for the global account, the boosters are accessible via the side menu. Select the Booster option to find the available automation tools. As shown in Figure the next figure, you can use the search function to filter specifically for “SAP Build”. This will result in the display of tiles for two specific boosters for SAP Build Apps: one for Detailed Account Setup, which provides a comprehensive configuration of the account, and another for Quick Account Setup, which provides a quick and simplified setup. These boosters differ in their scope and level of detail, both aiming at efficient setup and configuration of SAP Build Apps in your subaccount. We will refer to the booster for the detailed account setup in this chapter, so click the corresponding tile to open the booster.

In the Overview tab, you will find an architecture overview, as shown in the next figure. This contains all the components installed by the booster, including the optional components. The integration into other cloud and on-premise systems is also shown.

In the Components tab, you will find an overview of all services and subscriptions that are installed by the booster. The mandatory label shows you whether this component is mandatory. Using the example of the booster for SAP Build Apps (see next figure), you can see that only SAP Build Apps and SAP Cloud Identity Services are mandatory. The remaining components, such as SAP Mobile Services; SAP BTP, Cloud Foundry runtime; and SAP Build Work Zone, standard edition, are optional. Note that the services incur costs as soon as they have been subscribed to in a subaccount. Click the Start button to start the booster.

In the first step of the booster, the prerequisites are checked as shown in the next figure. This means that the booster checks whether you have the appropriate authorizations to run the booster, whether a custom identity provider is available, and whether the required entitlements are present. If all prerequisites have been checked successfully, you can jump to the next step of the configuration by clicking the Next button.

In the Select Scenario step, as shown below, you can choose whether an existing subaccount should be used or whether the booster should create a new subaccount for this use case. After selecting the appropriate action, click the Next button to continue.

In the Configure Subaccount step, you have the option of customizing the entitlements (see next figure). At this point, all components (services and subscriptions), both those that are mandatory and those that are optional, are selected. The optional components can be deleted by clicking the trash can button.

You can then change the Subaccount Name. By default, this is composed of the global account name in combination with a generated name. We recommend using a human-readable name at this point. We also advise against using spaces in the name. You then have the option of selecting the Provider (AWS, Azure, or Google) and an associated data center—that is, a Region. Note that SAP Build Apps is not available in all data centers of all providers. Click Next as usual to jump to the next step of the configuration.
In the Add Users step, you must select an Application Identity Provider and a Platform Identity Provider, as shown in the next figure. The application identity provider is used to authenticate the developers who want to use SAP Build Apps. It is also responsible for authenticating end users if you deploy the created apps to this subaccount and make them available via SAP Mobile Services or SAP Build Work Zone, standard edition. The platform identity provider authenticates those users who administer the subaccount and, for example, create destinations there. You must then enter the email addresses of the users who are assigned the subaccount administrator and SAP Build Apps administrator roles in the Administrators field. These users are authenticated against the platform identity provider. In the Developers field, you must maintain the email addresses of those users who are used as developers in SAP Build Apps. You can also add new users for both user types in the subaccount later.

In the last step, Review, you will see a summary of the previously created configuration. Click Finish to start the installation and configuration of the services.
Once the installation and configuration have been started, you will see a list of the steps performed (see below). This step may take a few minutes. If an error occurs, you will receive corresponding error information that will help you to create a support ticket.

Once the booster has run successfully, you will receive a success message. You can either close this by clicking Close or jump to the SAP BTP cockpit of the corresponding subaccount by clicking Navigate to Subaccount.

To keep an eye on the license costs caused by SAP Build Apps and SAP Build Work Zone, you should occasionally take a look at usage analytics. To do this, navigate to the Usage Analytics area in the side menu (see final figure). There you can see the current and historical usage for all metrics.

Editor’s note: This post has been adapted from a section of the book SAP Build: No-Code Development, Centralized Access, and Process Automation by Rene Glavanovits, Gernot Haider, Martin Koch, and Daniel Krancz.


Comments