Each company needs to bill its customers for the goods and services shipped to them and must update its sales revenue accounting.
Ideally, a customer invoice is created after receiving the confirmation that a service has been performed or that the goods have been shipped to the specified destination. The invoice contains information such as customer details, amount to be paid, payment terms, shipping address, and so on.
A customer invoice can be created in SAP S/4HANA Finance directly in accounts receivable or in sales and distribution using the order-to-cash business process. Let’s see now how both cases of customer invoice processing are treated in the system.
Automatic Creation of Customer Invoice (from Logistics)
After the created billing is released to accounting, a respective accounts receivable invoice is automatically generated simultaneously. The billing document generated during this process creates two different documents:
- A sales and distribution invoice (the bill)
- An account receivable invoice
Let’s follow an example to see how this process is performed in the system. To display a billing document, you can use Transaction VF03 or the application menu path Logistics > Sales and Distribution > Billing > Billing Document > Display.
In the screen that appears, enter the billing document number, for example, “90000008”, and press the (Enter) key. You’ll arrive at the overview of the billing item, as shown below.

Now you can display the document flow to see the sales and distribution invoice and the accounting invoice. To do so, choose More • Environment > Display Document Flow. You’ll arrive at the Document Flow screen shown here.
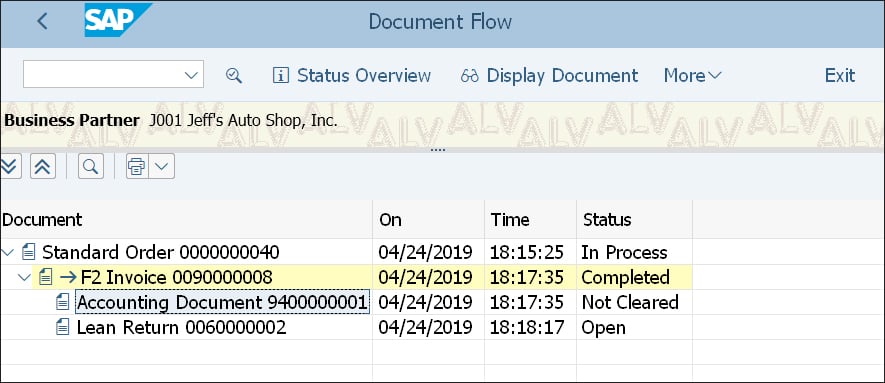
To open the accounts receivable invoice document, select Accounting Document 9400000001 in the listed document flow, and then click on the Display Document button. You’ll arrive at the screen shown below.
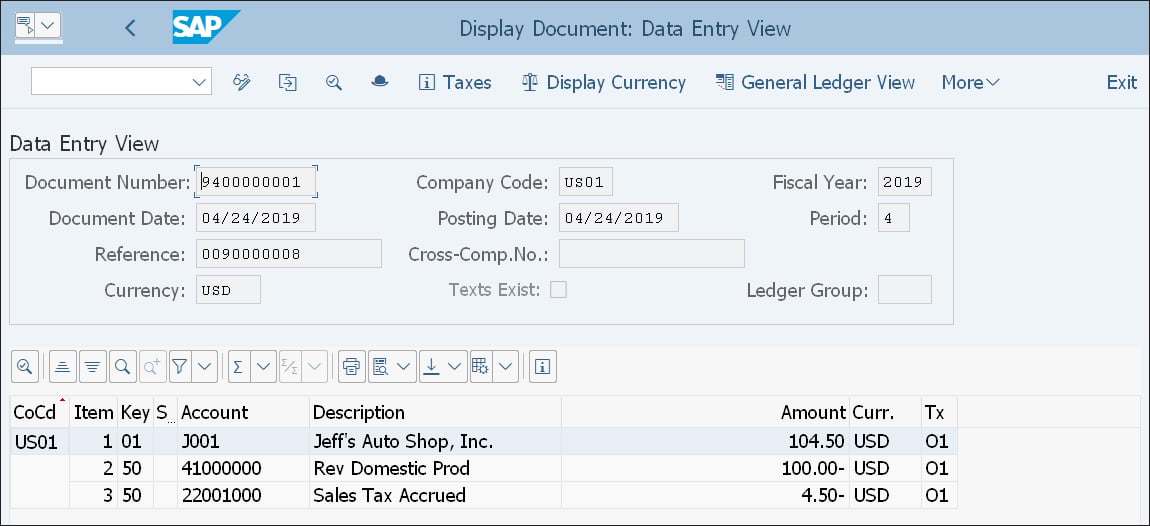
Here, you can see the accounting document invoice of the related billing document. In this example, this invoice isn’t cleared, as you can see in the Status field in the second figure above.
The corresponding SAP Fiori app is called Display Billing Documents (F2250). It's visually and functionally the same as the SAP GUI transaction. However, there is a beautiful new app called Display Document Flow (F3665) for visualizing the document flow. It shows the same document flow as shown before, but graphically presented, as shown below.
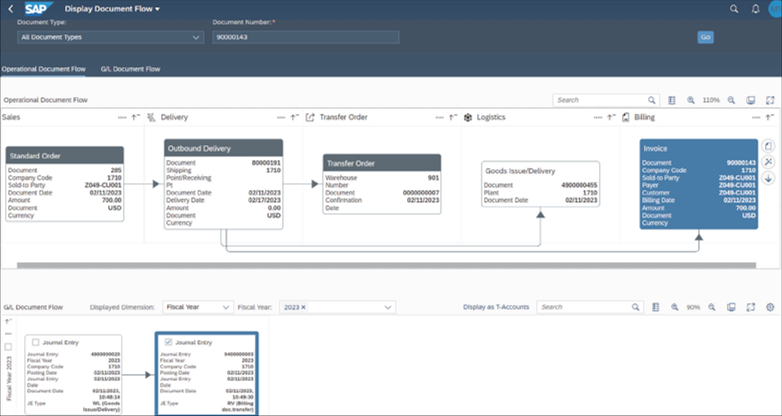
'By clicking on Display at T-Accounts, you can see all the relevant postings presented in t-accounts through the Display Journal Entries in T-Account View app (F3664), as shown below.
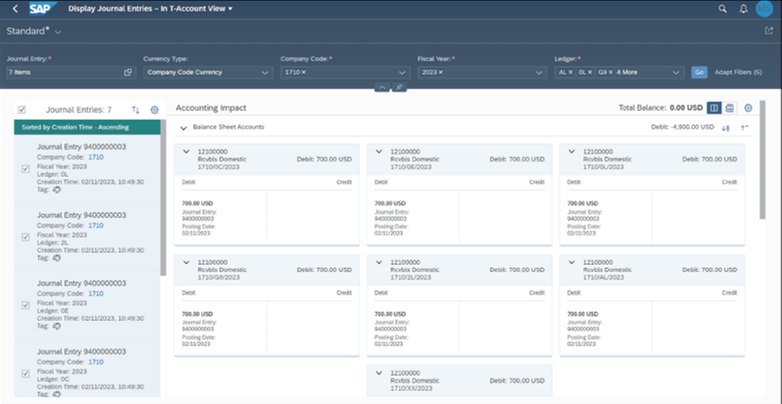
It’s essential to know that accounting integration from sales and distribution to accounts receivable is a one-way direction, which means that updates to accounting documents are applied from sales and distribution to accounts receivable but not from accounts receivable to sales and distribution.
Now, let’s discuss how to create a “direct” invoice without connection to logistics in accounts receivable.
Direct Customer Invoices
There are some differences between automatic and direct invoicing. Direct invoices, unlike automatic invoices, don’t refer to sales and distribution billing documents, which are created using Transaction VF01 as explained in the previous section. In addition, the standard document type for direct accounts receivable invoices is DR – Customer Invoice, whereas for the sales and distribution automatic invoices, it’s RV – Accounting Document for Billing.
Direct invoices are created in accounts receivable using Transaction FB70 or the application menu path Accounting > Financial Accounting > Accounts Receivable > Document Entry > Invoice.
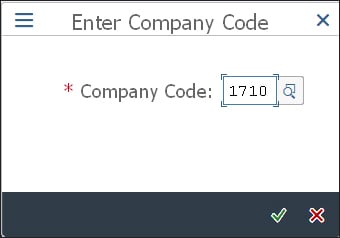
Next, enter the Company Code you want to post the invoice in the screen that appears, as shown below. Click the checkmark icon to continue or press the (Enter) key.
The Enter Customer Invoice screen appears, as shown here.
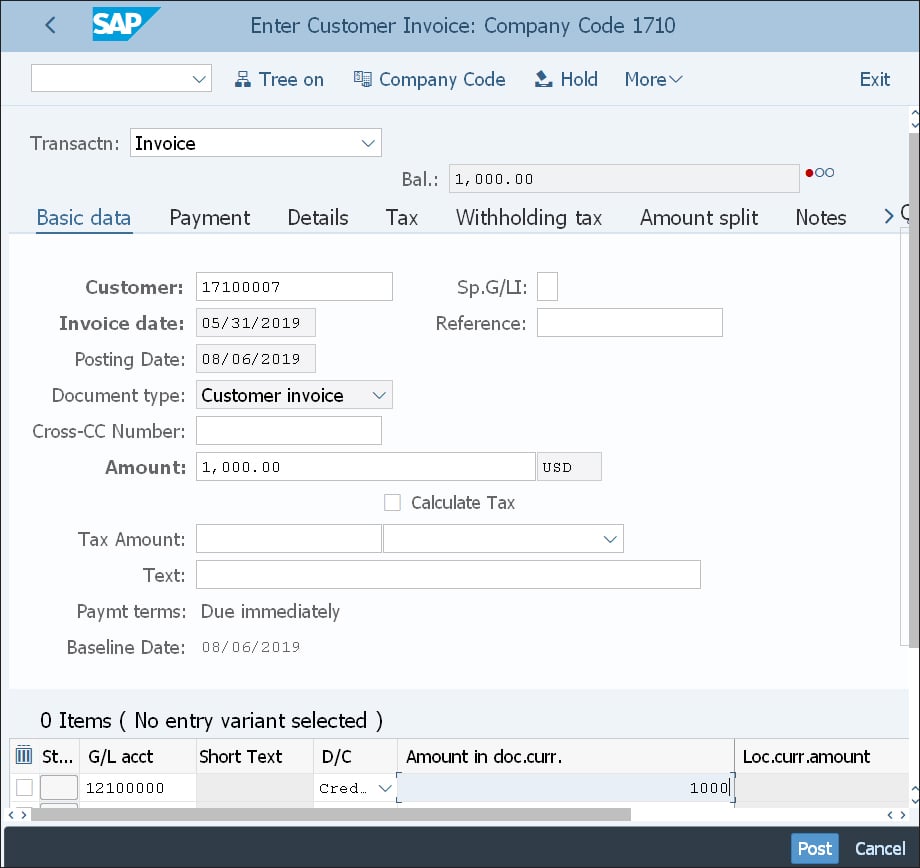
In the Basic data tab, specify the mandatory fields (e.g., Customer number, Invoice date, Posting Date, invoice Amount, and Tax Amount, if applicable), select the Calculate Tax checkbox if needed, and so on. Paymt terms and Baseline Date are automatically populated from the Payment Terms field in the Payment tab as explained later in this section. The other fields are optional and can be filled in if relevant. You can also enter the G/L acct as the revenue account in the Items area.
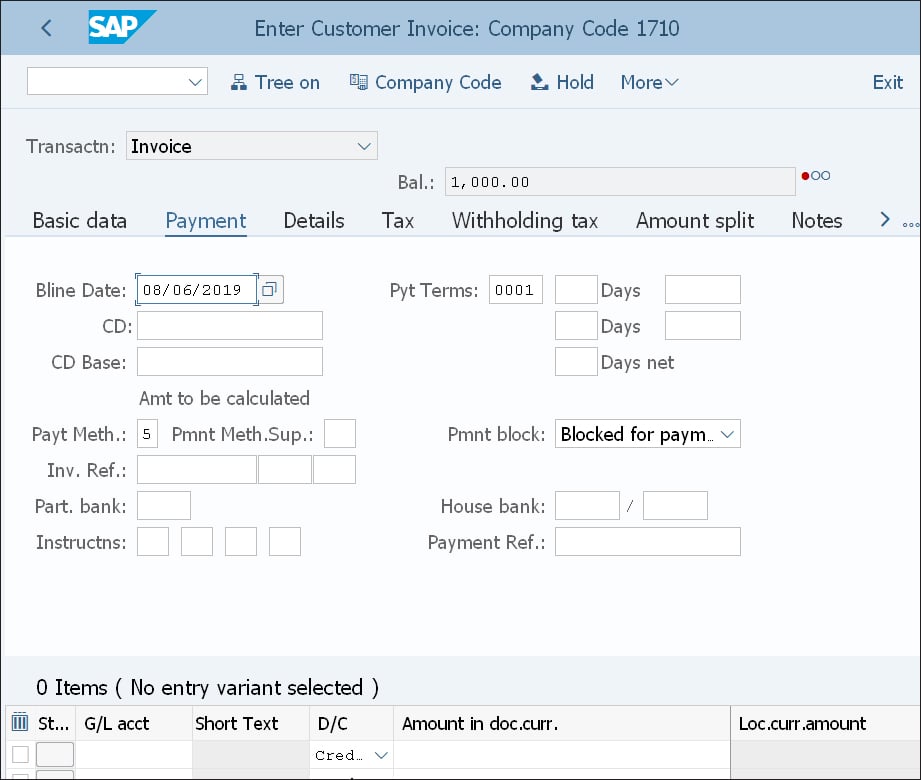
In the Payment tab, as shown in the figure below, define the Pyt Terms (payment terms), which refer to the conditions settled for the invoice payment, and the Bline Date (short cut for baseline date), which refers to the date from which the payment applies. You can also fill in the other optional fields, such as CD (refers to the cash discount amount), CD Base (refers to amount eligible for cash discount), Payt Meth. (payment method), Inv. Ref. (invoice reference), and so on.
The other tabs also refer to optional data that can be filled in depending on the specific case.
After you’ve entered the required data, you can click More > Simulate to check if there is any error before you post the invoice. If the simulation is successful, an overview screen will appear with overall information.
In the next step, you need to click on the Post button to post the customer invoice document. You’ll receive a message with the new document number at the bottom of the screen.
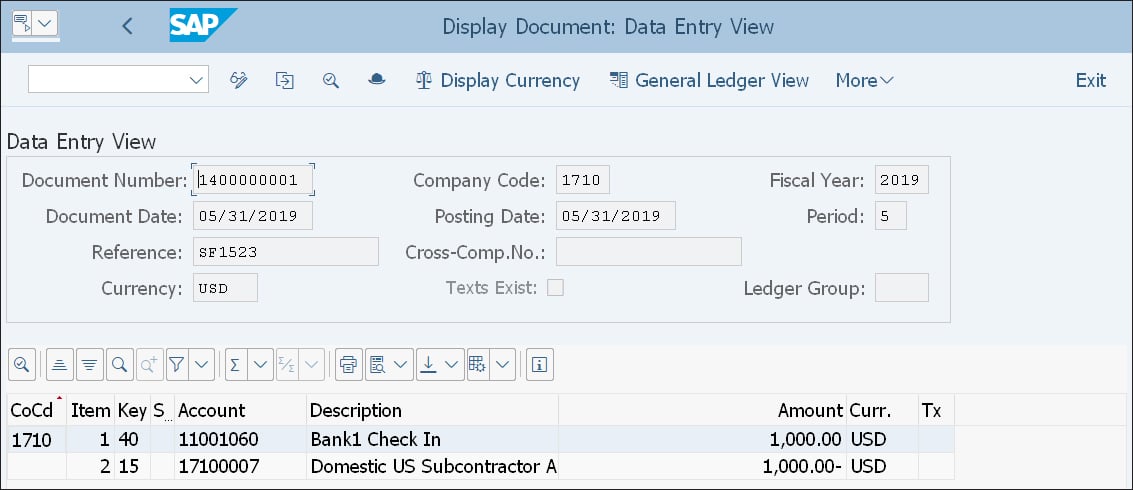
You can display the document created by clicking More > Document > Display to arrive at your created invoice, as shown below.
Editor’s note: This post has been adapted from a section of the book Financial Accounting with SAP S/4HANA: Business User Guide by Jonas Tritschler, Stefan Walz, Reinhard Rupp, and Nertila Mucka.


Comments