
SAP Access Control utilizes the default SAP email engine for sending and receiving messages.
However, similar to SAP ERP and SAP S/4HANA, an external email infrastructure is required to set up the mail configuration. The figure below shows an overview of how SMTP within SAP communicates with the external SMTP server.

An external SMTP server acts as a SMTP server between SAP and the receiver. This server is the email server used to send emails. You can use the official SMTP server of your enterprise (i.e., sap.com).
Since SAP Access Control uses workflows, you must set up the email configuration.
We’ll cover the following high-level steps in greater detail in the following sections:
- Open the port for SMTP.
- Maintain the RZ10 profile parameters for the SMTP service or maintain it in Transaction SMICM.
- Create a system user for receiving emails.
- Configure the SMTP service.
- Configure the SMTP server and the outbound and inbound flows.
- Set up SMTP jobs.
Opening a Simple Mail Transfer Protocol Port
SMTP is the basic standard that mail servers use to send email to one another across the Internet. SMTP email relies on domain names and Internet addresses to know where to send messages. However, these network addresses use specific port numbers. The first step in configuring the SMTP service is to open the port number. Your IT infrastructure team should be contacted to open the port and assign it to the SMTP service.
Maintaining RZ10 Profile Parameters for the Simple Mail Transfer Protocol Service
The ICM parameter for SMTP should be added to the RZ10 profile parameters by following these steps:
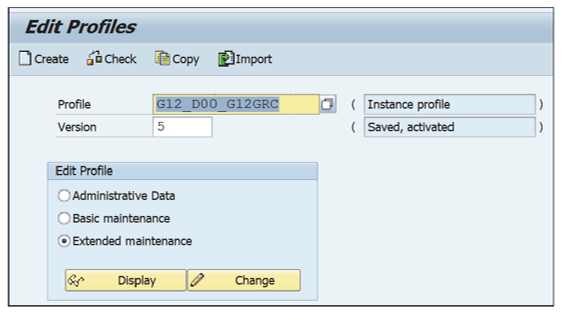
- Execute Transaction RZ10.
- Choose Instance profile from the available profiles and select the Extended maintenance radio button under Edit Profile, as shown in this figure.
- Click the New Entries button.
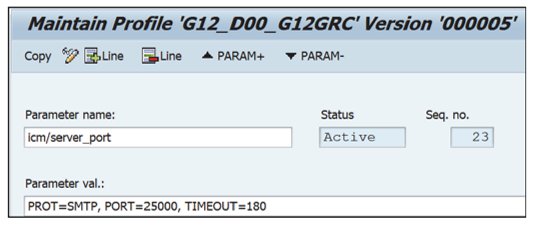
- Add an entry for SMTP. The parameter to be added is “icm/server_port_<no>” with value “PROT=SMTP, PORT=<port no which is opened for SMTP>, TIMEOUT=<time out value>, PROCTIMEOUT=<Process Timeout value>”. An example is shown below.
- Click Save to save these changes to the instance profile.
- If prompted to activate the profile, click Yes, and the activation information screen will be displayed.
Note: It is required to restart the SAP system to load the profile parameter values. As an alternative, to proceed with the configuration, the ports can be configured in the Transaction SMICM.
Creating a System User for Receiving Emails
For SMTP communication purposes, a dedicated ID is required. Create one user ID of the system type by following these steps:
- Execute Transaction SU01.
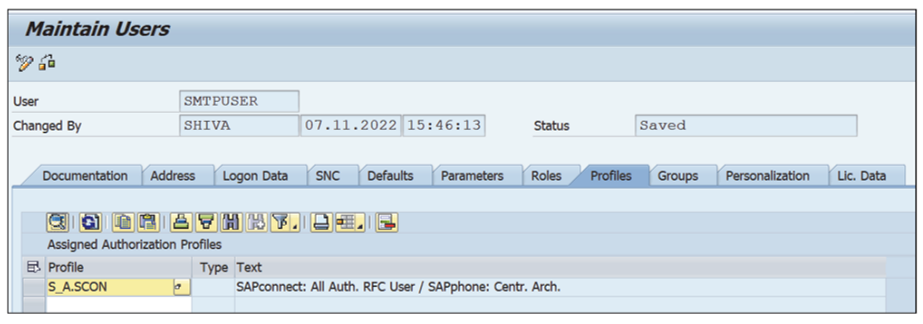
- Enter a user ID of the system type in the User field (e.g., “SMTPUSER”).
- Under the Profiles tab, assign the profile S_A.SCON from Transaction SU01, as shown below.
Note: You may assign additional authorizations as required.
- Click the Save icon to save the user ID.
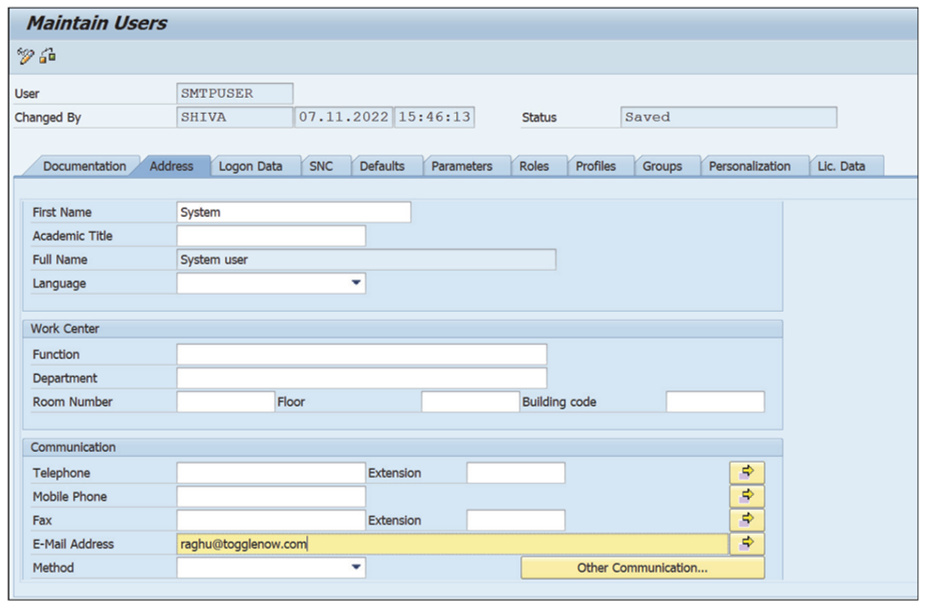
- Make sure all users in the SAP Access Control system have an email address assigned under the Address tab, as shown in this figure.3
Configuring the Simple Mail Transfer Protocol Service
To configure the SMTP service, follow these steps:
- Execute Transaction SICF.
- Click the Services icon.
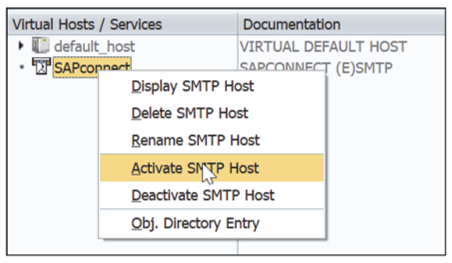
- Find the SAPconnect service, as shown in this figure.
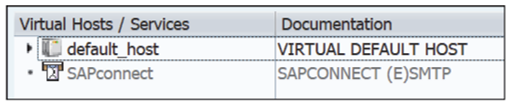
- Right-click the SAPconnect service and choose Display SMTP host.
- Click the Edit button.
- Check that the virtual SMTP server is configured, as shown below.
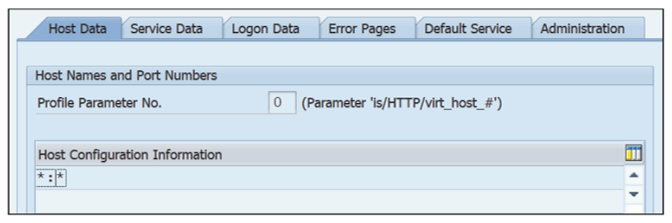
Note: The value of the Profile Parameter No. field must be the same as the value maintained in RZ10 profile parameter IS/HTTP/VIRT_HOST_#.
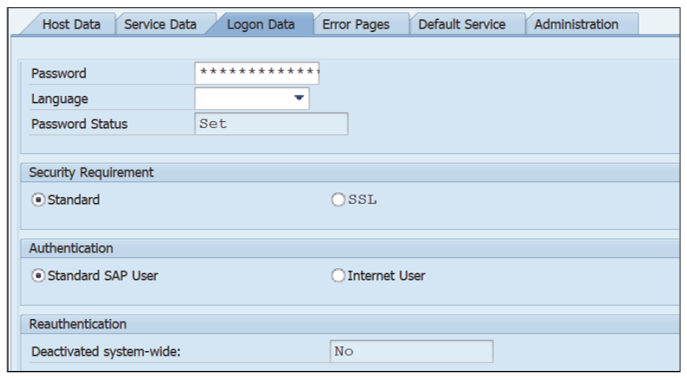
- Click the Logon Data tab and maintain the Client, User, and Password fields, using the SMTPUSER ID created in the previous step, as shown in this figure.
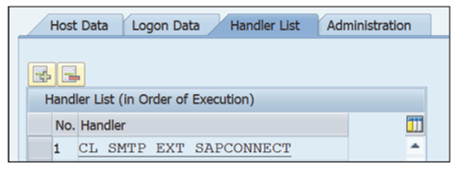
- Select the Handler List tab. In the Handler column, make sure that class CL_SMTP_EXT_ SAPCONNECT has been maintained, as shown below.
- Click Save to save these changes and then right-click the SAPconnect service again and select Activate SMTP Host to activate the service, as shown in this figure.
Configuring the Simple Mail Transfer Protocol Server Inbound/Outbound Flow
Once the SICF service is activated successfully, the next step is to configure the SMTP server and outbound and inbound flow by following these steps:
- Log on to SAP Access Control system.
- Execute Transaction SCOT.
- Click Settings _ Default domain or press (Ctrl)+(Shift)+(F9) to set the default domain, as shown in the below figure.
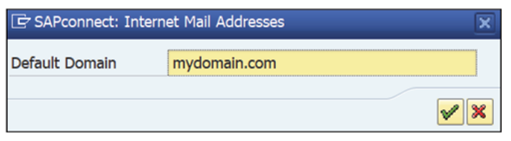
Note: Ensure that the domain maintained on this screen matches the email domain of the users (as maintained in Transaction SU01, under the Address tab).
- Click OK.
- Set up the outgoing SMTP server, as shown in the next figure. Enter “SMTP” in the Node field, provide a description, and maintain the Mail Host and Mail Post fields. Click OK.
Note: The Mail Host and Mail Port fields must be maintained.
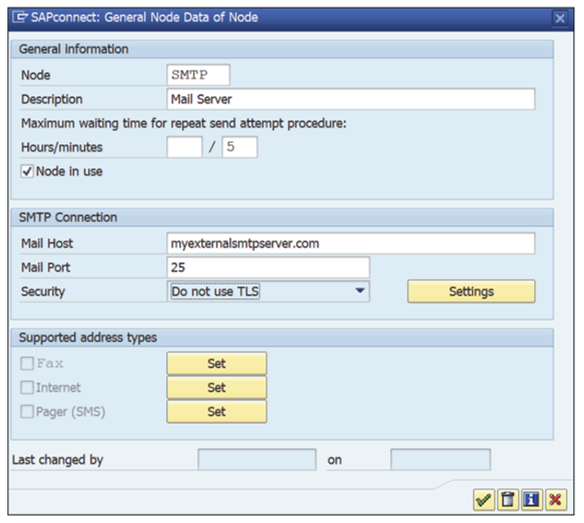
- Select the Internet checkbox and click the Set icon to set the address type.
- In the address areas, insert the valid format of email addresses. When you enter “*” the node will accept every email address.
Setting Up Simple Mail Transfer Protocol Jobs
Now, the node is configured to accept outgoing emails. What is missing is a job that picks up the emails from the outgoing queue and sends them.
To create a job that will send the queued messages, follow these steps:
- Click the Job menu and choose Create or press (Ctrl)+(F8).
- Enter the Job name and click OK.
- Select SAP&CONNECTALL or SAP&CONNECTINT for sending internet email.
- Click Start immediately to start the job to run immediately. Alternatively, the job can be scheduled to run at defined intervals. Click the Schedule button and schedule a job. The recommended interval is 1 minute.
Editor’s note: This post has been adapted from a section of the book SAP Access Control: The Comprehensive Guide by Raghu Boddu.


Comments